
Spooky Halloween Spider Cookies

Soft, buttery cookies dressed as spiders with Maltesers bodies, silky dark chocolate legs, and icing eyes—festive, adorable, and perfect for Halloween parties.
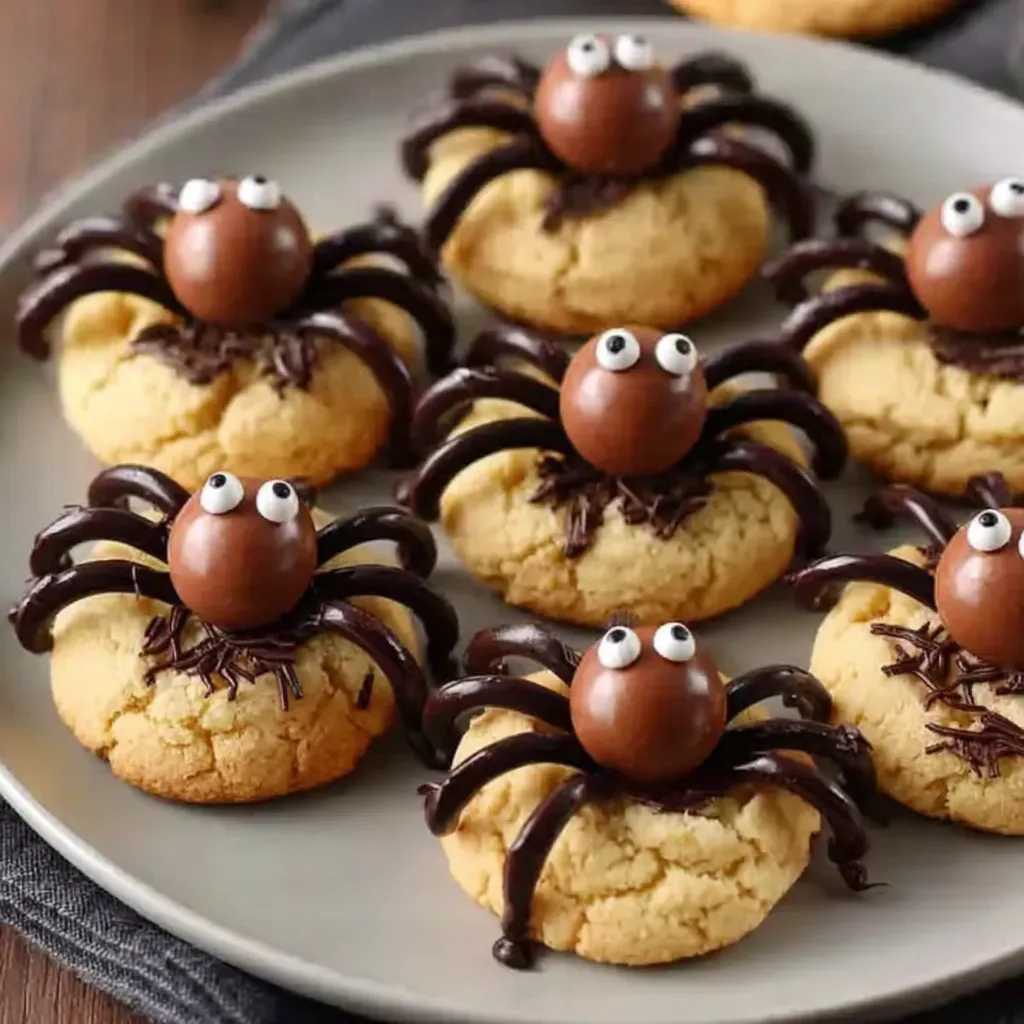
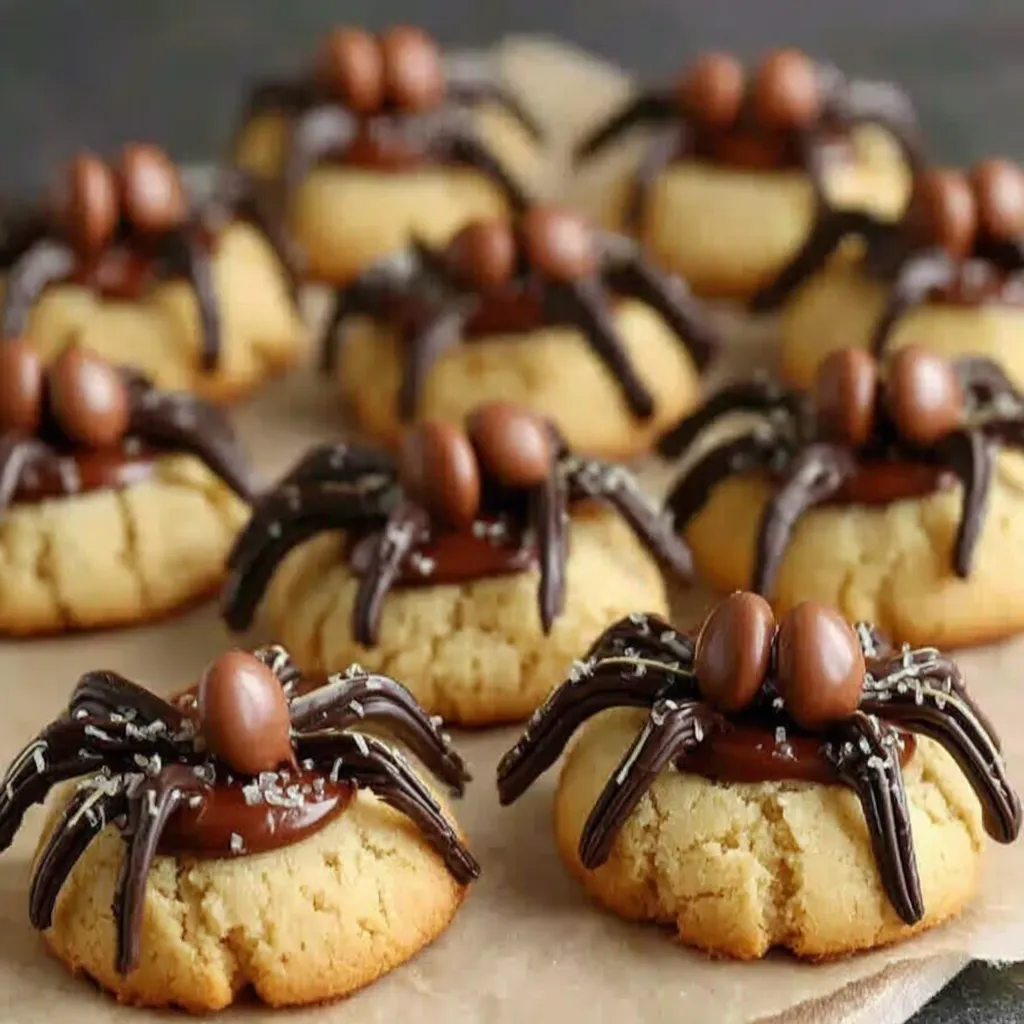
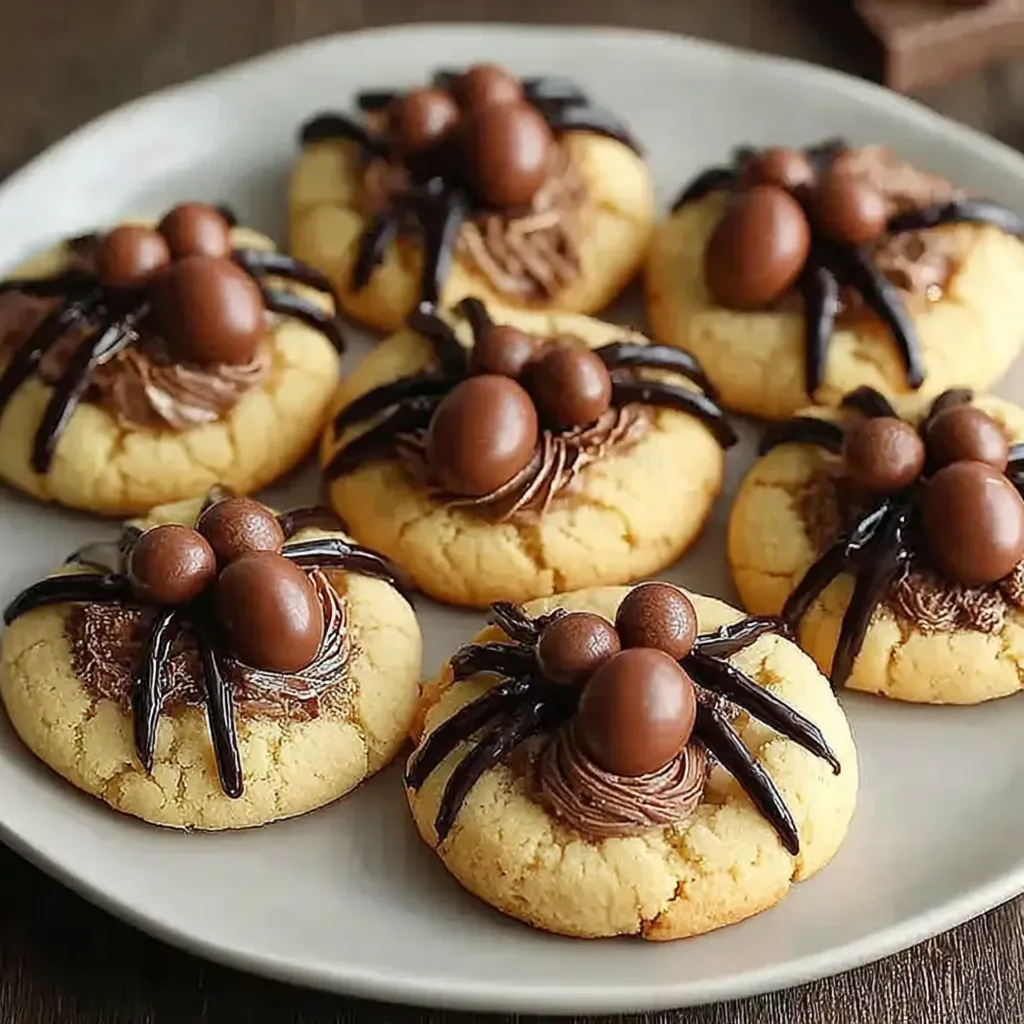
These Halloween spider cookies started as a last-minute party idea, and now they are the first tray empty at every October get-together. I discovered the trick of using Maltesers for the bodies years ago when I needed something speedy, cute, and guaranteed to make kids squeal with delight. The base is a soft, chewy vanilla cookie with caramel notes from brown sugar, which gives a perfect backdrop for the crisp, malty chocolate topping and delicate dark chocolate legs.
What makes these special is the contrast of textures: tender middles, lightly crisp edges, the signature crunch of the malted milk balls, and the snap of dark chocolate once it sets. I remember the first time I piped those tiny chocolate legs and my niece declared the cookies too adorable to eat—right before claiming two. The decorating is simple and fun, the kind of baking project that invites little hands into the kitchen, and the results are irresistibly festive.
Why You'll Love This Recipe
- Ready in under 45 minutes with basic pantry staples and minimal chilling.
- Kid-approved decorating project using easy tools like a zip-top bag for piping.
- Soft, chewy cookie base that stays tender for days and sets beautifully for decorating.
- Uses a small bag of Maltesers and a bit of dark chocolate for dramatic spider bodies and legs.
- Make-ahead friendly: bake cookies a day ahead, decorate later; they keep fresh up to one week.
- Scales effortlessly for parties and bake sales without changing technique.
When I bring these to school events, the plate is empty before the costumes finish rustling through the door. Kids love choosing their favorite spider, and adults appreciate the not-too-sweet balance from dark chocolate. The decorating pace is relaxing, almost meditative—line up the cookies, dot on the eyes, and pipe neat little legs in minutes.
Ingredients
- Unsalted butter: Melted butter makes the cookie tender with a shiny, slightly crackled top. Choose good-quality unsalted butter; the purity lets vanilla shine. Melt gently so it is fluid but not sizzling.
- Brown sugar: Packed light brown sugar adds moisture and a caramel hint that keeps the centers soft for days. Fresh, soft sugar prevents gritty dough.
- Granulated sugar: Balances sweetness and helps edges set. A half-and-half blend with brown sugar creates that craveable chewy texture.
- Egg: Binds the dough and adds richness. Room-temperature egg blends more evenly and avoids seizing the butter.
- Vanilla extract: Real vanilla deepens flavor. A teaspoon is enough to perfume every bite without overwhelming the malt.
- All-purpose flour: Provides structure for soft, puffed cookies that hold decorations. Spoon and level for accuracy so cookies do not turn dry.
- Baking soda, salt, and cornstarch: Baking soda lifts, salt balances sweetness, and cornstarch softens the crumb for plush, bakery-style texture.
- Maltesers: The malty crunch makes the spider bodies irresistible. A small 5-ounce bag is perfect for a standard batch.
- Dark chocolate: Melted and piped into clean, glossy legs. Choose 60 to 70% dark for fast setting and beautiful contrast.
- White decorating icing: Handy tube icing creates quick, tidy eyes that set firm for easy stacking and storage.
Instructions
Melt the butter: Place the butter in a large microwave-safe bowl and heat 30 to 50 seconds until mostly melted with a few soft pieces remaining. Whisk to finish melting, which cools the butter slightly and keeps the dough smooth. Mix the wet ingredients: Whisk in brown sugar, granulated sugar, egg, and vanilla until glossy and lump-free. Proper mixing dissolves sugar crystals slightly for a chewier finish. Add the dry ingredients: Sift flour, baking soda, salt, and cornstarch over the bowl. Fold gently with a spatula until no dry streaks remain. The dough will be soft but thick and scoopable. Chill briefly if needed: If the dough feels warm or sticky, refrigerate 10 to 15 minutes. Slightly cooler dough keeps cookies from spreading too much and bakes with fuller centers. Preheat the oven: Heat to 340°F with convection (or 350°F without convection). Line baking sheets with parchment for even browning and easy cleanup. Shape the cookies: Roll 2-tablespoon portions into balls and place spaced 5 cm apart on the prepared sheets. Press gently to flatten the tops slightly for even rise. Bake: Bake 12 to 15 minutes until edges are set and lightly golden but centers still look soft. They will firm as they cool. Do not overbake. Insert Maltesers: While cookies are warm, press two Maltesers gently into the top of each cookie to form the spider body and head. Let them sit on the sheet for 10 minutes. Cool completely: Transfer to a wire rack to cool so the chocolate decorations will set quickly and cleanly when piped. Prepare the chocolate legs: Melt dark chocolate until smooth. Spoon into a small zip-top bag and snip a tiny corner for a fine piping line that creates neat legs. Pipe the legs: Pipe four legs on each side of the Maltesers. Work steadily; thin lines set quickly and look delicate. Add a slight bend in the middle for lifelike shape. Add the eyes: Dot two small circles of white icing on the front Malteser. If desired, add a tiny dot of melted dark chocolate to each eye for pupils. Set and serve: Allow decorations to harden fully at cool room temperature. Serve once chocolate is firm to the touch and icing is dry.
You Must Know
- Cookies stay fresh up to 1 week in an airtight container at cool room temperature.
- The base is soft and chewy, so avoid overbaking; pull when centers look slightly underdone.
- Use 60 to 70% dark chocolate for legs that set fast and hold sharp lines.
- Chill dough briefly if warm to control spread and maintain a puffy center for decorating.
- Undecorated cookies freeze well for 2 months; thaw before adding chocolate and icing.
My favorite part is the moment the eyes go on—suddenly every cookie has personality. These have become our non-negotiable treat for pumpkin carving night, and the kids carefully choose which spider they are adopting. I keep a second bag ready because once the first tray appears, the “one per person” rule gets playful pushback.
Storage Tips
Allow decorations to set completely before storing. Place cookies in a single layer in an airtight container, separating layers with parchment to protect the legs. Keep at cool room temperature for up to 7 days. For longer storage, freeze undecorated cookies up to 2 months in freezer-safe containers; thaw at room temperature, then add Maltesers, chocolate legs, and eyes. Refrain from refrigerating decorated cookies, as condensation can spot the chocolate. If your kitchen runs warm, chill the dark chocolate a bit thicker by adding 1 teaspoon coconut oil to help it set with a glossy finish.
Ingredient Substitutions
No Maltesers nearby? Swap with Whoppers; the texture is similar, though slightly less malty. Use the same two-per-cookie placement. Semi-sweet chocolate chips can replace dark chocolate; legs will be sweeter and may set a touch slower. If you need a dairy-free option, bake the cookie base with a plant-based butter stick (not a spread) and decorate with dairy-free chocolate and a vegan-friendly icing; note that Maltesers contain milk, so use a dairy-free malt ball or chocolate-covered cereal as a visual stand-in. For gluten-free versions, use a 1:1 gluten-free baking flour with xanthan gum; texture stays soft, though spread may differ slightly—chill dough 20 minutes to compensate.
Serving Suggestions
Arrange cookies on a matte black platter or a wooden board for maximum Halloween contrast. Add a small bowl of candy eyes and extra Maltesers for nibbling alongside. These make adorable party favors: slip a cookie into a cellophane bag, tie with orange ribbon, and add a name tag. Pair with hot cider, cocoa, or a pumpkin-spiced latte for a cozy treat table. For a playful dessert board, mix the spiders with chocolate-dipped pretzels and pumpkin-shaped marshmallows, and scatter a few edible glitter stars to make the tray twinkle.
Cultural Background
Decorated holiday cookies are a long-standing American tradition, and Halloween invites the most whimsical designs. The use of malted milk balls as edible “bodies” likely grew from mid-century candy trends when malted milk confections were popular at movie theaters. Today, this playful mash-up of classic chewy cookies with candy-craft decoration exemplifies the approachable creativity of home baking—simple techniques, accessible ingredients, and plenty of room for imagination.
Seasonal Adaptations
For autumn warmth, add 1/2 teaspoon cinnamon to the dry ingredients and finish with a pinch of flaky salt. For winter parties, swap Maltesers with peppermint bark disks and draw “snowflake” legs in white chocolate. Spring gatherings can play with pastel eyes using tinted royal icing. If you are hosting a large Halloween bash, double the batch and bake on two racks, rotating sheets halfway through for even browning. For gluten-free guests, keep a separate decorating area to avoid cross-contact, and use clearly labeled bags for piping.
Meal Prep Tips
Make the dough up to 48 hours ahead and refrigerate tightly covered; scoop and bake straight from the fridge, adding 1 to 2 minutes to the bake time. Bake cookies one day in advance, store airtight, then decorate the morning of your party for the cleanest lines. If you need an ultra-fast decorating station, pre-fill two zip-top bags with melted chocolate; when one cools, switch to the second while you rewarm the first in short bursts. Keep icing at room temperature so it flows smoothly for tiny eyes.
Whether you are baking with little helpers or prepping for a big costume bash, these spiders bring instant cheer. Have fun with the designs, pile them high on a platter, and watch them vanish as quickly as they appeared.
Pro Tips
Whisk warm butter until fully melted to cool it slightly before adding the egg.
If dough is sticky, chill 10 to 15 minutes to control spread.
Pipe fine legs by cutting the smallest possible corner in the zip-top bag.
Press Maltesers into warm cookies so they adhere without cracking the tops.
Let decorations set completely before stacking or transporting.
This nourishing spooky halloween spider cookies recipe is sure to be a staple in your kitchen. Enjoy every moist, high protein slice — it is perfect for breakfast or as a wholesome snack any time.
FAQs about Recipes
Can I freeze the cookie dough?
Yes. Scoop dough balls and freeze on a sheet until solid, then transfer to a freezer bag for up to 2 months. Bake from frozen at 350°F, adding 1 to 2 minutes, then decorate once cool.
Can I use Whoppers instead of Maltesers?
Whoppers work well and have a similar look. They are slightly less malty than Maltesers, but the visual effect and crunch are still great.
How should I store the decorated cookies?
Store in a single layer in an airtight container for up to 1 week. Separate layers with parchment to protect the piped legs and eyes.
Is milk chocolate okay for the legs?
Yes, but dark chocolate sets fastest and gives sharper lines. If using milk chocolate, chill the tray briefly after piping so the legs firm up.
How can I make these dairy-free?
Use a plant-based butter stick and dairy-free chocolate. Replace Maltesers with a dairy-free chocolate-covered cereal or similar candy; check labels for allergens.
Tags
Spooky Halloween Spider Cookies
This Spooky Halloween Spider Cookies recipe makes perfectly juicy, tender, and flavorful steak every time! Serve with potatoes and a side salad for an unforgettable dinner in under 30 minutes.
Ingredients
Cookie Dough
Decorations
Instructions
Melt Butter
Microwave butter 30 to 50 seconds until mostly melted with a few soft pieces remaining; whisk until smooth.
Mix Wet Ingredients
Whisk in brown sugar, granulated sugar, egg, and vanilla until glossy and lump-free.
Add Dry Ingredients
Sift flour, baking soda, salt, and cornstarch over the bowl. Fold gently until no dry streaks remain; dough will be thick and soft.
Chill Dough if Needed
If warm or sticky, chill dough 10 to 15 minutes until firm enough to roll cleanly.
Preheat Oven
Heat oven to 340°F convection or 350°F conventional. Line baking sheets with parchment.
Shape Cookies
Roll 2-tablespoon portions into balls and set 2 inches apart on sheets. Press tops slightly to flatten.
Bake
Bake 12 to 15 minutes until edges are light golden and centers appear soft. Do not overbake.
Insert Maltesers
While warm, gently press two Maltesers into each cookie to form the spider body.
Cool Cookies
Let cookies rest on the sheet 10 minutes, then transfer to a wire rack to cool completely.
Prepare Chocolate Legs
Melt dark chocolate until smooth. Transfer to a small zip-top bag and snip a tiny corner for piping.
Decorate Legs
Pipe four legs on each side of the Maltesers using thin, steady lines with a slight bend.
Add Eyes
Dot two white icing eyes on each spider and add a tiny dot of dark chocolate for pupils, if desired.
Set and Serve
Allow chocolate and icing to harden fully before serving or storing.
Storage
Store decorated cookies in an airtight container at room temperature up to 1 week. Separate layers with parchment.
Last Step: Please leave a rating and comment letting us know how you liked this recipe! This helps our business to thrive and continue providing free, high-quality recipes for you.
Nutrition
Did You Make This?
Leave a comment & rating below or tag
@royalmorsel on social media!
Categories:
You might also like...

Cheeseburger Queso Sliders
Juicy beef, sweet-charred peppers, and a silky queso drizzle turn these sliders into the ultimate crowd-pleasing bite for game day or weeknight fun.

Short Ribs with Garlic Mash
Melt-in-your-mouth braised short ribs nestled over creamy garlic mashed potatoes, all in a rich, herb-scented sauce that feels like a warm hug.

Cheesy Garlic Pull-Apart Bread
Golden, garlicky pull-apart loaf swaddled in buttery herbs and stretchy mozzarella that begs to be shared warm from the oven.
Did You Make This?
Leave a comment & rating below or tag @royalmorsel on social media!
Rate This Recipe
Share This Recipe
Enjoyed this recipe? Share it with friends and family, and don't forget to leave a review!
Comments (1)
This recipe looks amazing! Can't wait to try it.
Comments are stored locally in your browser. Server comments are displayed alongside your local comments.

Hi, I'm Emma!
What's Popular

30-Minute Meals!
Join to receive our email series which contains a round-up of some of our quick and easy family favorite recipes.