
>>

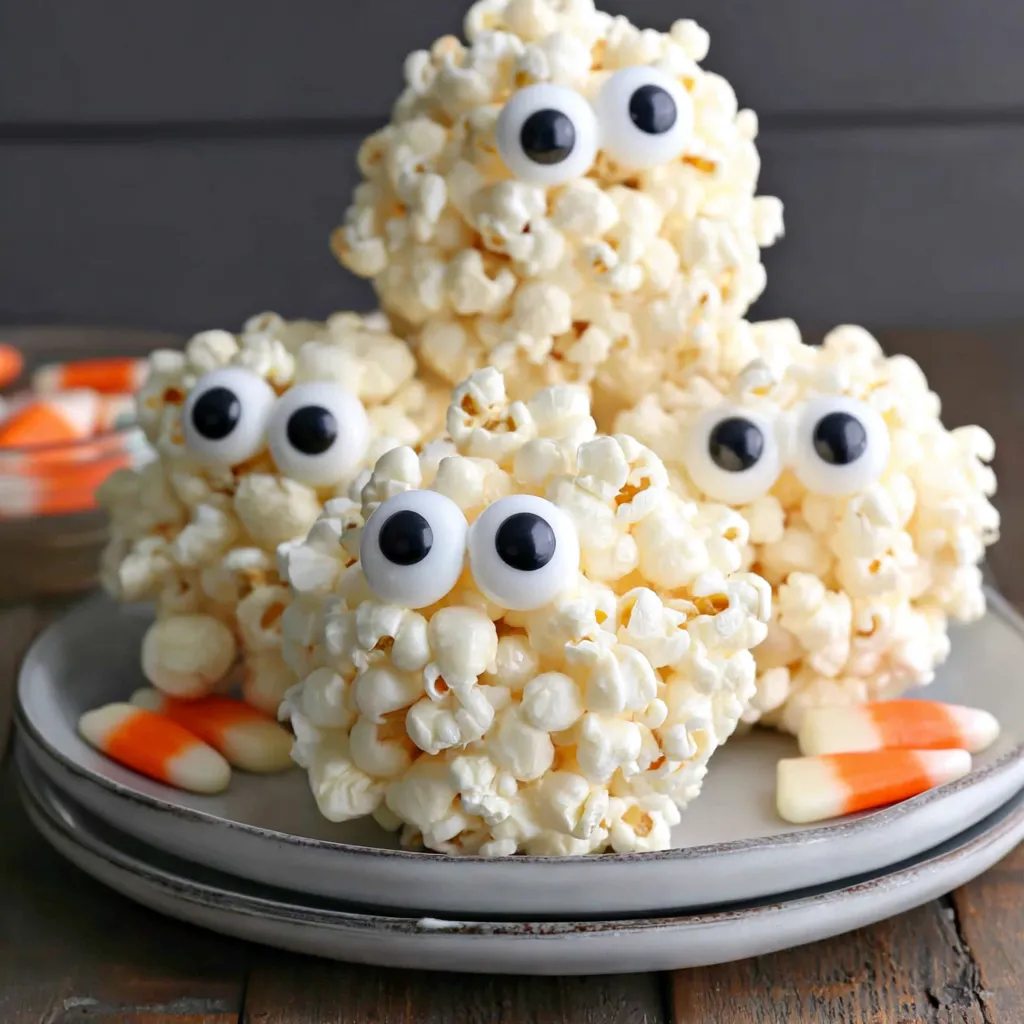
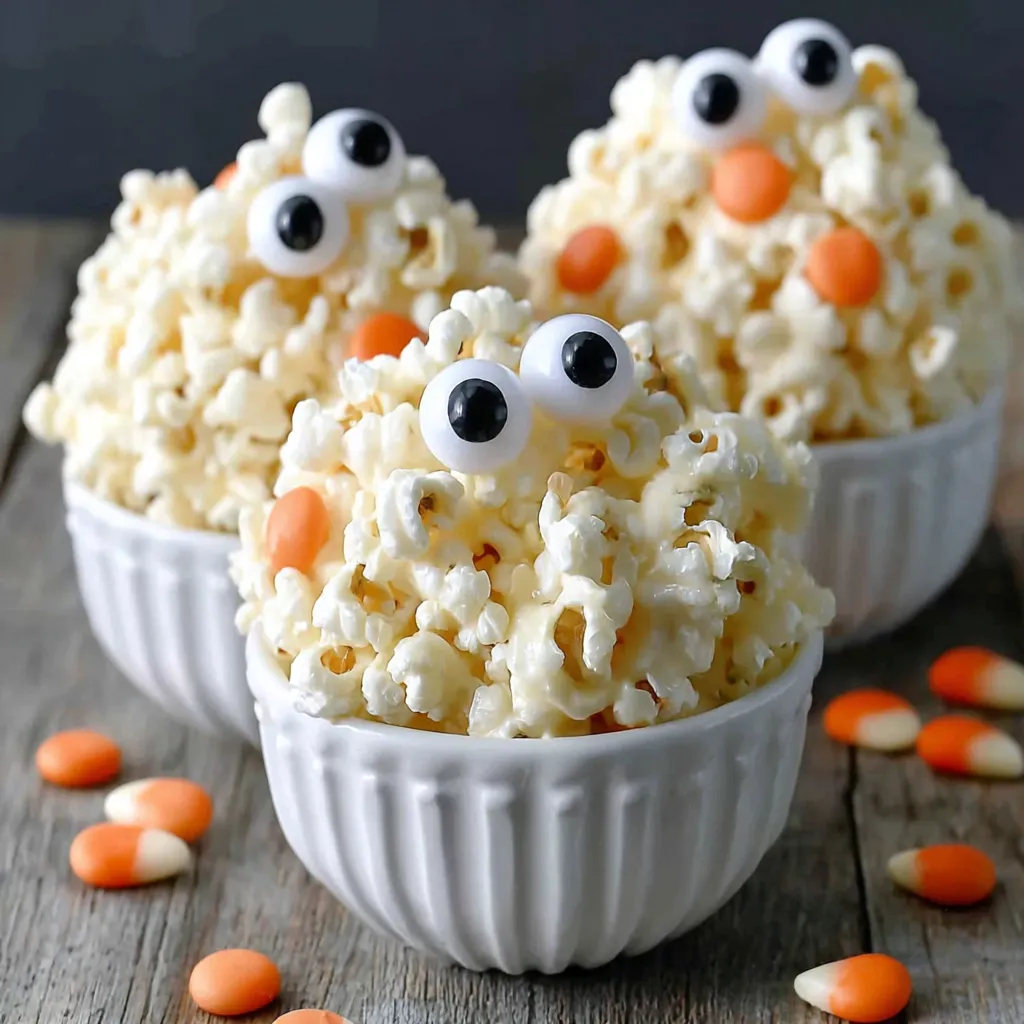
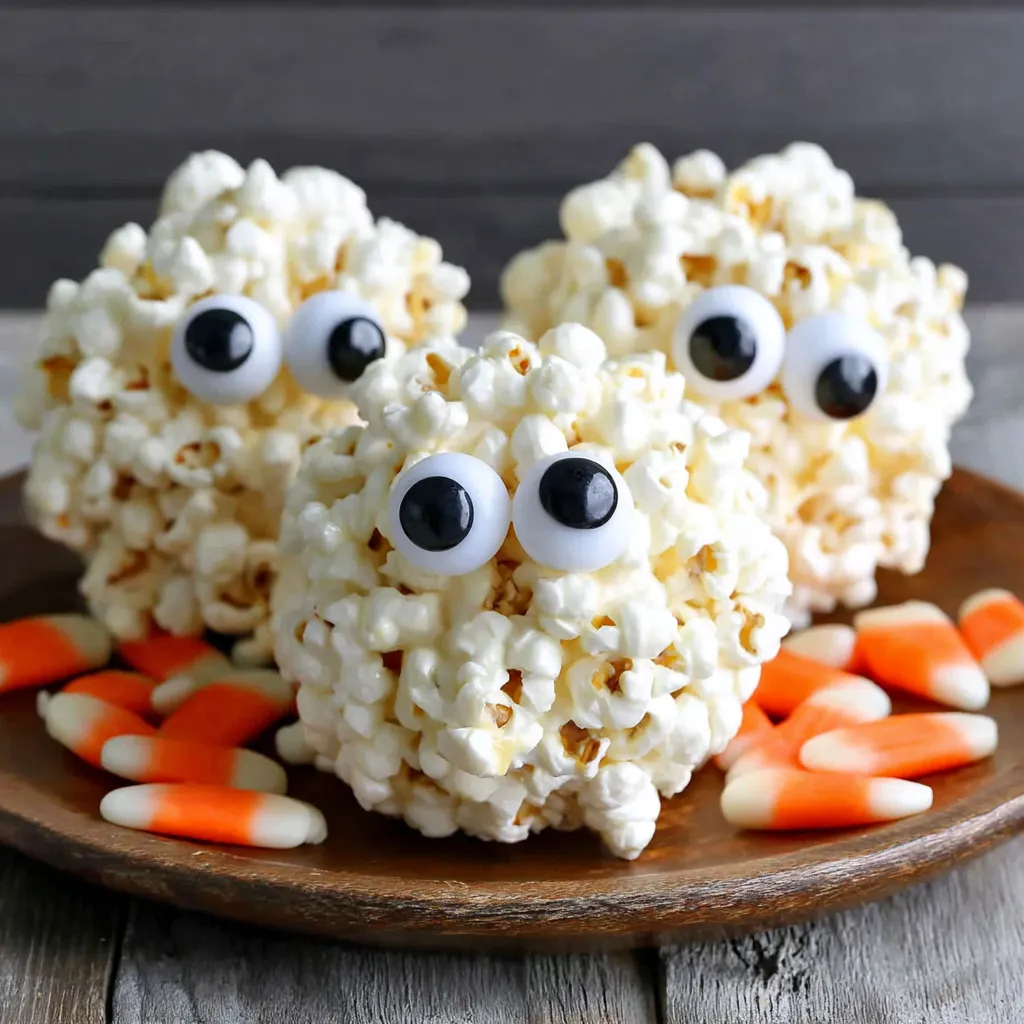
Crispy popcorn bound with buttery marshmallow, dipped in bright white candy melts, and finished with candy eyes for a fun, spooky treat.
When I bring these to school events or neighborhood gatherings, they disappear fast. Kids love choosing the one with the silliest eye placement, and adults appreciate that nostalgic marshmallow-chew paired with popcorn crunch. I have learned that slightly thinning the candy melts makes dipping easier and keeps the finish smooth and bright white.
My favorite part is the moment the eyes go on. There is a tiny window where the coating is just right—set enough to grip but soft enough to hold the candy. Once I found that timing, decorating became fast and foolproof. The expressions are irresistible, and no two ever look the same, which adds to their charm on a Halloween snack table.
Keep popcorn balls in an airtight container at room temperature for up to 3 days. Separate layers with parchment to protect the candy eyes and coating. Avoid refrigerating, which softens the popcorn and dulls the crisp texture. For short-term holding before a party, store in a cool, dry space away from sunlight so the candy coating stays bright and firm. If you need to transport them, loosely wrap each ball in parchment or place them in paper cupcake liners set in a lidded box. Re-crisping is not recommended, so aim to make them within a day or two of serving.
No candy melts? Use white chocolate chips, thinning with 1 to 2 teaspoons neutral oil for easy dipping. If you only have large marshmallows, cut them into pieces; weigh or measure 10 ounces for the best texture. Vegan or gelatin-free marshmallows work if that suits your diet; the set can be slightly softer, but they hold with careful packing. Substitute coconut oil for butter if dairy-free is needed, noting that flavor will be a touch more pronounced. Air-popped popcorn gives the cleanest flavor, but lightly salted microwave popcorn works well; avoid heavily buttered varieties so the sweetness stays balanced.
Arrange the popcorn balls on a big platter with a scatter of orange, purple, and black candies for instant Halloween energy. Add a few plastic spiders or small toy skeleton hands for a playful surprise. For a classroom treat, slide each ball into a cupcake liner and tuck it into a clear bag tied with ribbon. At home, I like to serve them alongside cider, hot chocolate, or a tray of sliced apples and caramel dip. If you made ghost shapes, stand them upright in a shallow pan of candy for a little spooky “graveyard” scene.
Popcorn balls are a nostalgic American treat that gained popularity in the early to mid-20th century, often appearing at fall festivals and Halloween gatherings. Traditionally bound with syrup or caramel, they were a thrifty, celebratory way to turn a staple grain into something special for the season. Marshmallows came later as a convenient binder that is quick to melt and easy to handle, perfect for making with kids. The modern twist of candy melts and edible eyes reflects the playful side of Halloween, blending old-fashioned texture with new, whimsical decorating ideas.
For autumn flair, mix in a handful of orange and black sprinkles with the marshmallow-coated popcorn before shaping. In winter, swap the white coating for dark chocolate and add snowflake sprinkles. Spring parties work with pastel candy melts and tiny candy flowers. For birthdays, color-coordinate the candy shell with the theme. You can also fold in mini chocolate chips, crushed chocolate sandwich cookies, or colored cereal for crunch and personality. Just keep add-ins modest so the balls hold together well and the marshmallow binder remains the star.
Pop the popcorn ahead and store it in a sealed bag for up to 24 hours to keep it crisp. Shape the balls the day you plan to serve for peak texture. If you want to work in stages, make and shape in the morning, then dip and decorate in the afternoon so the coating is glossy and fresh by party time. Use parchment-lined sheet pans for easy transport and clean-up. If you are serving outdoors, keep them shaded and cool so the candy coating stays firm. Label any allergen information on a small card for guests.
In the end, these spooky little treats are about fun as much as flavor. They are cheerful to make, a joy to decorate, and even more delightful to share. I hope they bring a bit of Halloween magic to your table.
Butter or oil your hands before shaping to prevent sticking.
Pick out unpopped kernels before coating for safer, smoother popcorn balls.
Apply candy eyes when the coating is tacky, not hot or fully hard.
Thin thick candy melts with a small amount of neutral oil for easier dipping.
Separate layers with parchment in storage to protect the eyes and coating.
This nourishing spooky halloween popcorn balls recipe is sure to be a staple in your kitchen. Enjoy every moist, high protein slice — it is perfect for breakfast or as a wholesome snack any time.
Yes. Store them in an airtight container at room temperature for up to 3 days. Do not refrigerate, as the popcorn will soften and lose its crisp texture.
Apply them when the candy coating is tacky, about 1 to 2 minutes after dipping. If the coating is too hot, the eyes may slide; if too cool, they may not stick.
Microwave candy melts in short bursts, stirring in between, or use a double boiler. Thin with 1 to 2 teaspoons neutral oil if needed for a smooth, dip-able consistency.
Yes. Use vegan marshmallows and plant-based butter. Note that set texture can be a bit softer; pack the balls more firmly to help them hold.
Air-popped or lightly salted microwave popcorn works best. Avoid heavily buttered varieties so the flavor stays balanced and the marshmallow binder coats evenly.
This Spooky Halloween Popcorn Balls recipe makes perfectly juicy, tender, and flavorful steak every time! Serve with potatoes and a side salad for an unforgettable dinner in under 30 minutes.
Place 16 cups popped popcorn in a large bowl (or divide between two bowls). Remove any unpopped kernels so they do not end up in the balls.
In a large pot over medium heat, melt 10 ounces mini marshmallows with 1/4 cup butter, stirring until smooth and glossy, about 3 to 5 minutes.
Pour the melted marshmallow mixture over the popcorn and fold with a greased spatula until every piece is evenly coated.
Butter your hands and form 2 1/2 to 3-inch balls, packing gently so they hold without crushing. Make ghost shapes by pinching the tops if desired.
Place on a parchment or silicone-lined baking sheet and let cool until firm, 30 to 60 minutes at room temperature.
Microwave bright white candy melts in 20- to 30-second bursts, stirring between each, until smooth. Thin with 1 to 2 teaspoons neutral oil if needed.
Dip the tops of each popcorn ball into the melted coating. Let sit 1 to 2 minutes until tacky, then press on candy eyeballs so they adhere.
Allow the coating to fully harden before serving. Store in an airtight container for up to 3 days.
Last Step: Please leave a rating and comment letting us know how you liked this recipe! This helps our business to thrive and continue providing free, high-quality recipes for you.
Leave a comment & rating below or tag
@royalmorsel on social media!

Juicy beef, sweet-charred peppers, and a silky queso drizzle turn these sliders into the ultimate crowd-pleasing bite for game day or weeknight fun.

Melt-in-your-mouth braised short ribs nestled over creamy garlic mashed potatoes, all in a rich, herb-scented sauce that feels like a warm hug.

Golden, garlicky pull-apart loaf swaddled in buttery herbs and stretchy mozzarella that begs to be shared warm from the oven.
Leave a comment & rating below or tag @royalmorsel on social media!
Enjoyed this recipe? Share it with friends and family, and don't forget to leave a review!
This recipe looks amazing! Can't wait to try it.
Comments are stored locally in your browser. Server comments are displayed alongside your local comments.

Join to receive our email series which contains a round-up of some of our quick and easy family favorite recipes.
