
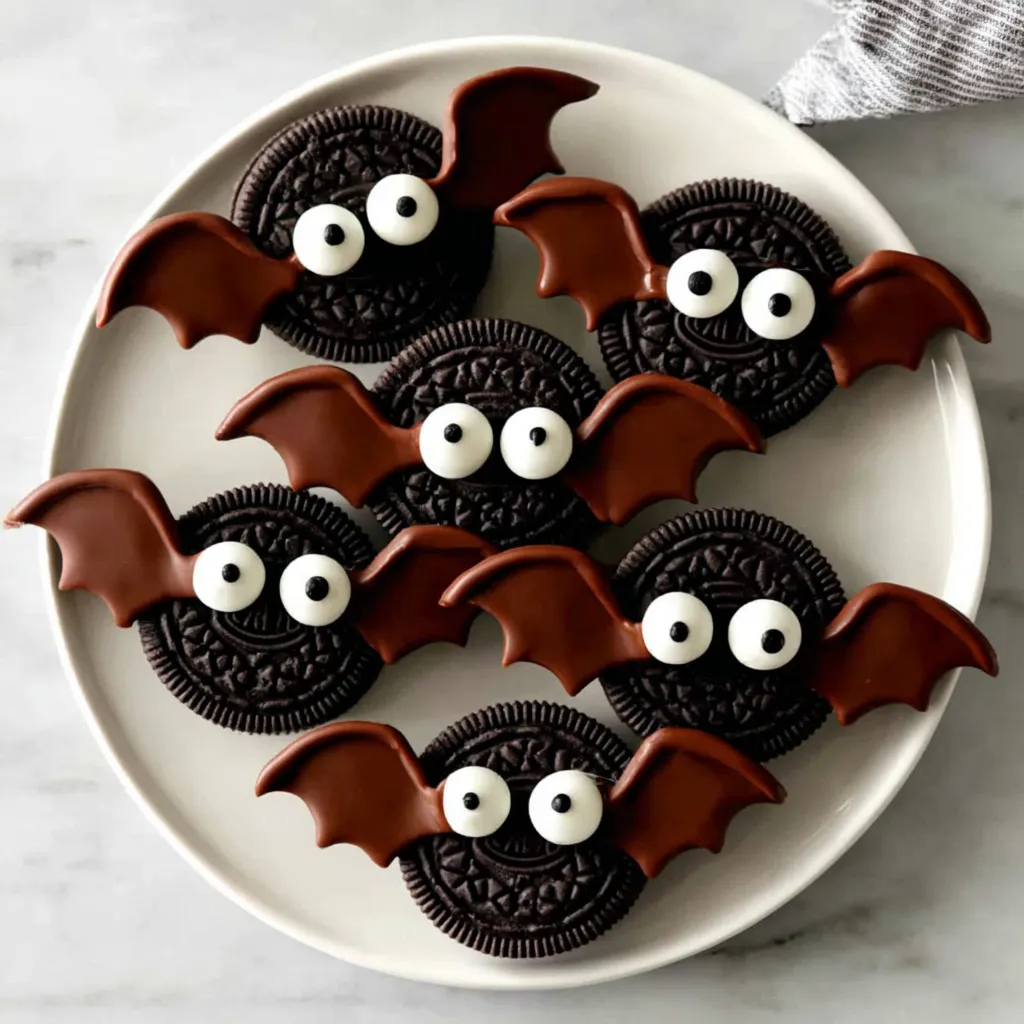
Spooky Chocolate Bat Oreos

Playful no-bake Bat Oreos with candy eyes and a glossy chocolate cap. Quick to assemble, kid-approved, and perfect for Halloween parties.
Why You'll Love This Recipe
- No-bake and fast: ready in about 20 minutes from start to finish, ideal for last-minute gatherings or classroom parties.
- Minimal ingredients: just Oreos, chocolate melting wafers, and candy eyeballs—easy to find at most grocery or craft stores.
- Kid-friendly assembly: little hands can help place wings and eyes, turning dessert into a crafty, memory-making activity.
- Make-ahead friendly: sets well in the fridge and holds beautifully for 2 to 3 days in an airtight container.
- Reliable presentation: the glossy chocolate cap and bright eyes look festive on any dessert table with almost no effort.
- Scalable for a crowd: double or triple the batch with no change in technique, perfect for parties and school events.
When I first served these at a neighborhood pumpkin-carving night, the platter was empty in less than five minutes. Adults laughed at the googly eyes while kids debated which bat looked the “spookiest.” These cookies are the rare party treat that bring smiles before the first bite—and the flavor keeps everyone coming back for seconds.
Ingredients
- Double Stuf Oreos: The extra cream acts like edible glue to secure the wings, making assembly easier and sturdier. Look for fresh, crisp cookies so the wings cut cleanly without crumbling.
- Chocolate melting wafers: Choose smooth-melting wafers like Ghirardelli or Merckens for a glossy finish and consistent set. They re-melt well if you need to thin or touch up.
- Candy eyeballs: Wilton or store-brand candy eyes give each bat personality. Pick medium-size eyes so they sit neatly without sliding on the chocolate.
Instructions
Prep the wings: Select 5 Oreos for the wings. Twist each cookie to separate, scrape off and discard the cream, then use a sharp paring knife to cut each wafer round in half to form semicircle wings. Work on a cutting board and use a gentle rocking motion to prevent cracking. Assemble the bat bodies: Lay out 10 whole Double Stuf Oreos. Press one wing into the cream on the left side and one on the right, pushing just enough to anchor without splitting the cookie. If a wing loosens, add a tiny dab of melted chocolate later to secure it. Melt the chocolate: Place 1/2 cup chocolate melting wafers in a microwave-safe bowl. Heat in 20-second bursts, stirring thoroughly after each. Stop when almost melted and stir until fully smooth; residual heat will finish the job without scorching. Cap the cookies with chocolate: Using a spoon or small offset spatula, spread a thin, even layer of melted chocolate over the top of each assembled Oreo, covering the center and slightly overlapping the seams where the wings meet the filling. Aim for a smooth, shiny surface about 2 millimeters thick. Add candy eyes: While the chocolate is still wet, gently press two candy eyeballs onto each cookie. Place them close together near the upper third so they look lively. If an eye slides, wait 30 seconds for the chocolate to thicken, then reposition. Set and chill: Transfer the bats to a parchment-lined baking sheet and chill in the refrigerator for 10 to 15 minutes, or until the chocolate is firm to the touch. Keep chilled until serving for the cleanest look.
You Must Know
- Chill helps: setting in the fridge keeps the chocolate glossy and prevents smudges.
- Sturdy wings: Double Stuf cream grips better, reducing wing slip.
- Microwave gently: short bursts avoid scorching and ensure a smooth spread.
- Allergen alert: contains wheat, soy, and likely milk; some candy eyes include egg whites.
- Great make-ahead: holds well 2 to 3 days refrigerated in an airtight container.
My favorite part is watching kids choose their favorite bat; somehow each cookie looks like it has its own personality. Over the years, I have learned to assemble a double batch because parents end up sneaking extras for the drive home. If you bring these once, you will be asked to bring them again, guaranteed.
Storage Tips
Arrange the finished Bat Oreos in a single layer on a parchment-lined sheet and chill until the chocolate is fully firm. Transfer to an airtight container, separating layers with parchment to protect the eyes and wings. Refrigerate up to 3 days for best texture and appearance. For short events, you can hold them at cool room temperature for 1 to 2 hours, but avoid warm rooms or direct sun or the chocolate may soften. Freezing is possible, though candy eyes can dull slightly; if freezing, place in a rigid container for up to 1 month and thaw in the refrigerator to minimize condensation.
Ingredient Substitutions
If you cannot find Double Stuf Oreos, use regular Oreos and add a tiny smear of melted chocolate where the wings slide into the cream for extra hold. If melting wafers are unavailable, chocolate chips work; stir in 1 teaspoon neutral oil per 1/2 cup chips to help with smoothness and shine. For candy eyes, mini chocolate chips can stand in—place them point-side down while the coating is wet. Gluten-free chocolate sandwich cookies make a good base for those avoiding gluten, and dairy-free melting wafers allow a completely dairy-free finish—just check candy eye labels carefully, as many brands contain egg whites.
Serving Suggestions
Set these on a black or orange platter with a sprinkle of chocolate cookie crumbs to mimic “night sky” vibes. Pair with bowls of popcorn, caramel apples, or a simple hot chocolate bar for a cozy Halloween spread. For a themed dessert board, add chocolate-dipped pretzel rods, pumpkin-shaped marshmallows, and clementines drawn with jack-o-lantern faces. If you want height on your table, stack the bats on a cake stand and tuck a few mini tea lights nearby to show off their glossy eyes. They make charming party favors wrapped individually in clear treat bags tied with ribbon.
Cultural Background
Decorated cookies and no-bake sweets have long played a role in American holiday traditions, especially for Halloween, where whimsy and spectacle are key. The idea of bat-shaped desserts took off as home bakers embraced easy craft-food hybrids—simple cookies transformed into recognizable characters with minimal tools. Candy eyeballs became a pantry staple over the past decade thanks to cake-decorating aisles expanding in everyday grocery stores. These Bat Oreos sit perfectly in that lineage: playful, approachable, and deeply shareable. They draw on the classic American love for Oreos, a nostalgic cookie that bridges generations and makes any themed dessert feel familiar yet festive.
Seasonal Adaptations
In autumn, add a pinch of pumpkin pie spice to the melted chocolate for a warm, cozy flavor. For winter gatherings, swap the eyes for tiny snowflake sprinkles and use white melting wafers for a frosty look. In spring, tint white wafers pastel colors and switch eyes for mini confetti sprinkles, turning bats into cheerful butterflies. For birthdays, drizzle a contrasting color over the chocolate cap or add an edible gold dust for sparkle. No matter the season, the base technique stays the same—assemble, cap with chocolate, decorate, and chill—so you can tailor the vibe with sprinkles and colors.
Meal Prep Tips
For effortless party prep, cut the wings and assemble the bodies up to a day ahead. Store the winged Oreos flat in a covered container with parchment between layers. Melt and spread the chocolate the morning of your event, then chill and add eyes. Keep finished cookies refrigerated until just before serving to maintain a clean shine. If you are transporting the bats, line a shallow, rigid baking pan with parchment, pack in a single layer, and keep cool with an ice pack beneath the pan; the structure stays neat and the eyes will not shift.
These Bat Oreos are everything I love about holiday cooking: simple ingredients, maximum joy, and a presentation that makes people laugh as they reach for a second. Make them once, and you might find yourself buying candy eyes in bulk come October.
Pro Tips
Work on parchment to reduce mess and make transferring to chill easier.
If chocolate thickens, rewarm 5 to 10 seconds and stir thoroughly.
Press wings into the filling before melting chocolate to streamline assembly.
Chill the assembled bats before transporting to keep eyes centered.
Use a small offset spatula for a smooth, glossy chocolate cap.
This nourishing spooky chocolate bat oreos recipe is sure to be a staple in your kitchen. Enjoy every moist, high protein slice — it is perfect for breakfast or as a wholesome snack any time.
FAQs about Recipes
How do I store Bat Oreos?
Store in an airtight container lined with parchment and refrigerate up to 3 days. For short events, keep at cool room temperature up to 2 hours.
Can I freeze them?
Yes. Freeze in a rigid, airtight container up to 1 month. Thaw in the refrigerator to prevent condensation from dulling the chocolate.
What if I do not have melting wafers?
Use chocolate chips with 1 teaspoon neutral oil per 1/2 cup chips, or white/candy wafers. Reheat gently in short bursts.
How do I keep the wings from falling out?
Choose Double Stuf for better grip. If using regular Oreos, add a dab of melted chocolate at the wing seam to secure them.
Tags
Spooky Chocolate Bat Oreos
This Spooky Chocolate Bat Oreos recipe makes perfectly juicy, tender, and flavorful steak every time! Serve with potatoes and a side salad for an unforgettable dinner in under 30 minutes.
Ingredients
Bat Oreos
Instructions
Prep the wings
Twist apart 5 Oreos, scrape off cream, and cut each wafer round in half to create semicircle wings. Work on a cutting board with a sharp paring knife for clean cuts.
Assemble the bat bodies
Press two wings into the cream of 10 whole Double Stuf Oreos, one on each side, until anchored. If a cookie cracks, gently press it back together; the chocolate cap will reinforce it later.
Melt the chocolate
Microwave 1/2 cup chocolate melting wafers in 20-second bursts, stirring well between each until smooth. Stop when nearly melted and stir to finish to prevent scorching.
Cap with chocolate
Spread a thin, even layer of melted chocolate over each Oreo top, covering the center and slightly overlapping the wing seams for a clean finish.
Add eyes
While the chocolate is wet, press two candy eyeballs near the top of each cookie. If sliding occurs, wait 30 seconds for the chocolate to thicken before adjusting.
Set and serve
Chill decorated Oreos on a parchment-lined sheet for 10 to 15 minutes, until firm. Keep refrigerated until ready to serve for best definition.
Store
Refrigerate in an airtight container up to 3 days, separating layers with parchment to protect decorations.
Last Step: Please leave a rating and comment letting us know how you liked this recipe! This helps our business to thrive and continue providing free, high-quality recipes for you.
Nutrition
Did You Make This?
Leave a comment & rating below or tag
@royalmorsel on social media!
Categories:
You might also like...

Cheeseburger Queso Sliders
Juicy beef, sweet-charred peppers, and a silky queso drizzle turn these sliders into the ultimate crowd-pleasing bite for game day or weeknight fun.

Short Ribs with Garlic Mash
Melt-in-your-mouth braised short ribs nestled over creamy garlic mashed potatoes, all in a rich, herb-scented sauce that feels like a warm hug.

Cheesy Garlic Pull-Apart Bread
Golden, garlicky pull-apart loaf swaddled in buttery herbs and stretchy mozzarella that begs to be shared warm from the oven.
Did You Make This?
Leave a comment & rating below or tag @royalmorsel on social media!
Rate This Recipe
Share This Recipe
Enjoyed this recipe? Share it with friends and family, and don't forget to leave a review!
Comments (1)
This recipe looks amazing! Can't wait to try it.
Comments are stored locally in your browser. Server comments are displayed alongside your local comments.

Hi, I'm Emma!
What's Popular

30-Minute Meals!
Join to receive our email series which contains a round-up of some of our quick and easy family favorite recipes.