
>>

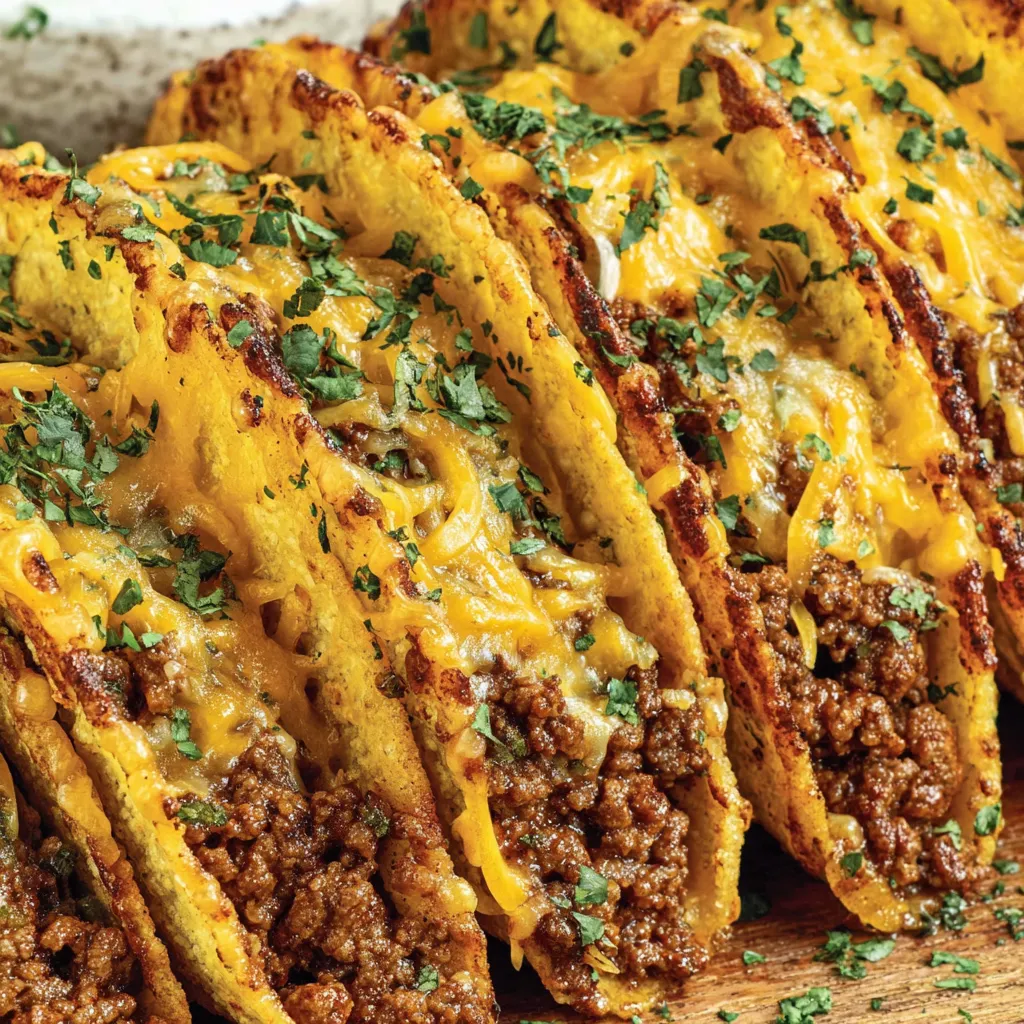
Crisp corn shells filled with seasoned beef and melty cheddar-jack—an easy oven-baked version of taco night that keeps shells crunchy and cleanup minimal.
This recipe for oven-baked stand & stuff tacos has been my go-to for weeknights when I want something that tastes special but comes together quickly. I first landed on this method during a chaotic week of after-school activities, needing tacos that could be assembled, tucked into the oven, and served piping hot with minimal fuss. The wide hard corn shells with flat bottoms make assembly easy and they cooperate with the oven to deliver consistently crisp shells while the cheese melts to golden perfection. The result is crunchy, savory, and reliably comforting—my family always reaches for seconds.
What makes these tacos memorable is the balance between the browned ground beef and the modest tomato sauce that keeps the filling moist but not watery, preventing soggy bottoms. I use 85/15 ground round because it browns beautifully, develops flavor quickly, and still gives a satisfying bite without excessive grease. This has become our crowd-pleaser for movie nights and casual dinners; it’s an approachable riff on traditional tacos with a homey baked finish that’s ideal for feeding a small crowd without spending all night in the kitchen.
On the first night I made these, my teenager announced they were "better than takeout," and my neighbor asked for the recipe the next day—simple praise that convinced me this preparation deserved a permanent spot in the rotation. Over time I’ve refined timing and seasoning so the filling is juicy enough to be flavorful but dry enough to preserve shell crunchiness; those small adjustments make a big difference.

My favorite part of these is how the cheese browns just enough to form little crispy edges where it meets the shell—simple pleasures. Friends who visit always comment that the shells stay crunchier than you’d expect from an oven method, and that small surprise keeps this dish in rotation for gatherings and busy weeknights alike.

Cool leftovers to room temperature and store in an airtight container for up to 3 days in the refrigerator. To reheat while retaining crispness, place tacos on a sheet pan and warm in a 350°F oven for 6–8 minutes; this helps restore texture better than microwaving. If you want to meal-prep, cook the filling and refrigerate in a sealed container; assemble shells and bake just before serving for the best crunch. Do not freeze assembled tacos because the shells will absorb moisture and lose their crispness. Instead, freeze the filling in labeled freezer bags for up to three months—thaw overnight in the fridge and reheat on the stovetop before filling shells.
If you’re avoiding red meat, substitute ground turkey or a plant-based crumbled protein—note that turkey is leaner and benefits from a splash of olive oil during cooking to avoid dryness. For dairy-free diets, omit the cheese or use a dairy-free shredded cheese alternative; keep an eye on moisture since dairy-free cheeses melt differently. Swap yellow onion for white or sweet onion, and for a fresher profile add a squeeze of lime to the finished tacos. If you prefer more heat, use a spicy taco seasoning or add a pinch of cayenne or chipotle powder.
Serve these with crunchy shredded lettuce, diced tomatoes, pickled red onions, and a dollop of sour cream or Greek yogurt for tang. A simple side of cilantro-lime rice or black beans complements the savory beef and keeps the meal balanced. For a fun dinner spread, set out bowls of guacamole, salsa, pickled jalapeños, and shredded cabbage so everyone can top their tacos to taste. Garnish with fresh cilantro and serve with lime wedges for brightness.
These oven-baked tacos are inspired by Tex-Mex weeknight interpretations of traditional Mexican street tacos, adapted for home convenience. The idea of baking assembled tacos to melt cheese and crisp shells is a practical American development that blends convenience with familiar taco flavors. While not an authentic regional dish from Mexico, this version reflects how Mexican flavors are embraced and adapted in home kitchens across the U.S. to suit busy modern schedules.
In summer, replace tomato sauce with a spoonful of fresh pico de gallo folded into the cooked meat for brightness, and top with grilled corn kernels. In colder months, add a pinch of smoked paprika or a spoonful of chipotle in adobo to the filling for warmth and depth. During holidays, bulk up the filling with roasted sweet potatoes and black beans for a heartier, vegetarian-friendly option that still benefits from the oven’s finishing touch.
Prepare the seasoned meat up to two days ahead and store it in the refrigerator. On the day you plan to serve, warm the filling gently in a skillet and fill the shells then bake briefly. For family lunches, pack the filling separately in a microwave-safe container and provide shells and cheese to assemble and bake or microwave at lunchtime if an oven isn’t available. Use airtight containers and label with dates to keep everything organized.
One last note: encourage experimentation. Small changes—different cheeses, a splash of hot sauce, or swapping proteins—can transform this simple technique into your family’s signature take on taco night. Share it, enjoy it, and make it your own.
Drain excess grease after browning the beef to prevent soggy shell bottoms and to concentrate flavor.
If filling appears too wet, simmer another 1–2 minutes to reduce moisture before filling shells.
Use freshly shredded cheese for creamier melt and better browning compared to pre-shredded blends.
Arrange shells with space between them in the 9x13 dish to ensure even crisping.
This nourishing oven-baked stand & stuff tacos recipe is sure to be a staple in your kitchen. Enjoy every moist, high protein slice — it is perfect for breakfast or as a wholesome snack any time.
Yes—assemble the shells right before baking. If the filling is hot, it will melt the cheese evenly and crisp the shells without making them soggy.
To reheat while keeping crunch, warm in a 350°F oven for 6–8 minutes instead of using a microwave.
This Oven-Baked Stand & Stuff Tacos recipe makes perfectly juicy, tender, and flavorful steak every time! Serve with potatoes and a side salad for an unforgettable dinner in under 30 minutes.
Preheat oven to 400°F. Stand 10 hard taco shells upright in a 9x13 baking dish without overcrowding so each shell crisps evenly.
Heat 1 tablespoon olive oil in a large skillet over medium-high heat. Add 3/4 cup diced yellow onion and cook 2–3 minutes until softened. Add 1 1/2 pounds ground beef, 1/2 teaspoon salt, and 1/4 teaspoon pepper. Cook 8–10 minutes, breaking meat into small pieces and draining excess grease.
Stir in 3/4 cup tomato sauce and 1 ounce taco seasoning. Cook an additional 2–3 minutes until the meat has absorbed sauce and is not overly wet.
Divide the filling evenly and spoon about 1/3 to 1/2 cup into each shell, mounding toward the center to keep shells balanced.
Sprinkle 1 1/2 cups shredded cheddar-jack evenly over the filled shells. Bake at 400°F for 5–7 minutes until cheese melts and shells are crisp. Watch closely to avoid over-browning.
Remove from oven, let rest 1–2 minutes, and sprinkle with 1 tablespoon chopped cilantro if desired. Serve warm with lime wedges and favorite toppings.
Last Step: Please leave a rating and comment letting us know how you liked this recipe! This helps our business to thrive and continue providing free, high-quality recipes for you.
Leave a comment & rating below or tag
@royalmorsel on social media!

Juicy beef, sweet-charred peppers, and a silky queso drizzle turn these sliders into the ultimate crowd-pleasing bite for game day or weeknight fun.

Melt-in-your-mouth braised short ribs nestled over creamy garlic mashed potatoes, all in a rich, herb-scented sauce that feels like a warm hug.

Golden, garlicky pull-apart loaf swaddled in buttery herbs and stretchy mozzarella that begs to be shared warm from the oven.
Leave a comment & rating below or tag @royalmorsel on social media!
Enjoyed this recipe? Share it with friends and family, and don't forget to leave a review!
This recipe looks amazing! Can't wait to try it.
Comments are stored locally in your browser. Server comments are displayed alongside your local comments.

Join to receive our email series which contains a round-up of some of our quick and easy family favorite recipes.
