
>>

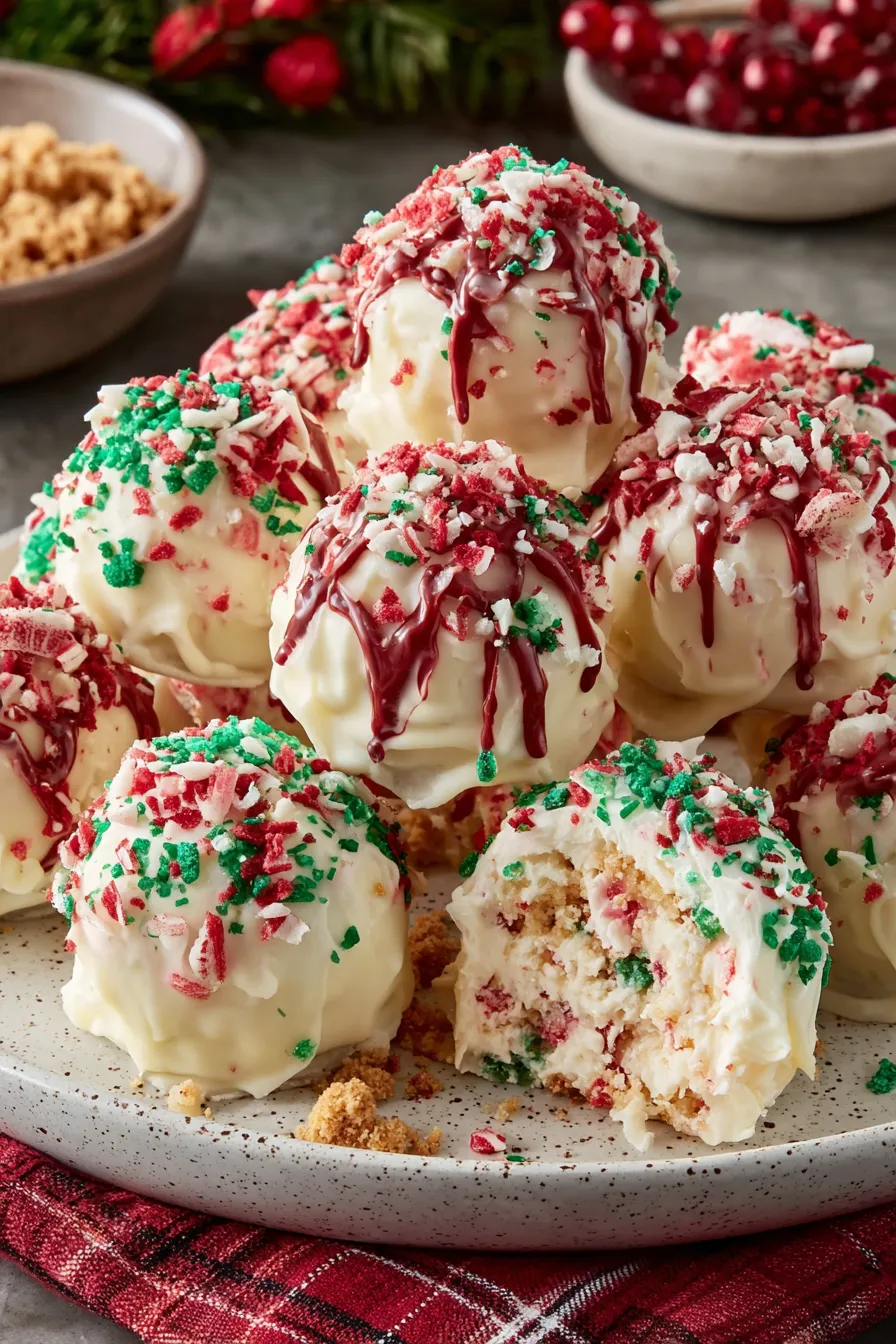
Festive no-bake cheesecake bites dipped in red and green candy melts, finished with sprinkles. Easy to make, perfect for parties and holiday gifting.
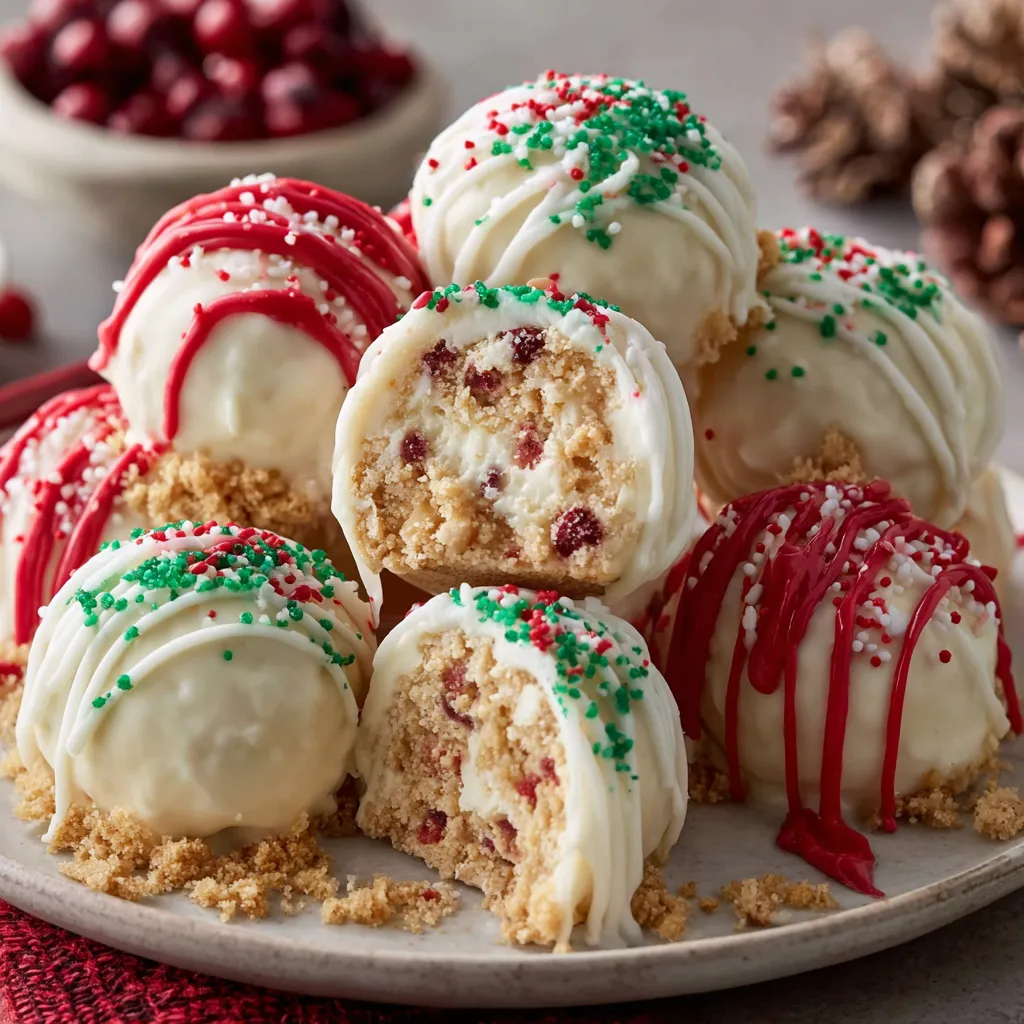
This recipe for no-bake Christmas cheesecake bites has become my go-to holiday treat whenever I need something festive that disappears fast. I first made these years ago for a cookie swap when I realized that people who normally avoid rich desserts were sneaking back for seconds. They are creamy, slightly tangy, and sweet with a crunchy hint from the crumb base. Small, handheld, and visually cheerful, they are a perfect last-minute dessert that still looks like effort went into it.
I discovered the combination during a December afternoon when I had leftover holiday candy and a block of cream cheese on the counter. The white chocolate adds silkiness and stability, the graham crumbs give a toasty background note, and the candy melts make the bites feel like little ornaments on the plate. These bites are ideal for gatherings because they are easy to transport, hold up well on a platter, and can be made ahead in large batches. Every year I make them for family and friends, and they have become a small but memorable tradition at holiday brunches and office parties.
In my experience these bites are the first to go at any holiday table. On more than one occasion guests have asked for the recipe while still holding a plate. I like that they look impressive yet are forgiving to make; even if your coating is slightly uneven the sprinkles and variations in color hide imperfections and add charm.
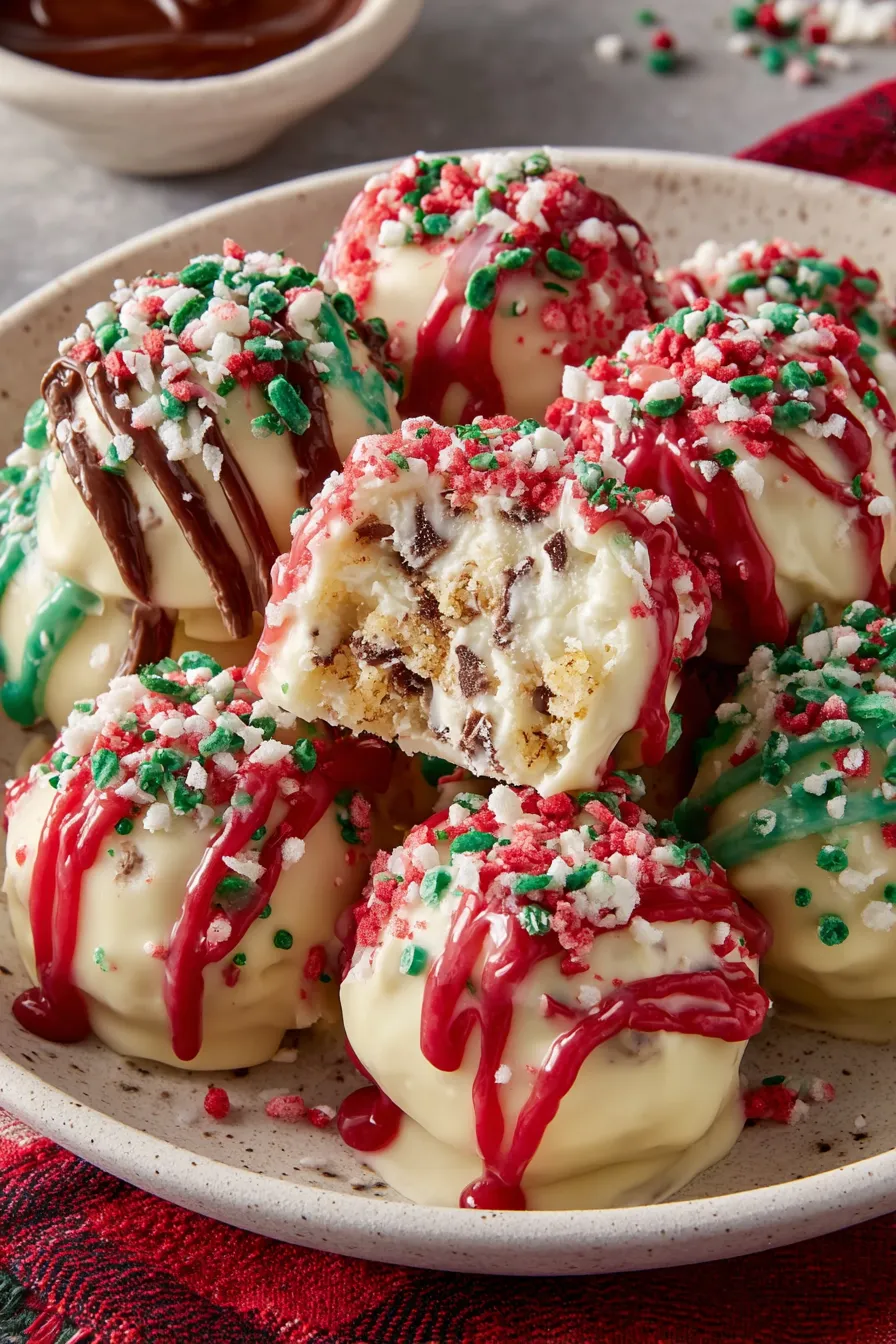
My favorite thing about these bites is how versatile they are. One year I made half with crushed ginger snaps for a spicier backdrop and the other half with Oreos for a cookies and cream version. Guests loved both. They are quick to assemble, easy to transport, and their small size means people try more than one flavor. It is the type of treat that invites conversation and nostalgia at holiday gatherings.
Store the cheesecake bites in an airtight container layered with parchment to prevent sticking. Refrigerated, they keep well for up to five days. For longer storage freeze in a single layer until firm, then transfer to a sealed freezer bag for up to three months. Thaw overnight in the refrigerator before serving. When reheating slightly soften the coating by bringing the container to room temperature for 15 minutes; avoid microwaving as it melts the candy coating unevenly.
If you need to avoid gluten substitute gluten free graham crumbs or crushed gluten free vanilla cookies. For a dairy free version use dairy free cream cheese and dairy free whipped topping, and swap white chocolate chips for a dairy free white chocolate alternative that melts smoothly. If you prefer less sweetness, reduce the powdered sugar by one quarter cup and add a pinch of fine sea salt to balance flavor. For a deeper flavor use browned butter cookie crumbs instead of graham for a nutty note.
Arrange on a festive platter with small paper doilies and alternating red and green bites for visual effect. Pair with hot cocoa, mulled cider, or a sparkling wine for adult gatherings. They are ideal as part of a dessert grazing table with other small sweets like peppermint bark and spiced nuts. Garnish individual bites with a tiny edible gold star or a single nonpareil for elegance.
Small no-bake sweets like these draw from classic American chilled desserts and bite sized confection traditions that became popular in home baking during the mid 20th century. Candy melts and themed sprinkles gained traction as a way to simplify decorative work without tempering chocolate. These little bites combine the creamy cheesecake heritage with the playfulness of decorated confections that families make for special occasions.
For winter variations swap the graham crumbs for crushed ginger snaps and use white and gold candy melts for a New Year look. For Valentine season use pink and red coating with heart shaped sprinkles. In summer a lemon curd swirl and pastel coating can make them feel light. The filling accepts flavor additions like orange zest or a tablespoon of espresso for an adult twist.
Make the filling up to two days ahead and keep chilled. Shape and freeze on a baking sheet and dip straight from semi frozen for faster work. If you are preparing for an event, schedule assembly in stages: morning make filling and chill; afternoon shape and freeze; just before serving dip and decorate. This reduces last minute stress and makes the process efficient.
These no-bake cheesecake bites are a small celebration in every bite. They are forgiving, adaptable, and reliably festive. I encourage you to make a double batch the first time so you can experiment with coatings and crumbs. Share them, label the flavors, and enjoy the delight they bring to holiday gatherings.
Chill the filling before shaping so the balls hold together and do not fall apart during dipping.
If candy melts are too thick add 1 teaspoon of neutral oil at a time until you reach the desired consistency.
Work in small batches when dipping so the coating remains fluid and smooth.
Use a small offset spatula to transfer dipped bites if forks leave too many marks.
This nourishing no-bake christmas cheesecake bites recipe is sure to be a staple in your kitchen. Enjoy every moist, high protein slice — it is perfect for breakfast or as a wholesome snack any time.
This No-Bake Christmas Cheesecake Bites recipe makes perfectly juicy, tender, and flavorful steak every time! Serve with potatoes and a side salad for an unforgettable dinner in under 30 minutes.
Beat the softened cream cheese until smooth, then add powdered sugar and vanilla. Mix until homogenous and free of lumps.
Melt white chocolate chips in 20 second intervals in the microwave, stirring between intervals, and allow to cool for two minutes before mixing into the cream cheese.
Stir in the crushed graham crackers, then gently fold in the thawed whipped topping to keep the filling light.
Refrigerate the mixture for 30 to 40 minutes until firm. Scoop or roll into 1 inch balls and place on a parchment lined sheet.
Melt red and green candy melts in separate bowls according to package instructions. Thin with a small amount of oil if necessary for dipping.
Dip each chilled ball into the melted coating, tap off excess, and add sprinkles immediately. Transfer back to parchment and chill to set.
Refrigerate in an airtight container for up to five days or freeze for up to three months. Thaw in refrigerator before serving.
Last Step: Please leave a rating and comment letting us know how you liked this recipe! This helps our business to thrive and continue providing free, high-quality recipes for you.
Leave a comment & rating below or tag
@royalmorsel on social media!

Juicy beef, sweet-charred peppers, and a silky queso drizzle turn these sliders into the ultimate crowd-pleasing bite for game day or weeknight fun.

Melt-in-your-mouth braised short ribs nestled over creamy garlic mashed potatoes, all in a rich, herb-scented sauce that feels like a warm hug.

Golden, garlicky pull-apart loaf swaddled in buttery herbs and stretchy mozzarella that begs to be shared warm from the oven.
Leave a comment & rating below or tag @royalmorsel on social media!
Enjoyed this recipe? Share it with friends and family, and don't forget to leave a review!
This recipe looks amazing! Can't wait to try it.
Comments are stored locally in your browser. Server comments are displayed alongside your local comments.

Join to receive our email series which contains a round-up of some of our quick and easy family favorite recipes.
