
>>

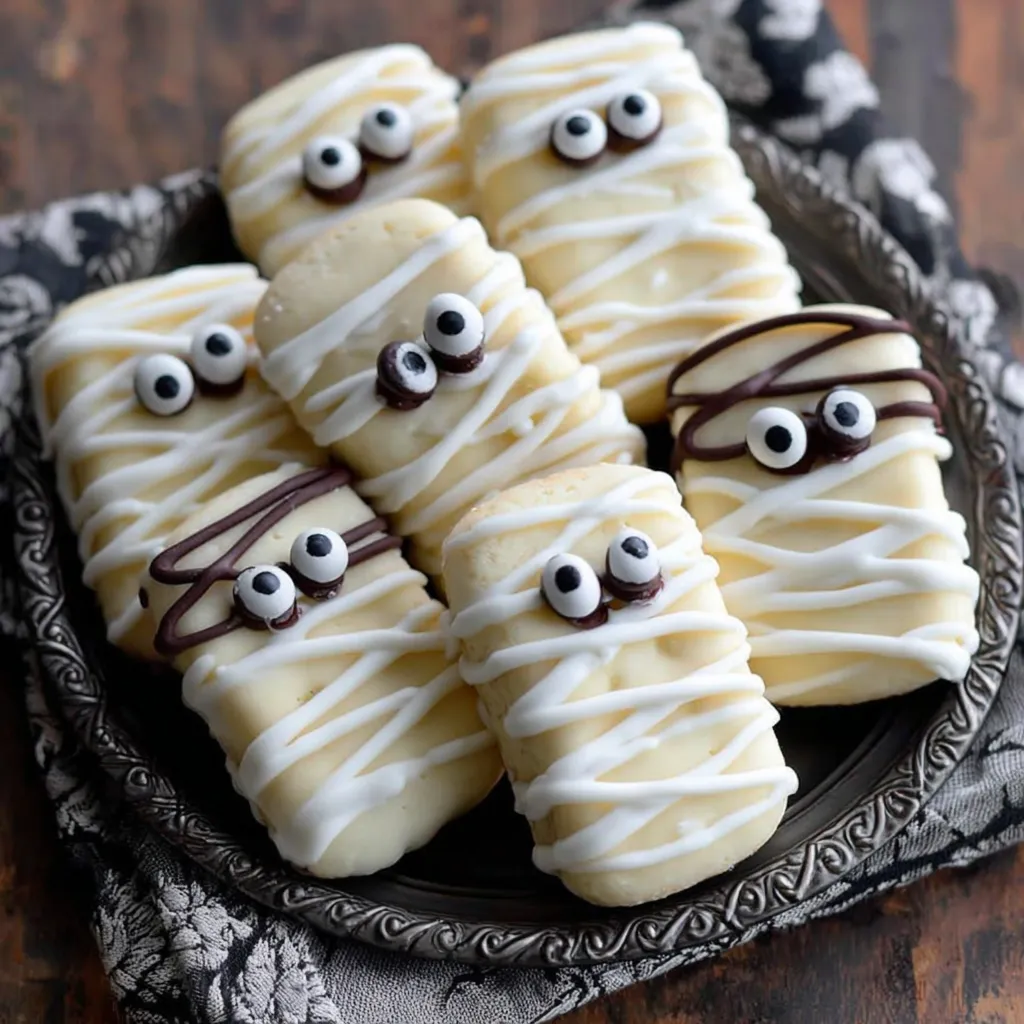
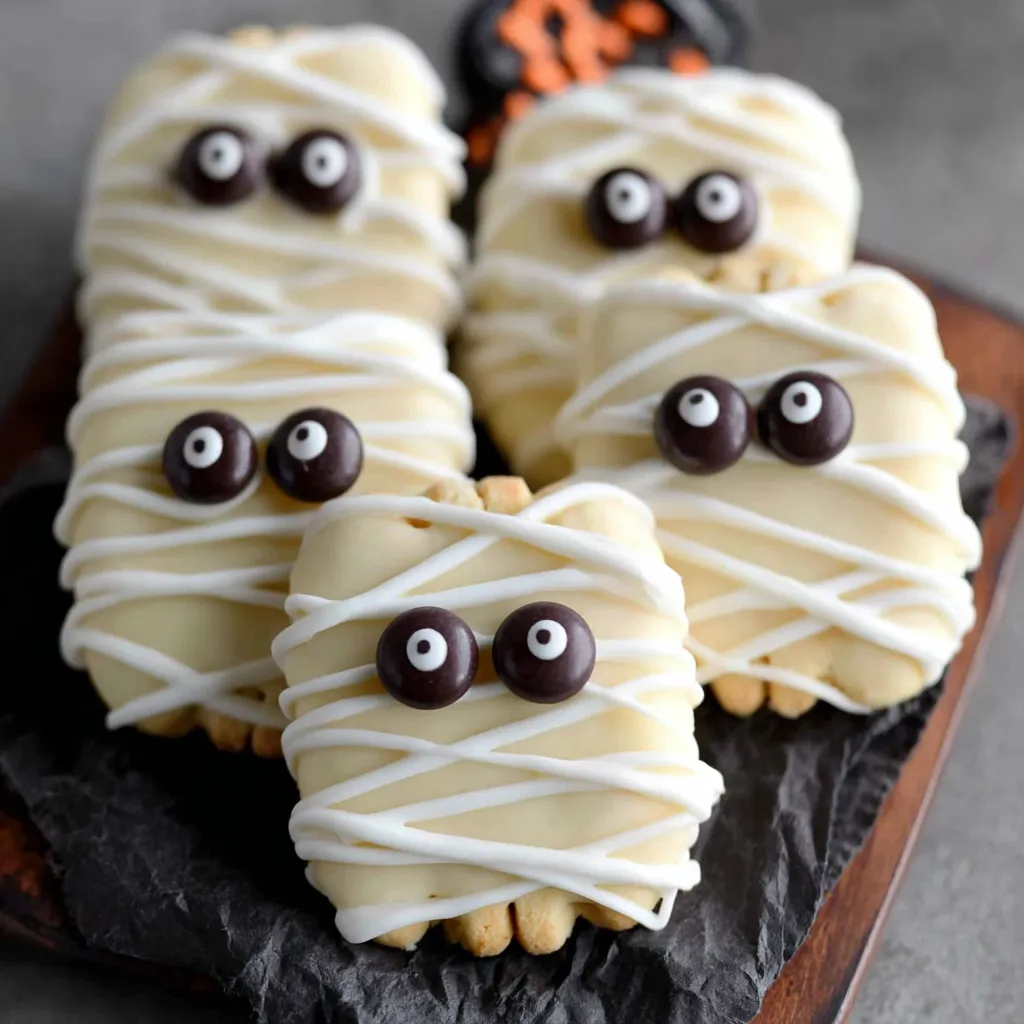
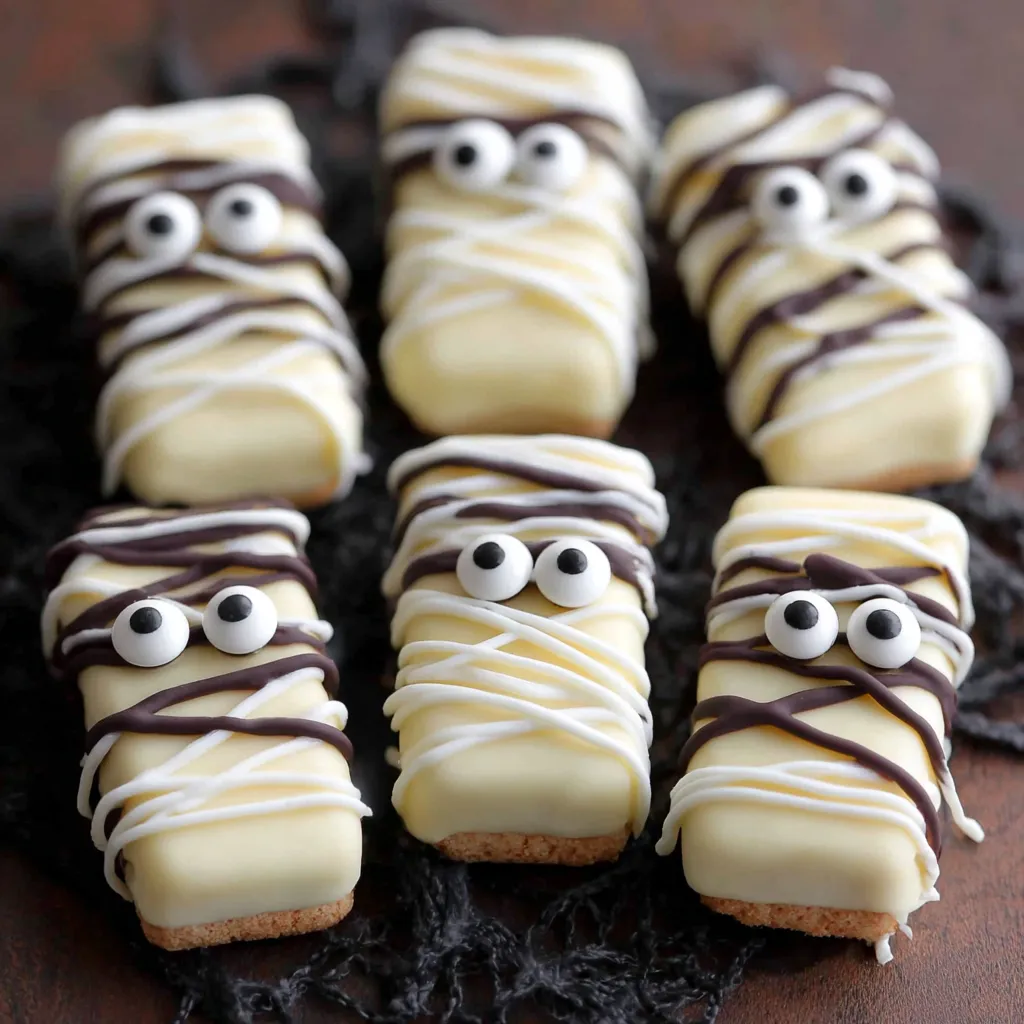
These playful mummy cookies pair crisp Vienna Fingers with a creamy white candy coating and mini M&M eyes for an easy, kid-approved Halloween treat.
Every time I serve these, someone asks for the “secret,” expecting a complicated technique. The joy is telling them it’s simply a dip, a drizzle, and two little candies for eyes. My family loves helping with assembly lines, and we always end up laughing at the silly expressions. They transport well too, so I can finish them the night before and bring them chilled to any event.
What I love most is how approachable these cookies are. I can prep stations for dipping and drizzling, and everyone naturally falls into a rhythm. There is something magical about watching a plain vanilla cookie transform into a tiny character with just a few swipes of candy and two bright eyes. Even teens get into it, competing for the creepiest mummy face. That sense of play makes them a guaranteed hit at any Halloween table.
Let the coating harden fully before storing. Layer cookies in a rigid airtight container with parchment between layers to prevent scuffing. Keep at cool room temperature for up to 2 weeks, away from heat and humidity. For longer storage, freeze in a zip-top freezer bag or airtight container for up to 4 months. Thaw at room temperature, still in the container, to avoid condensation forming on the candy surface. If stacking in treat boxes, cushion with parchment or tissue so the drizzle stays intact and the eyes do not shift.
If you cannot find Vienna Fingers, any oval-shaped vanilla sandwich cookie will work. For coating, white candy melts or almond bark are most reliable; white chocolate chips can be used but may require more gentle heating and can be thicker. If your coating is too thick, warm it slightly and stir thoroughly; a teaspoon or two of neutral oil can help loosen some candy coatings, but check the package guidelines. For the eyes, mini chocolate chips or small candy pearls also work; dab a tiny dot of coating underneath to secure them. Colorful drizzles can be achieved with orange or black candy melts for extra Halloween flair.
Arrange your mummies on a large black or slate platter to make the white drizzle pop. Sprinkle a handful of extra mini M&Ms around the edges for color. These pair beautifully with hot cocoa, apple cider, or a simple vanilla milkshake for a themed dessert table. For a party favor, slip one or two cookies into clear treat bags and tie with orange ribbon. Add a small tag with a playful message like “Unwrap me if you dare.” They also look great on cupcake stands, alternating with small pumpkins or faux cobwebs to complete the spooky vibe.
Decorated holiday cookies are a cherished American tradition, and Halloween has inspired some of the most whimsical designs. While cut-out sugar cookies often steal the show, these dipped sandwich cookies carry forward that same festive spirit with fewer steps. The idea of candy-coated cookies gained popularity with the rise of candy melts, which make professional-looking finishes accessible to home bakers. Mummy-themed treats become instant conversation pieces because they strike the right balance between cute and spooky. This version aligns with the trend of semi-homemade desserts that leverage store-bought items for consistency and speed, without sacrificing creativity.
For a fall harvest look, swap the white coating for caramel-colored candy melts and use dark chocolate chips as eyes. At Christmas, keep the white coating and add red and green drizzle for a candy-cane effect. For spring parties, tint a small portion of coating pastel shades and zigzag over the white base. You can even shape personalities by angling the eyes or spacing them closer for different expressions. The same method works on heart-shaped sandwich cookies for Valentine’s Day or egg-shaped cookies for Easter; just match the drizzle pattern to the theme.
To run this like a pro, prep an assembly line: one sheet for dipped cookies, one for drizzled, and a small bowl with sorted mini M&Ms. Melt only enough coating for 6 to 8 cookies at a time so it stays fluid and easy to work with. Keep a second bowl of warm water nearby to rest your piping bag so the coating stays soft between cookies. When transporting, chill the decorated cookies first, then pack in single layers with parchment. At the party, move them to the serving platter just before guests arrive for the cleanest look.
Halloween is about leaning into fun and sharing treats that spark smiles. These Mummy Halloween Cookies deliver that joy with simple steps, playful decorations, and a finish that looks bakery-ready. Make them once, and they will become your October tradition.
Work in small batches to keep the coating smooth and manageable.
Tap the fork on the bowl edge to remove excess coating for neater edges.
Add candy eyes while the drizzle is still wet for secure adhesion.
This nourishing mummy halloween cookies recipe is sure to be a staple in your kitchen. Enjoy every moist, high protein slice — it is perfect for breakfast or as a wholesome snack any time.
Yes. White chocolate chips can work, but they tend to melt thicker and may seize if overheated. Melt slowly at 50% power, stir often, and add a small amount of neutral oil only if the package recommends thinning.
Store fully set cookies in an airtight container at cool room temperature for up to 2 weeks. For longer storage, freeze up to 4 months and thaw in the container at room temperature to prevent condensation.
This Mummy Halloween Cookies recipe makes perfectly juicy, tender, and flavorful steak every time! Serve with potatoes and a side salad for an unforgettable dinner in under 30 minutes.
Melt white candy coating at 50% power in 30-second intervals, stirring between bursts, until smooth and lump-free. Alternatively, melt gently on the stovetop over medium-low heat or in a double boiler for larger batches, stirring constantly to maintain a glossy, fluid texture.
Line a baking sheet with waxed or parchment paper. Using a fork, submerge each Vienna Fingers cookie in the melted coating, turn to cover all sides, then lift and tap off excess. Place on the lined sheet, using a second fork to help release the cookie cleanly.
Allow coated cookies to firm up: about 30 minutes in the refrigerator or 1 hour at room temperature. The surface should be dry to the touch with a slight sheen and no soft spots before decorating.
Transfer a portion of melted coating to a small zip-top bag and snip a tiny corner. Drizzle lines over each cookie to mimic mummy wrappings. While the drizzle is wet, press two mini M&Ms onto the upper third of each cookie to form eyes.
Let the drizzle harden completely, then lift cookies from the paper. Arrange on a platter or package in treat bags. Store airtight at cool room temperature or chill briefly to firm if needed.
Last Step: Please leave a rating and comment letting us know how you liked this recipe! This helps our business to thrive and continue providing free, high-quality recipes for you.
Leave a comment & rating below or tag
@royalmorsel on social media!

Juicy beef, sweet-charred peppers, and a silky queso drizzle turn these sliders into the ultimate crowd-pleasing bite for game day or weeknight fun.

Melt-in-your-mouth braised short ribs nestled over creamy garlic mashed potatoes, all in a rich, herb-scented sauce that feels like a warm hug.

Golden, garlicky pull-apart loaf swaddled in buttery herbs and stretchy mozzarella that begs to be shared warm from the oven.
Leave a comment & rating below or tag @royalmorsel on social media!
Enjoyed this recipe? Share it with friends and family, and don't forget to leave a review!
This recipe looks amazing! Can't wait to try it.
Comments are stored locally in your browser. Server comments are displayed alongside your local comments.

Join to receive our email series which contains a round-up of some of our quick and easy family favorite recipes.
