
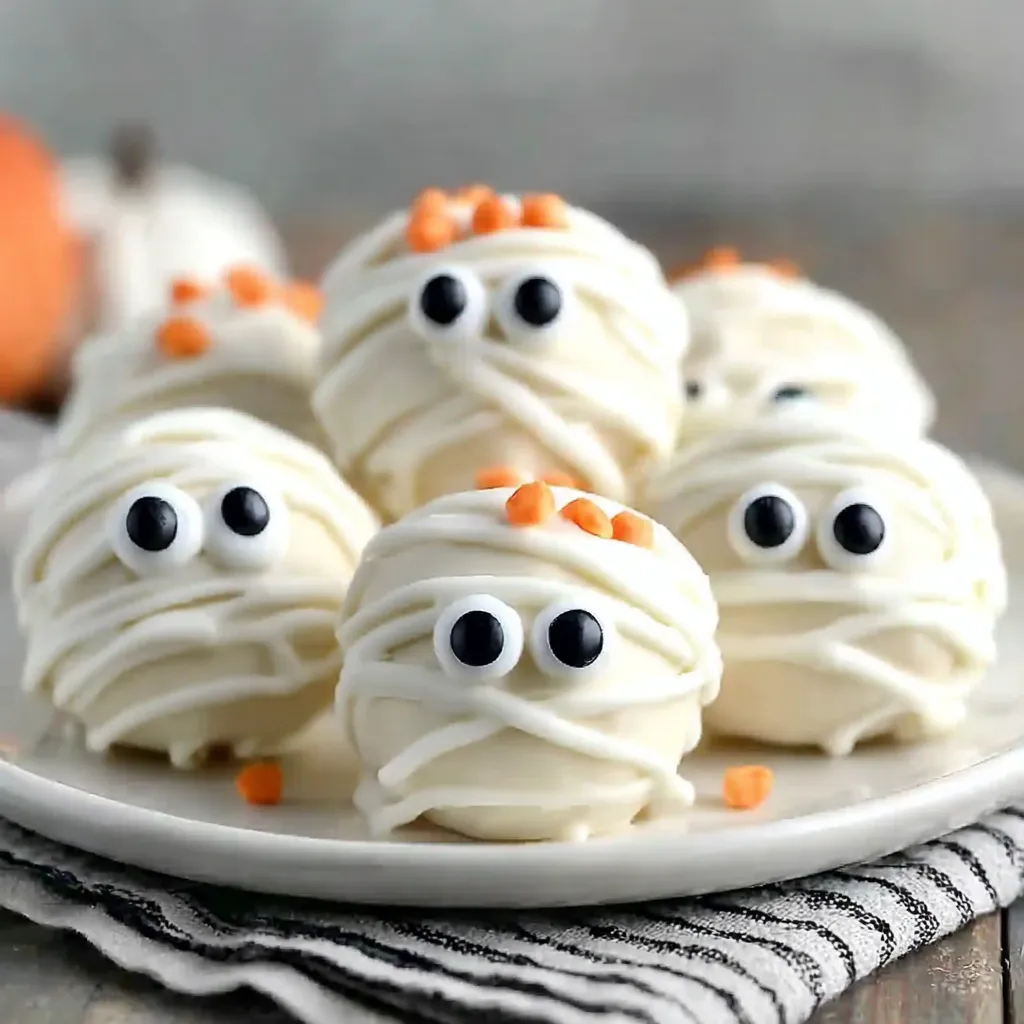
Mummy Cake Balls

Spooky-cute vanilla cake balls dipped in creamy almond bark, dotted with candy eyes, and drizzled like bandages for a fun Halloween treat.
Why You'll Love This Recipe
- Quick to make: Ready in about 90 minutes total, with plenty of hands-off time while the cake bakes and the balls chill.
- Kid-friendly decorating: Simple dipping and eye placement make this a fun, low-stress project for little helpers.
- Minimal ingredients: Uses a white cake mix, cream cheese, and vanilla almond bark—pantry-friendly and budget-conscious.
- Perfectly portable: Bite-sized treats that travel well to school parties, potlucks, or neighborhood gatherings.
- Make-ahead friendly: The cake balls can be frozen before dipping, so you can split the work across days.
- Guaranteed crowd-pleaser: The creamy center and crisp shell offer a satisfying texture contrast everyone loves.
Every October, I set up a decorating station with bowls of melted coating and trays of chilled cake balls. The best part is seeing the mummies take shape in seconds—two eyes, a drizzle, and suddenly a tray of characters. Even the imperfect ones look adorable, and the smooth vanilla flavor keeps everyone coming back.
Ingredients
- White cake mix (prepared and cooled): Any 15.25-ounce box white cake mix works well. Bake per package directions (typically 350°F) and let it cool completely for clean crumbling and even texture.
- Cream cheese: Use 8 ounces full-fat cream cheese at room temperature for a smooth, truffle-like interior that binds the cake crumbs without being overly sweet.
- Vanilla almond bark (candy coating): About 16 ounces melts easily and sets with a clean snap. Choose a brand labeled for dipping; it gives a tidy finish and smooth drizzle.
- Candy eyes: These give the mummies their personality. Look for medium-size eyes so they read clearly against the white coating. Check labels if you need a gelatin-free option.
Instructions
Bake the Cake: Prepare the white cake mix per package directions (usually 350°F). Bake until a toothpick comes out clean. Cool the cake fully on a rack—this prevents steam from making the crumbs soggy and ensures a consistent, rollable mixture later. Mix with Cream Cheese: Crumble the cooled cake into a large bowl, breaking it down to fine crumbs. Add softened cream cheese and beat with an electric mixer on low until the mixture is uniform, thick, and slightly sticky. Avoid overmixing to prevent a gummy texture. Form Cake Balls: Scoop about 2 tablespoons of mixture per ball for bite-size treats. Roll gently between your palms to create smooth, even spheres. Aim for uniform sizing so they chill and dip at the same rate. Freeze the Balls: Arrange the balls on a parchment-lined baking sheet and freeze for 30 minutes. Chilling firms the centers, making dipping cleaner and reducing the risk of crumbs loosening in the coating. Melt the Almond Bark: Melt the vanilla almond bark according to package directions, typically in 30-second microwave bursts, stirring between each. Warm just until fluid and glossy—overheating can thicken or scorch the coating. Dip and Decorate: Using a fork or dipping tool, submerge each chilled cake ball, tap off excess, and place on parchment. Immediately press on two candy eyes before the coating sets so they adhere firmly. Drizzle Coating: Let the first layer set until just firm. Transfer a bit of melted coating to a piping bag or zip-top bag and drizzle back-and-forth lines to mimic mummy bandages. Allow to set fully. Serve: Once the drizzles harden, transfer the mummies to a platter or airtight container. Keep cool and dry until serving so the shells stay crisp and the centers remain creamy.
You Must Know
- Chilling the rolled balls helps prevent cracks in the coating and keeps crumbs out of the melted bark.
- If the coating seems thick, rewarm briefly and stir well; a smooth, fluid texture yields neater dips and drizzles.
- Store finished cake balls in a cool, dry place or refrigerate for up to 5 days; they also freeze well for 2 months.
- These are rich and satisfying, so 2-tablespoon portions are perfect for party trays and lunchbox treats.
My favorite part of these mummies is how consistently they impress with minimal effort. The combination of tender, gently tangy cake centers and crisp vanilla coating feels like a bakery confection. They also scale effortlessly, so I can make double batches for neighborhood gatherings without doubling the stress—just chill, dip, and drizzle when time allows. They are playful, tasty, and wonderfully reliable.
Storage Tips
Let the coating set completely before storing. Arrange the cake balls in a single layer in an airtight container, then add parchment between layers to protect the drizzle. At room temperature, they keep well for about 1 day if your kitchen is cool and dry. Refrigerate up to 5 days to maintain a snappy shell and a creamy center. For longer storage, freeze up to 2 months: place the balls on a sheet pan to freeze solid, then transfer to freezer-safe containers with parchment between layers. Thaw in the refrigerator for several hours before serving to prevent condensation from softening the coating.
Ingredient Substitutions
If you prefer less tang, swap half the cream cheese for 4 tablespoons of unsalted butter, softened. For a different flavor profile, try a yellow cake mix or funfetti for colorful speckles inside. If almond bark is unavailable, use white candy melts or white chocolate chips stabilized with 1 teaspoon of neutral oil per 1 cup chips for smoother dipping. Need dairy-light? Use a dairy-free cream cheese and a dairy-free white coating, noting that set and flavor may differ slightly. If candy eyes are not available, dot tiny circles of melted dark chocolate or mini chips to create eyes.
Serving Suggestions
Arrange your mummies on a black cake stand or a slate board for spooky contrast. Add a few crumbled chocolate cookie “crumbs” around the edges as edible dirt. For a party spread, pair them with orange slices, caramel apples, or a simple cocoa dip to complement the vanilla flavor. If you are making a dessert board, include pretzel rods dipped in leftover coating, chocolate-covered peanuts, and candied popcorn for varied texture. A final dusting of edible glitter makes them party-ready without hiding the cute eyes and bandage drizzle.
Cultural Background
Cake balls and cake pops became wildly popular in the late 2000s as a creative way to repurpose cake scraps into truffle-like bites. The method—combining crumbled cake with a binder such as frosting or cream cheese—quickly evolved into a playful decorating canvas. Mummy designs are a natural fit for Halloween baking traditions, echoing the holiday’s love of whimsical, mildly spooky sweets. Using candy coatings that set quickly allowed home bakers to craft character desserts without specialized tools, and the trend has stuck because it is both approachable and festive for all ages.
Seasonal Adaptations
For Christmas, tint a portion of the coating pale green and add tiny red sprinkle “berries” to transform mummies into festive “bandaged” ornaments. In spring, switch to a lemon cake mix and add pastel sprinkles over the drizzle for an Easter vibe. For birthdays, skip the eyes and use a funfetti interior with rainbow drizzle. You can also drizzle with tinted white coating—orange for fall, pink for Valentine’s Day, or school colors for team parties—keeping the same dependable cake-and-cream-cheese base.
Meal Prep Tips
To get ahead, bake the cake the day before and refrigerate it overnight. Roll the balls and freeze until solid, then store in freezer-safe containers for up to 2 months. When you are ready to finish, thaw in the refrigerator until just chilled (about 1 hour), then dip and decorate. Keep a warm towel near the coating bowl to wipe off condensation and maintain a clean work area. If the coating thickens, microwave for 10 seconds and stir thoroughly. Prepare extra parchment-lined trays so each batch can set without crowding.
Whether you are hosting a school bake sale, a neighborhood costume party, or a cozy family movie night, these Mummy Cake Balls bring smiles before the first bite. Have fun with the decorating, make them in stages, and enjoy the sweet satisfaction of a treat that always delights.
Pro Tips
Use room-temperature cream cheese for a smooth, lump-free mixture.
Chill rolled balls for at least 30 minutes to keep crumbs out of the coating.
Work in small dipping batches so the balls stay cold and round.
Place eyes immediately after dipping, before the coating sets.
Pipe drizzle using a small zip-top bag with a tiny corner snip for thin bandages.
This nourishing mummy cake balls recipe is sure to be a staple in your kitchen. Enjoy every moist, high protein slice — it is perfect for breakfast or as a wholesome snack any time.
FAQs about Recipes
How do I get a smooth coating without cracks?
Chill the rolled cake balls thoroughly before dipping, and make sure the coating is smooth and fluid. Tap off excess coating and set each ball on parchment. If the coating gets thick, rewarm briefly and stir.
Can I make these ahead and freeze them?
Yes. Freeze the rolled cake balls on a sheet pan until solid, then transfer to freezer-safe containers with parchment between layers. Thaw in the refrigerator before dipping. You can also freeze fully finished mummies for up to 2 months.
What can I use instead of vanilla almond bark?
If almond bark is unavailable, use white candy melts or white chocolate chips mixed with 1 teaspoon neutral oil per cup of chips for easier dipping and drizzling.
Tags
Mummy Cake Balls
This Mummy Cake Balls recipe makes perfectly juicy, tender, and flavorful steak every time! Serve with potatoes and a side salad for an unforgettable dinner in under 30 minutes.
Ingredients
Cake Mixture
Coating and Decoration
Instructions
Bake the Cake
Prepare the white cake mix according to package directions (typically 350°F). Bake until a toothpick comes out clean. Cool the cake completely on a rack.
Mix with Cream Cheese
Crumble cooled cake into fine crumbs. Add softened cream cheese and beat on low until evenly combined and cohesive.
Form Cake Balls
Scoop about 2 tablespoons per ball and roll between palms to form smooth, uniform spheres.
Freeze the Balls
Place on a parchment-lined baking sheet and freeze for 30 minutes to firm.
Melt the Almond Bark
Melt almond bark per package instructions, stirring until smooth and fluid.
Dip and Decorate
Dip each chilled ball, let excess drip off, set on parchment, and immediately press on two candy eyes.
Drizzle Coating
Drizzle additional melted coating over each ball to create mummy bandages. Let set.
Serve
Allow coating to harden completely before serving or storing.
Last Step: Please leave a rating and comment letting us know how you liked this recipe! This helps our business to thrive and continue providing free, high-quality recipes for you.
Nutrition
Did You Make This?
Leave a comment & rating below or tag
@royalmorsel on social media!
Categories:
You might also like...

Cheeseburger Queso Sliders
Juicy beef, sweet-charred peppers, and a silky queso drizzle turn these sliders into the ultimate crowd-pleasing bite for game day or weeknight fun.

Short Ribs with Garlic Mash
Melt-in-your-mouth braised short ribs nestled over creamy garlic mashed potatoes, all in a rich, herb-scented sauce that feels like a warm hug.

Cheesy Garlic Pull-Apart Bread
Golden, garlicky pull-apart loaf swaddled in buttery herbs and stretchy mozzarella that begs to be shared warm from the oven.
Did You Make This?
Leave a comment & rating below or tag @royalmorsel on social media!
Rate This Recipe
Share This Recipe
Enjoyed this recipe? Share it with friends and family, and don't forget to leave a review!
Comments (1)
This recipe looks amazing! Can't wait to try it.
Comments are stored locally in your browser. Server comments are displayed alongside your local comments.

Hi, I'm Emma!
What's Popular

30-Minute Meals!
Join to receive our email series which contains a round-up of some of our quick and easy family favorite recipes.