
>>

A silky, no-bake mocha cheesecake with an Oreo crust, whipped cream filling, and glossy coffee-chocolate ganache — perfect for coffee lovers and special occasions.
This mocha cheesecake has been a celebration staple in my kitchen ever since I first combined two of my greatest comforts: rich chocolate and bold coffee. I discovered this combination one rainy afternoon when I was craving a dessert that felt both indulgent and elegant without the fuss of baking. The result was a velvety, no-bake cheesecake that delivers smooth cream cheese richness, a whisper of espresso, and a deep cocoa finish — everyone asked for the recipe the next day.
What makes this version special is the balance of textures: a firm, chocolatey Oreo crust that gives a crisp base, an airy whipped filling that still feels satisfyingly dense, and a shiny mocha ganache that glazes the top for a professional finish. It's a dessert that travels well to parties, keeps beautifully in the refrigerator, and can be dressed up with a dusting of cocoa or chocolate shavings for a holiday table. I love serving it with a small cup of espresso to echo the mocha notes and watching friends and family savor that first cool, coffee-kissed bite.
Personally, I remember the first time I brought this to a family dinner: the plate went around twice, guests debated whether to add a dollop of whipped cream and everyone agreed it paired perfectly with evening coffee. Even my notoriously picky uncle — who normally skips dessert — had two slices and called it "dangerously good."
 Release and prepare ganache:
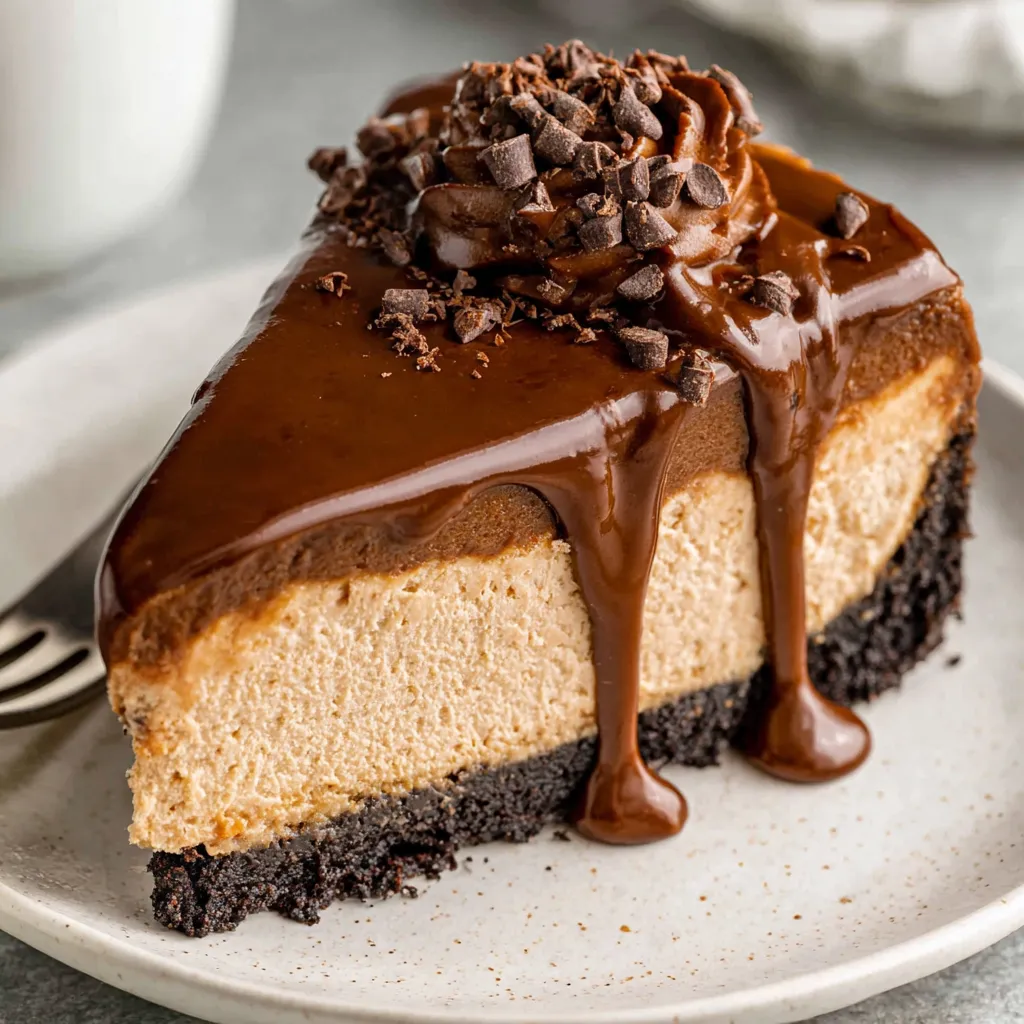
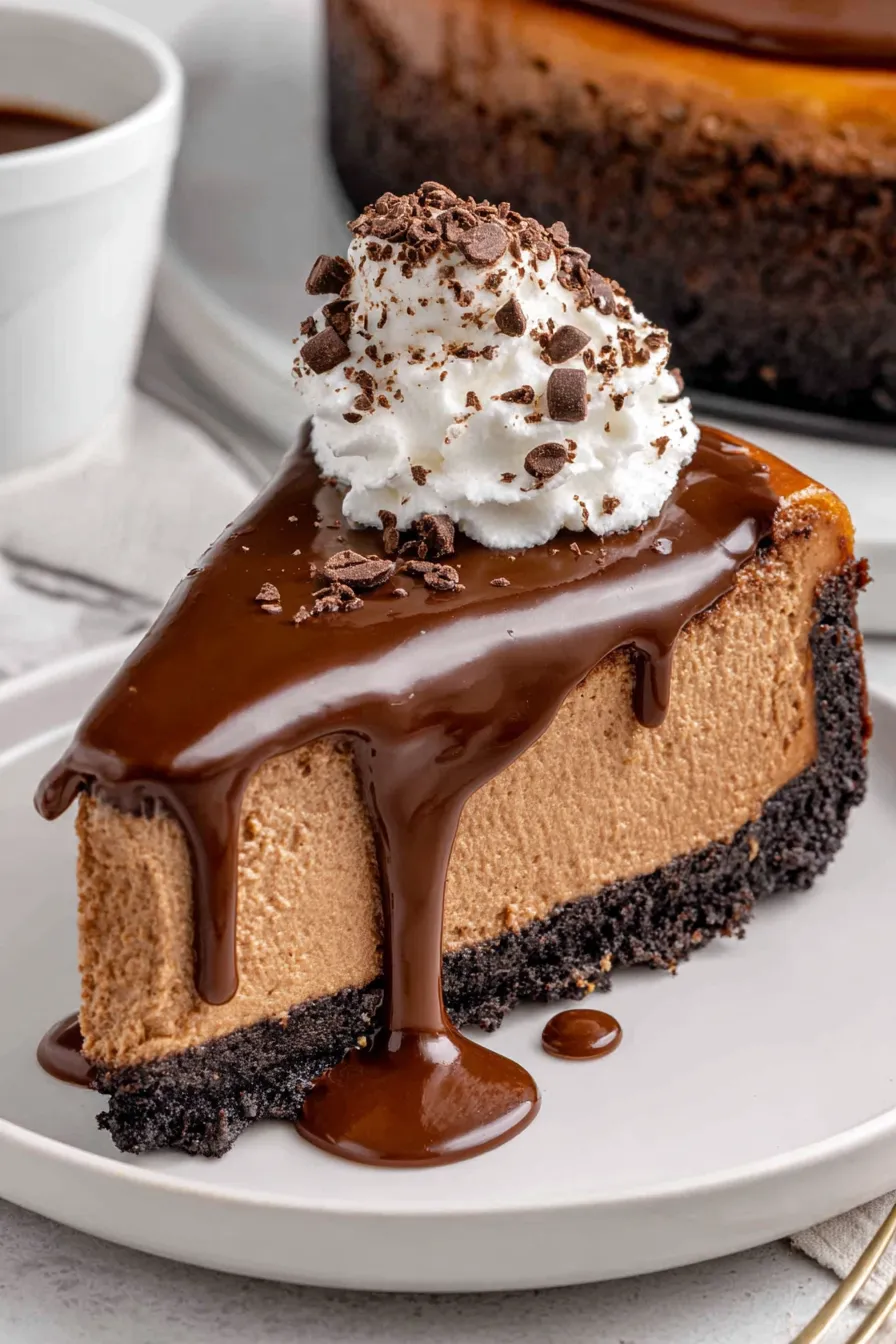
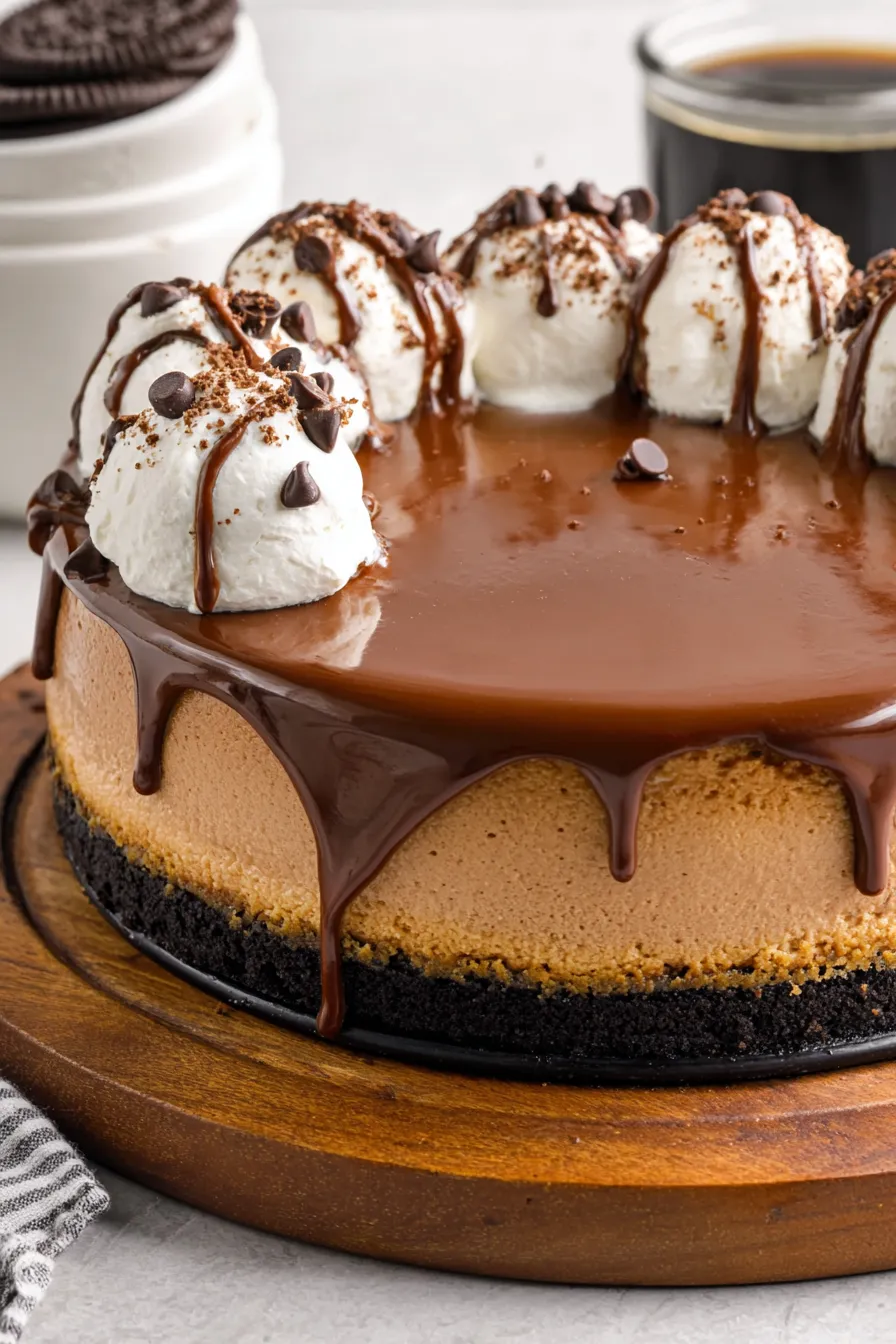
When you are ready to serve, run a thin knife around the edge of the cheesecake and carefully release the springform ring. Place the cheesecake on a serving plate. In a small microwave-safe bowl, stir 1/4 cup heavy whipping cream with 2 teaspoons instant espresso powder and heat until just steaming (about 1 minute). Add 1/2 cup semi-sweet chocolate chips and 1 tablespoon light corn syrup; let sit for 2 minutes, then stir until smooth and glossy. If needed, microwave in 5-second bursts to get the last bits melted.
Finish and serve:
Spoon the warm ganache over the center of the cheesecake and gently spread toward the edges, letting it drip slightly for a bakery-style look. Let the ganache set for about 10 minutes in the fridge before slicing. Use a sharp knife dipped in hot water and wiped dry between cuts to get clean slices. Serve chilled and store leftovers as instructed below.
Release and prepare ganache:
When you are ready to serve, run a thin knife around the edge of the cheesecake and carefully release the springform ring. Place the cheesecake on a serving plate. In a small microwave-safe bowl, stir 1/4 cup heavy whipping cream with 2 teaspoons instant espresso powder and heat until just steaming (about 1 minute). Add 1/2 cup semi-sweet chocolate chips and 1 tablespoon light corn syrup; let sit for 2 minutes, then stir until smooth and glossy. If needed, microwave in 5-second bursts to get the last bits melted.
Finish and serve:
Spoon the warm ganache over the center of the cheesecake and gently spread toward the edges, letting it drip slightly for a bakery-style look. Let the ganache set for about 10 minutes in the fridge before slicing. Use a sharp knife dipped in hot water and wiped dry between cuts to get clean slices. Serve chilled and store leftovers as instructed below.
What I adore most is how forgiving this preparation is: even when I’ve rushed the whipping or had slightly cooler cream cheese, a gentle fold and a long chill have rescued the texture every time. Family members still joke that the ganache is my "secret polish" that turns a simple dessert into something party-ready.
Wrap the cooled cheesecake tightly in plastic wrap or store in an airtight container in the refrigerator for up to 3 days to maintain moisture and prevent flavor transfer. For freezer storage, wrap the whole cake in plastic wrap followed by foil, or slice and individually wrap portions for quick thawing. Frozen cheesecake keeps well for up to 2 months — thaw overnight in the refrigerator. When reheating small slices to soften slightly, use a 10-15 second low-power microwave burst or let sit at room temperature for 10 minutes; avoid extended heating to preserve structure.
For a gluten-free version, substitute gluten-free chocolate sandwich cookies or wafer cookies for the crust; the filling and ganache remain naturally gluten-free. To reduce sugar, try a powdered sugar substitute designed for baking, but be mindful it can change texture and sweetness perception. If you don’t have instant espresso powder, double the amount of instant coffee powder or stir in 1 shot (about 1 ounce) of strong brewed espresso — reduce the heavy cream in the ganache slightly if you add brewed liquid. For a dairy-free attempt, use stabilized dairy-free cream cheese and coconut whipping cream; the texture will be slightly different and may need additional stabilizer.
Serve slices with a small cup of espresso or a dollop of lightly sweetened whipped cream. Garnish with chocolate shavings, a light dusting of cocoa, or a sprinkle of finely ground espresso for a café-style finish. Pair with fresh raspberries or a tart berry compote to cut the richness for special occasions. This dessert is lovely for birthdays, dinner parties, and holiday tables — it feels indulgent without being fussy.
While classic cheesecake has deep roots in many culinary traditions, the pairing of chocolate and coffee is a modern twist inspired by café culture and mocha desserts. The Oreo crust is an American innovation that modernized torte-style bases into quick, no-bake foundations, making this a contemporary dessert that marries European creaminess with distinctly American convenience and flavor profiles.
In winter, add a pinch of cinnamon or orange zest to the filling for a warm, festive twist; in summer, lighten the dessert with a fruit compote and use espresso powder more sparingly to keep it bright. For holiday presentations, pipe dollops of espresso-scented whipped cream and top with candied coffee beans or chocolate-dipped biscotti for an elegant platter.
Make the crust and filling a day ahead and keep them chilled; assemble and pour ganache the day you plan to serve for the freshest shine. Slice and portion individual servings into airtight containers for grab-and-go treats; this approach is great for potlucks or gifting. Use a shallow airtight container to prevent the ganache from sticking to anything and to protect the cake from absorbing strong fridge odors.
Whether you’re making this for a special dinner or preparing it as a make-ahead treat, this mocha cheesecake rewards patience with a beautiful texture and deep, layered flavor. Enjoy crafting it, and don’t be surprised when it becomes a requested classic in your own circle.
Chill the mixing bowl and beaters before whipping the cream to achieve higher volume and a firmer whipped cream.
Use room-temperature cream cheese and beat it thoroughly to prevent lumps before folding in the whipped cream.
Press the crust firmly with the flat bottom of a measuring cup to compact crumbs and ensure clean slices.
For clean cheesecake slices, dip the knife in hot water and wipe it dry between cuts.
This nourishing mocha cheesecake recipe is sure to be a staple in your kitchen. Enjoy every moist, high protein slice — it is perfect for breakfast or as a wholesome snack any time.
Yes. Use gluten-free chocolate sandwich cookies for the crust and verify that all other ingredients are labeled gluten-free.
If you don't have instant espresso powder, double the amount of instant coffee powder or use 1 ounce of strong brewed espresso and slightly reduce the ganache cream.
This Mocha Cheesecake recipe makes perfectly juicy, tender, and flavorful steak every time! Serve with potatoes and a side salad for an unforgettable dinner in under 30 minutes.
Lightly grease a 9-inch springform pan with butter or shortening and set aside on a baking sheet for stability.
Process 22 Oreos in a food processor until fine crumbs form. While processing, drizzle in 5 tablespoons melted butter until crumbs clump. Press into bottom and slightly up the sides of the pan and freeze for at least 20 minutes.
Chill the mixer bowl and beaters if possible. Pour 1 1/2 cups cold heavy cream and whip to stiff peaks. Set aside in the refrigerator.
Beat 24 ounces softened cream cheese with 1/3 cup cocoa powder and 1 tablespoon instant espresso until smooth. Add 1 cup powdered sugar and 1 teaspoon vanilla and beat until silky.
Fold the whipped cream into the cream cheese mixture in three additions to maintain airiness, stopping when streak-free.
Spread the filling over the chilled crust, smooth the top, cover, and refrigerate for at least 6 hours or overnight for best results.
Run a thin knife around the pan and release the springform ring. Heat 1/4 cup cream with 2 teaspoons espresso until steaming, add 1/2 cup chocolate chips and 1 tablespoon corn syrup; rest 2 minutes then stir until smooth.
Pour ganache over the top, smooth, chill 10 minutes, then slice with a hot, wiped knife and serve chilled.
Last Step: Please leave a rating and comment letting us know how you liked this recipe! This helps our business to thrive and continue providing free, high-quality recipes for you.
Leave a comment & rating below or tag
@royalmorsel on social media!

Juicy beef, sweet-charred peppers, and a silky queso drizzle turn these sliders into the ultimate crowd-pleasing bite for game day or weeknight fun.

Melt-in-your-mouth braised short ribs nestled over creamy garlic mashed potatoes, all in a rich, herb-scented sauce that feels like a warm hug.

Golden, garlicky pull-apart loaf swaddled in buttery herbs and stretchy mozzarella that begs to be shared warm from the oven.
Leave a comment & rating below or tag @royalmorsel on social media!
Enjoyed this recipe? Share it with friends and family, and don't forget to leave a review!
This recipe looks amazing! Can't wait to try it.
Comments are stored locally in your browser. Server comments are displayed alongside your local comments.

Join to receive our email series which contains a round-up of some of our quick and easy family favorite recipes.
