
>>

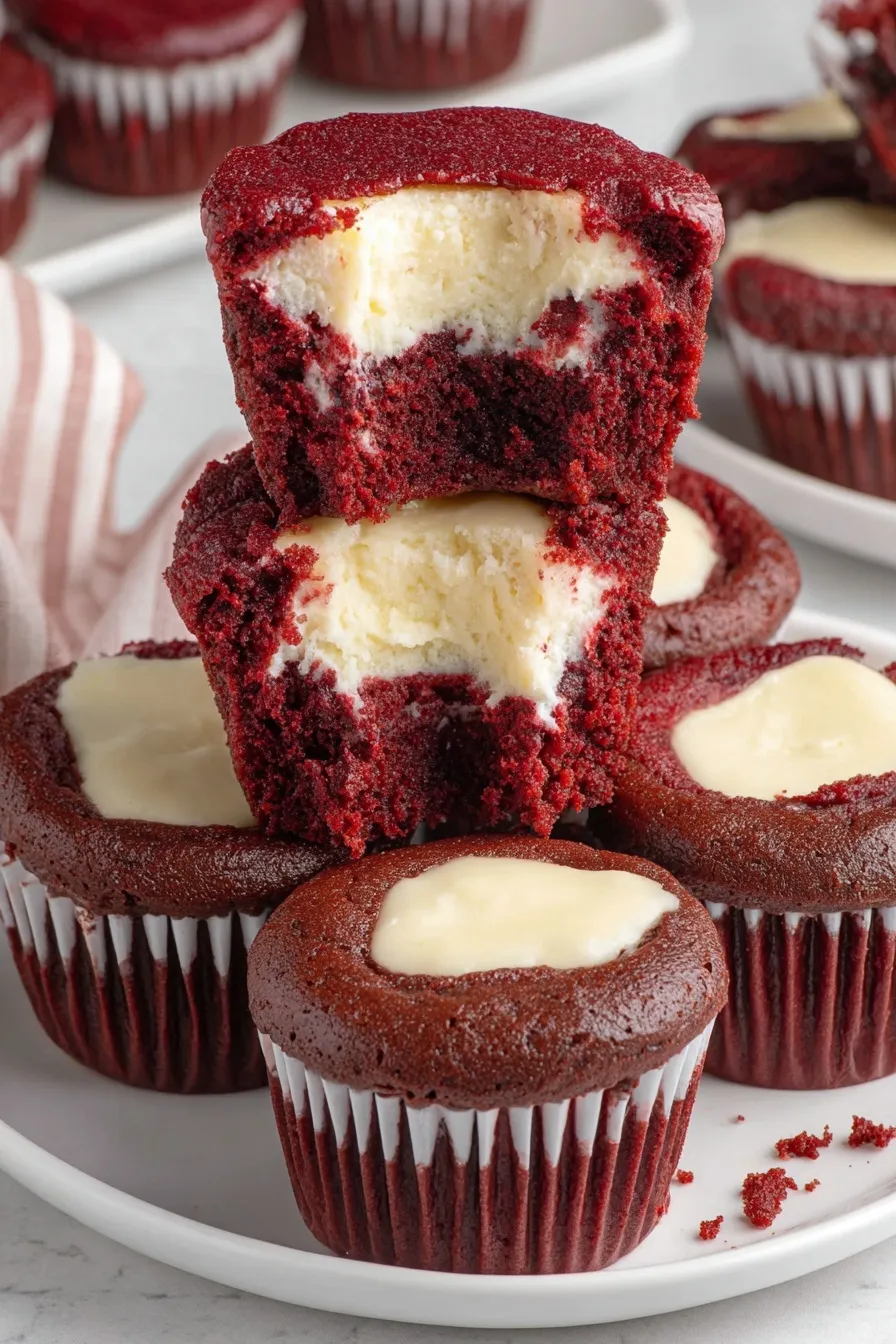
Tiny, velvety red cake cups filled with creamy cheesecake — perfect for parties, holidays, and bite-sized indulgence.
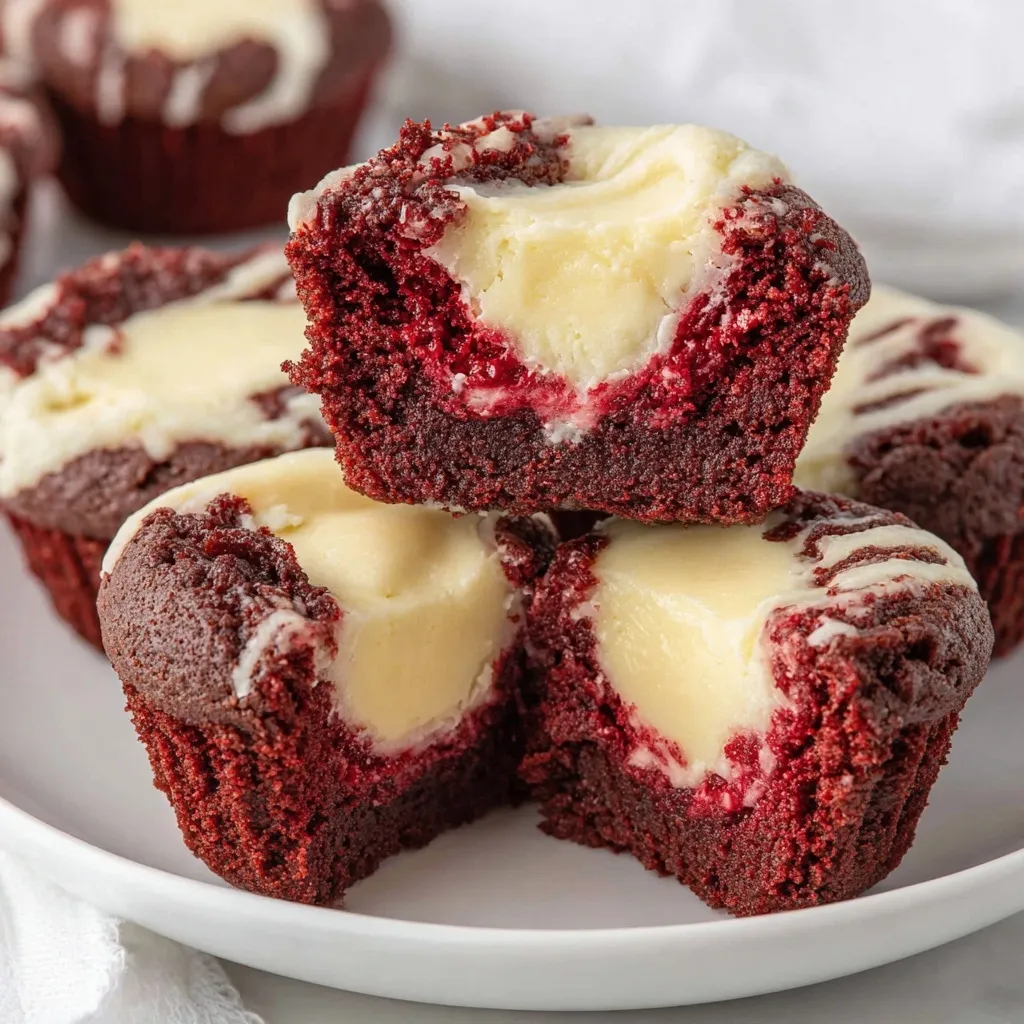
This recipe for Mini Red Velvet Cheesecake Bites is one of those small pleasures that never fails to bring people together. I developed it during a holiday cookie swap when I wanted something that felt festive but wasn’t a full cake — easy to pick up, pretty on a platter, and indulgent in every bite. The red velvet base provides tender, cocoa-bright pockets that cradle a tangy, velvety cheesecake center. It’s the contrast of moist crumb and creamy filling that makes each bite memorable.
I first tested these on a chilly December evening, swapping out big pans for a mini muffin tin because I wanted more sharing-friendly portions. The first batch disappeared by the end of the night. Since then they’ve become my go-to for potlucks and small celebrations: quick to mix, forgiving in technique, and endlessly adaptable. The texture is delicate — the cake is soft and slightly crumbly while the filling is smooth and just set, creating a delightful bite-size dessert that feels both elegant and homey.
When I serve these at gatherings, guests often ask for the recipe — they’re small enough to try more than one and pretty enough to prompt compliments. I especially love how fast the batter comes together and how forgiving the method is: overmixing is the only common misstep, and keeping an eye on bake time ensures tender centers every time.
My favorite aspect is how approachable the technique is: no water baths or complicated chilling steps, just careful mixing and precise baking time. Family and friends always comment on the elegant look despite the simple method, and I’ve brought these to brunches, showers, and cookie exchanges with consistently enthusiastic feedback.
Store finished bites in an airtight container in the refrigerator for up to 3 days. Layer them with parchment between tiers to prevent sticking. To freeze, flash-freeze on a tray until solid (about 1 hour), then transfer to a freezer-safe bag or container for up to 3 months. Thaw overnight in the refrigerator before serving. For reheating, allow to come to room temperature or warm briefly in a 300°F oven for 5–7 minutes to refresh the texture without melting the filling.
If you need dairy-free options, use a high-quality dairy-free cream cheese and vegan butter substitute; texture will be slightly different and the centers may be less tangy. For gluten-free, replace all-purpose flour with a 1:1 gluten-free baking blend and allow the batter to rest 10 minutes to hydrate. If you want a milder color, reduce the red gel to 2 teaspoons — use more if you want vivid holiday red. Swap salted butter for unsalted and add 1/4 teaspoon fine salt if preferred.
Serve these on a tiered platter for parties or alongside coffee and tea for brunch. Garnish with a small dusting of cocoa, a sprinkle of powdered sugar, or a tiny dollop of whipped cream and a fresh raspberry for contrast. They pair well with sparkling wine, rich coffee, or a robust black tea. For a festive touch, top with white chocolate shavings or a single red sprinkles dot.
Red velvet is an American favorite with roots tied to cocoa chemistry and Victorian-era desserts. The signature color became popular in the United States during the 20th century and was further popularized by famous hotels and bakeries. Combining red velvet with a cheesecake center takes inspiration from the classic red velvet cake and the global love of cream cheese-based fillings, creating a hybrid that honors both traditions in bite-sized form.
In winter, emphasize deep red hue and garnish with sugared cranberries or a sprinkle of cinnamon. In spring, lighten the flavor with citrus-zest in the filling (a teaspoon of orange zest) and top with edible flowers. For summer gatherings, serve chilled with a bright berry compote on the side. If making for Valentine’s Day, increase the red color slightly and present on heart-shaped doilies for a romantic touch.
Make the base and filling up to a day ahead: store the cooled base batter in the fridge (stir gently before piping) and keep the cheesecake filling chilled in a piping bag. Assemble and bake on the day you’ll serve for best texture. If you need to transport, pack chilled in a cooler to maintain shape. Use silicone mini liners for easy removal when transporting or storing the bites.
These mini red velvet cheesecake bites have become a personal favorite because they are small treats that capture the best parts of both cake and cheesecake. They’re fast enough for last-minute gatherings, pretty enough for special occasions, and comforting enough to become a repeated request at family events. I hope you make them your own and enjoy sharing them as much as I do.
Bring eggs and cream cheese to room temperature before mixing to avoid lumps and ensure smooth batter.
Use gel food coloring for a vivid red without changing batter consistency.
Bake only until the cheesecake center is slightly jiggly—carryover will finish the set while cooling.
This nourishing mini red velvet cheesecake bites recipe is sure to be a staple in your kitchen. Enjoy every moist, high protein slice — it is perfect for breakfast or as a wholesome snack any time.
This Mini Red Velvet Cheesecake Bites recipe makes perfectly juicy, tender, and flavorful steak every time! Serve with potatoes and a side salad for an unforgettable dinner in under 30 minutes.
Preheat oven to 350°F and spray a mini muffin pan with nonstick spray or grease with butter. Proper greasing ensures clean removal of each bite.
Whisk together 1 cup flour and both measures of cocoa powder in a small bowl to remove lumps and blend color evenly.
Whisk melted cooled butter, 1 1/4 cups sugar, red gel color, vanilla, and beaten eggs until glossy to create the red velvet batter base.
Fold the dry ingredients into the wet just until combined; avoid overmixing to keep the crumb tender.
Beat softened cream cheese for 1 minute, add 1/4 cup sugar and 1 teaspoon vanilla and beat 1–1 1/2 minutes. Mix in egg yolk until no streaks remain.
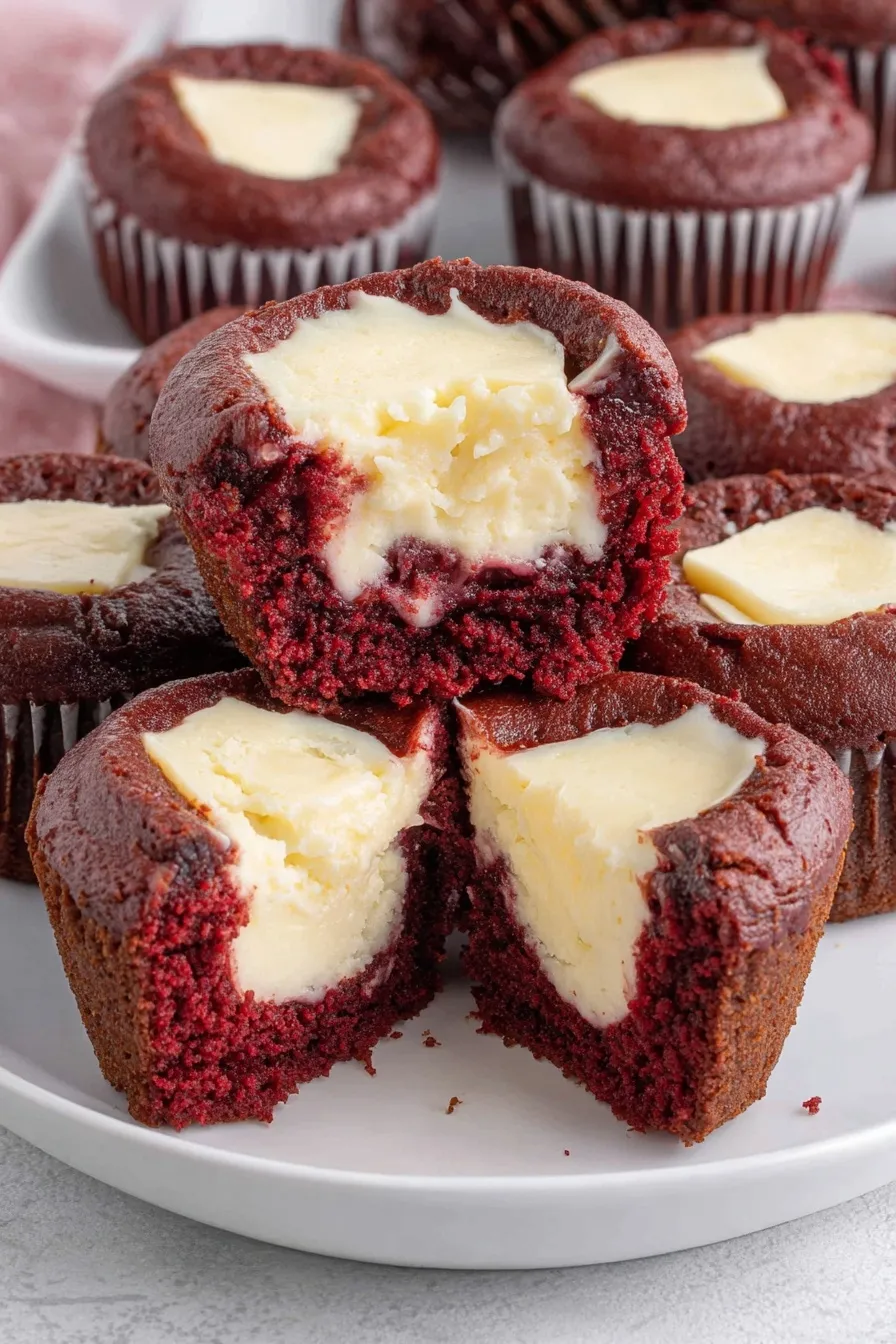
Spoon 1 tablespoon of red velvet batter into each cup, pipe 2 teaspoons of cheesecake filling into center, then bake 8–9 minutes at 350°F until centers are slightly jiggly.
Cool in the pan 20–30 minutes, transfer to a wire rack to cool completely, then refrigerate or serve at room temperature.
Last Step: Please leave a rating and comment letting us know how you liked this recipe! This helps our business to thrive and continue providing free, high-quality recipes for you.
Leave a comment & rating below or tag
@royalmorsel on social media!

Juicy beef, sweet-charred peppers, and a silky queso drizzle turn these sliders into the ultimate crowd-pleasing bite for game day or weeknight fun.

Melt-in-your-mouth braised short ribs nestled over creamy garlic mashed potatoes, all in a rich, herb-scented sauce that feels like a warm hug.

Golden, garlicky pull-apart loaf swaddled in buttery herbs and stretchy mozzarella that begs to be shared warm from the oven.
Leave a comment & rating below or tag @royalmorsel on social media!
Enjoyed this recipe? Share it with friends and family, and don't forget to leave a review!
This recipe looks amazing! Can't wait to try it.
Comments are stored locally in your browser. Server comments are displayed alongside your local comments.

Join to receive our email series which contains a round-up of some of our quick and easy family favorite recipes.
