
>>

Decadent no-bake mini cheesecakes with a Reese's peanut butter cup base and a light, fluffy peanut butter filling — perfect for parties and make-ahead treats.
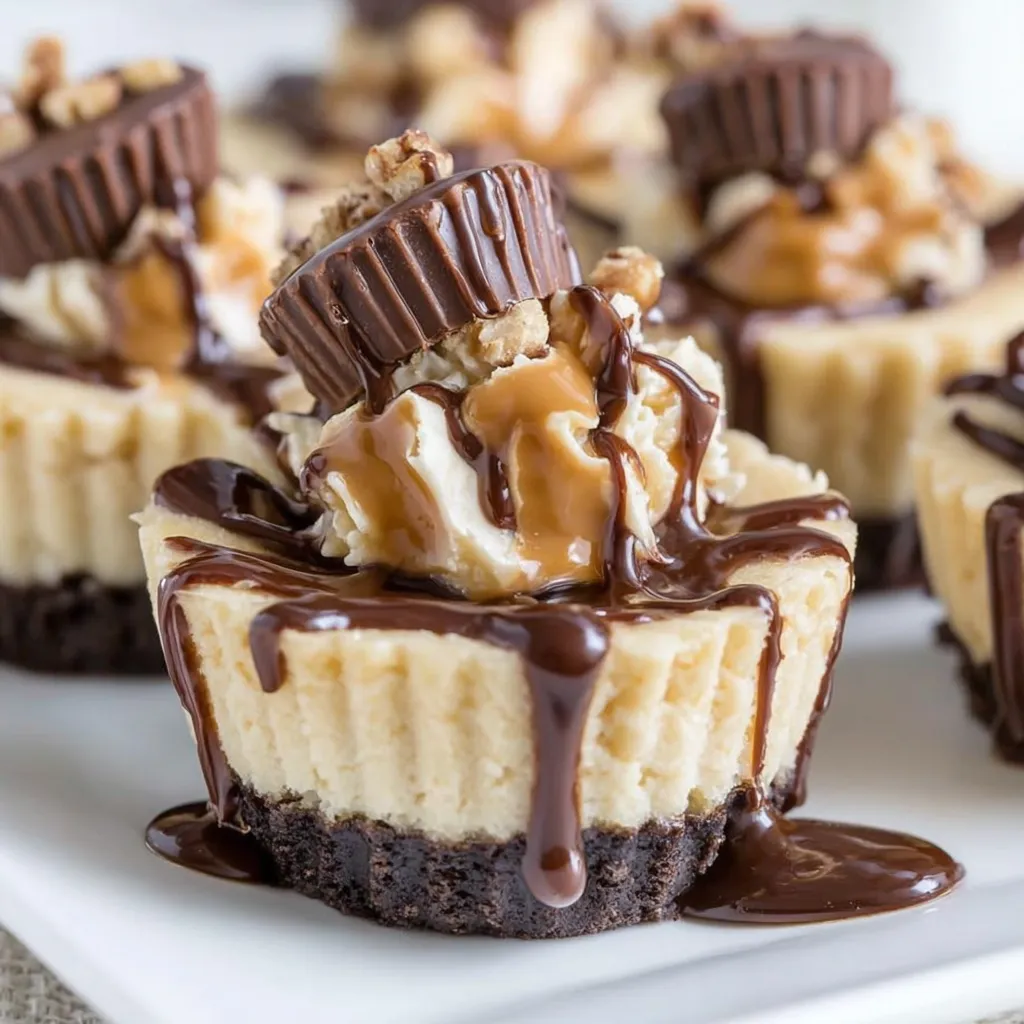
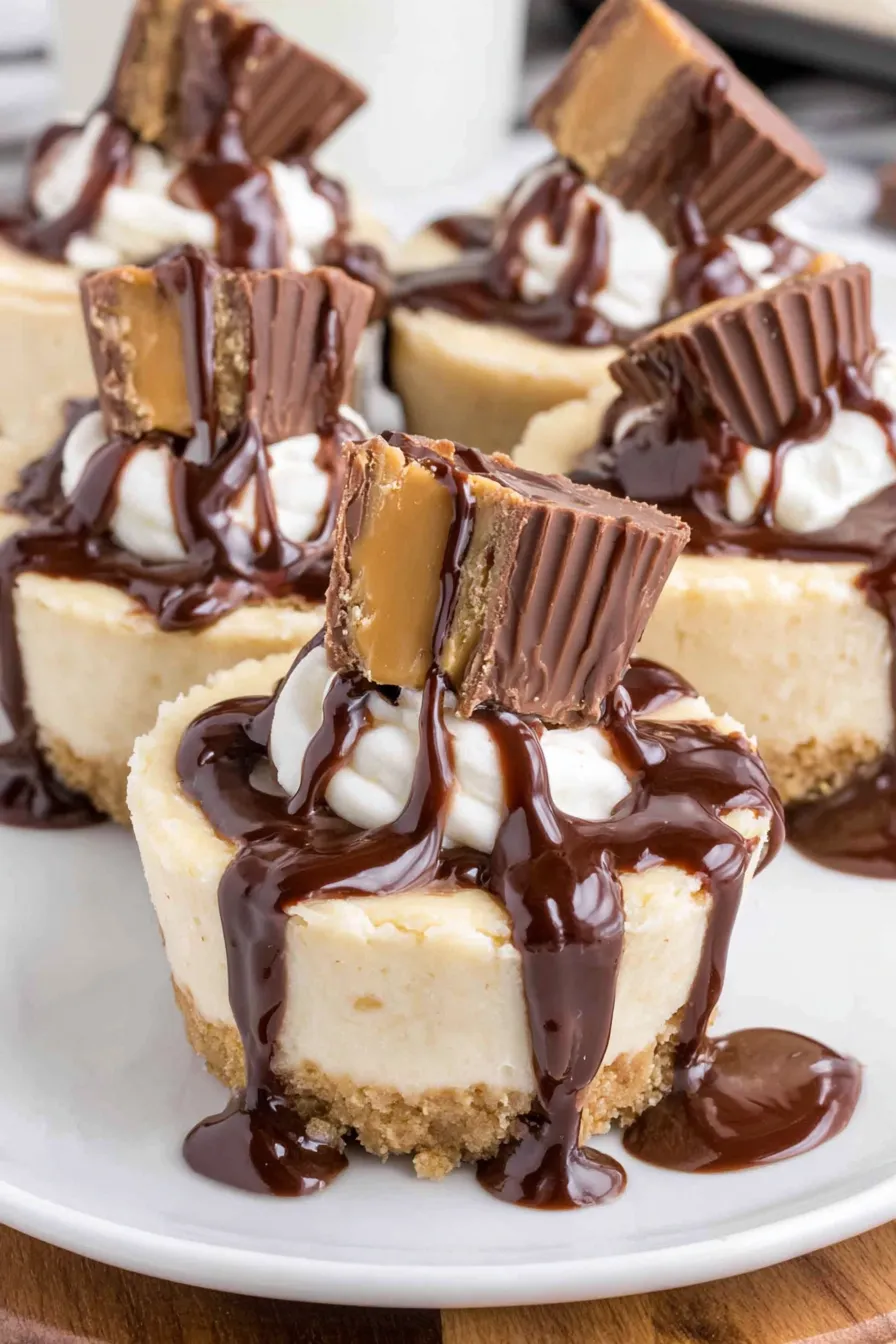
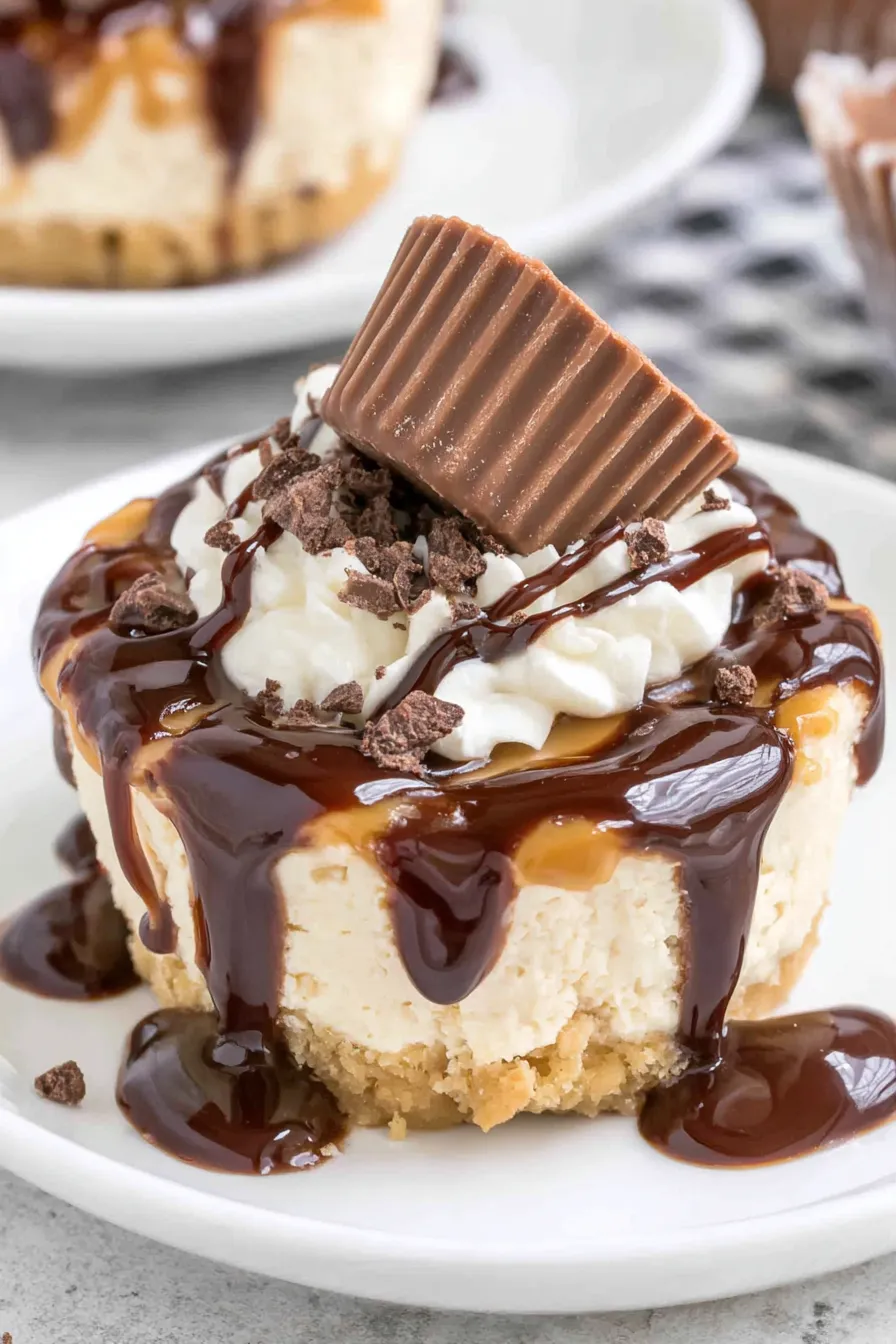
This recipe for mini peanut butter cheesecakes is the kind of dessert my family requests for birthdays, game nights, and any time we want a small, indulgent bite. I first developed this version during a weekend when I had a bag of Reese's cups and a craving for something relatively simple that still felt special. The result is a no-bake treat that balances creamy, tangy cream cheese with rich peanut butter and a hit of chocolate from the peanut butter cups. The texture is smooth and airy, set around a candy base that adds both crunch and nostalgia.
I love how these small desserts transform a handful of pantry staples into something everyone raves about. They come together quickly — most of the work is mixing and piping — and then you let the refrigerator do the rest. Serving them is joyful: guests lift a little paper liner and find a perfectly portioned, decadent bite studded with an exposed mini Reese's cup. This is comfort food with a playful twist and a family favorite I find myself making throughout the year.
When I first served these at a neighborhood potluck, guests lined up to ask for the recipe. My kids call them "little peanut butter pies" and always save the mini cup on top until the last bite — a habit I happily encourage. Over time I've learned small changes that boost flavor and stability, like using room-temperature cream cheese and sifting powdered sugar for a silky result.
My favorite part about these is how easily the look of the dessert elevates any gathering: a simple paper liner and a drizzle of chocolate turns pantry candy into an elegant bite. Watching guests lift the liner and reveal the mini cup on top is always the highlight — it sparks that little moment of recognition and joy that makes homemade treats so rewarding.
Store the mini cheesecakes in a single layer inside an airtight container in the refrigerator for up to 4 days. If stacking is necessary, separate layers with parchment paper to avoid smudging the tops. For longer storage, freeze the individual portions on a sheet tray until firm, then transfer to a freezer-safe container or bag for up to 3 months. Thaw in the refrigerator overnight before serving and add fresh chocolate drizzle after thawing for best presentation. Avoid leaving them at room temperature more than two hours to preserve texture and food safety.
If you need to adapt the recipe, use a natural peanut butter but reduce added sugar slightly and stir well to reincorporate oils. For a lower-fat filling, substitute half the cream cheese with Neufchâtel, though the texture will be slightly less rich. To make a nut-free version, replace peanut butter and Reese's cups with cookie butter and chocolate-covered cookie pieces, but expect different flavor notes. For a dairy-free alternative, use dairy-free cream cheese and coconut cream whipped into the mixture; the flavor shifts toward coconut and will pair best with dark chocolate cups labeled dairy-free.
Present these on a dessert platter lined with parchment and sprinkle a few chopped roasted peanuts or flaky sea salt over the chocolate drizzle for contrast. They pair beautifully with coffee or a cold milk glass for classic comfort, or serve alongside fresh berries for a bright counterpoint. For a party, arrange them on tiers or in cupcake stands to make grabbing easy. Tiny forks or cocktail napkins work well for neat serving at buffet-style events.
Mini cheesecakes like these lean on an American love of bite-sized desserts and the long-standing popularity of peanut butter and chocolate pairings. Reese's peanut butter cups, introduced in the 1920s, helped popularize the chocolate-peanut butter combination in the United States. Adapting classic cheesecake into individual, no-bake portions is a modern convenience that blends nostalgic candy with the creamy richness of cheesecake, creating a portable, party-friendly version of two beloved flavors.
For holiday variations, swap the chocolate drizzle for salted caramel and top with crushed pretzels for a sweet-salty winter twist. In summer, finish with a sprinkle of toasted coconut and use chilled, slightly firmer filling to withstand warmer temperatures. Around Valentine's Day, sandwich a thin layer of raspberry jam between the unwrapped base cup and the filling for a fruity contrast that pairs beautifully with chocolate and peanut butter.
Make the filling one day ahead and keep in an airtight container; simply pipe and top with the mini cups the next day before chilling. If preparing for an event, assemble the day before and allow overnight chilling for the best set. When transporting, keep them upright in a shallow cooler to prevent shifting. For quick portioning, use an ice cream scoop or cookie scoop to deposit filling before smoothing or pressing the mini cup into the center.
These mini peanut butter cheesecakes are small in size but large in charm — easy to share, easy to love, and endlessly adaptable. Try them once, share them often, and make small tweaks to make them uniquely yours.
Always use room-temperature cream cheese to avoid lumps and to whip a smoother filling.
Sift the powdered sugar to prevent grit and ensure a silky texture.
Chill the heavy cream before whipping to help it aerate and lighten the filling.
Pipe the filling to get even, full portions and tidy tops for a professional look.
This nourishing mini peanut butter cheesecakes recipe is sure to be a staple in your kitchen. Enjoy every moist, high protein slice — it is perfect for breakfast or as a wholesome snack any time.
Refrigerate for at least 8 hours or overnight; do not freeze and serve immediately without thawing.
Yes — use a zip-top bag with the corner cut off for piping; a wide round tip yields neater portions.
This Mini Peanut Butter Cheesecakes recipe makes perfectly juicy, tender, and flavorful steak every time! Serve with potatoes and a side salad for an unforgettable dinner in under 30 minutes.
Line a standard 12-cup muffin pan with paper liners and place one standard-sized Reese's peanut butter cup into the bottom of each liner to form the base.
In a large bowl, use a handheld mixer on medium-high speed to beat the softened cream cheese and creamy peanut butter until light and slightly airy, about 2 to 3 minutes.
Sift the powdered sugar into the bowl and beat on low to combine, then increase speed to medium-high until smooth and creamy, about 1 to 2 minutes.
Add vanilla extract and cold heavy cream, then beat on high for 2 minutes until the filling is light, fluffy, and pipeable.
Transfer the filling to a piping bag or zip-top bag, pipe into each liner filling to the top, then press one mini Reese's cup into the center of each portion leaving the top exposed.
Refrigerate the assembled portions for a minimum of 8 hours or overnight so the filling firms completely; garnish with chocolate syrup before serving.
Last Step: Please leave a rating and comment letting us know how you liked this recipe! This helps our business to thrive and continue providing free, high-quality recipes for you.
Leave a comment & rating below or tag
@royalmorsel on social media!

Juicy beef, sweet-charred peppers, and a silky queso drizzle turn these sliders into the ultimate crowd-pleasing bite for game day or weeknight fun.

Melt-in-your-mouth braised short ribs nestled over creamy garlic mashed potatoes, all in a rich, herb-scented sauce that feels like a warm hug.

Golden, garlicky pull-apart loaf swaddled in buttery herbs and stretchy mozzarella that begs to be shared warm from the oven.
Leave a comment & rating below or tag @royalmorsel on social media!
Enjoyed this recipe? Share it with friends and family, and don't forget to leave a review!
This recipe looks amazing! Can't wait to try it.
Comments are stored locally in your browser. Server comments are displayed alongside your local comments.

Join to receive our email series which contains a round-up of some of our quick and easy family favorite recipes.
