
>>

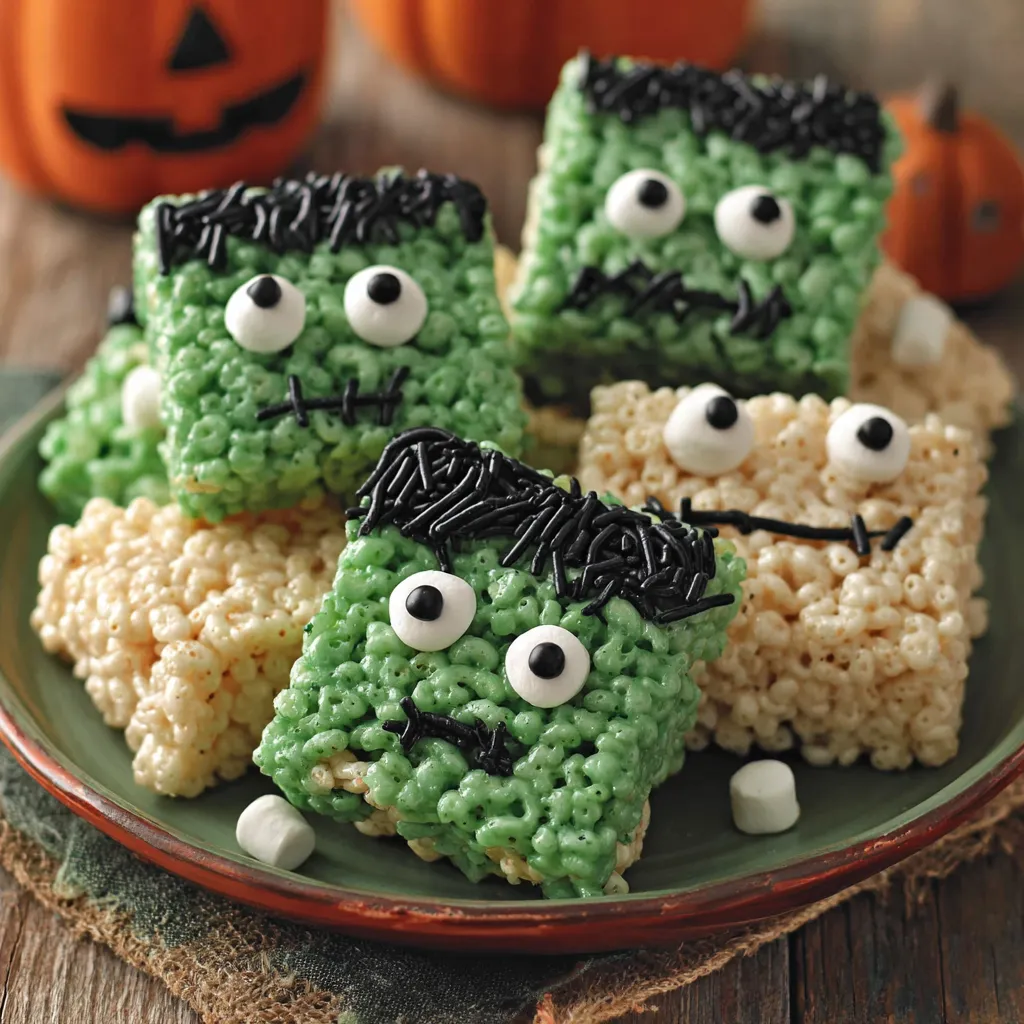
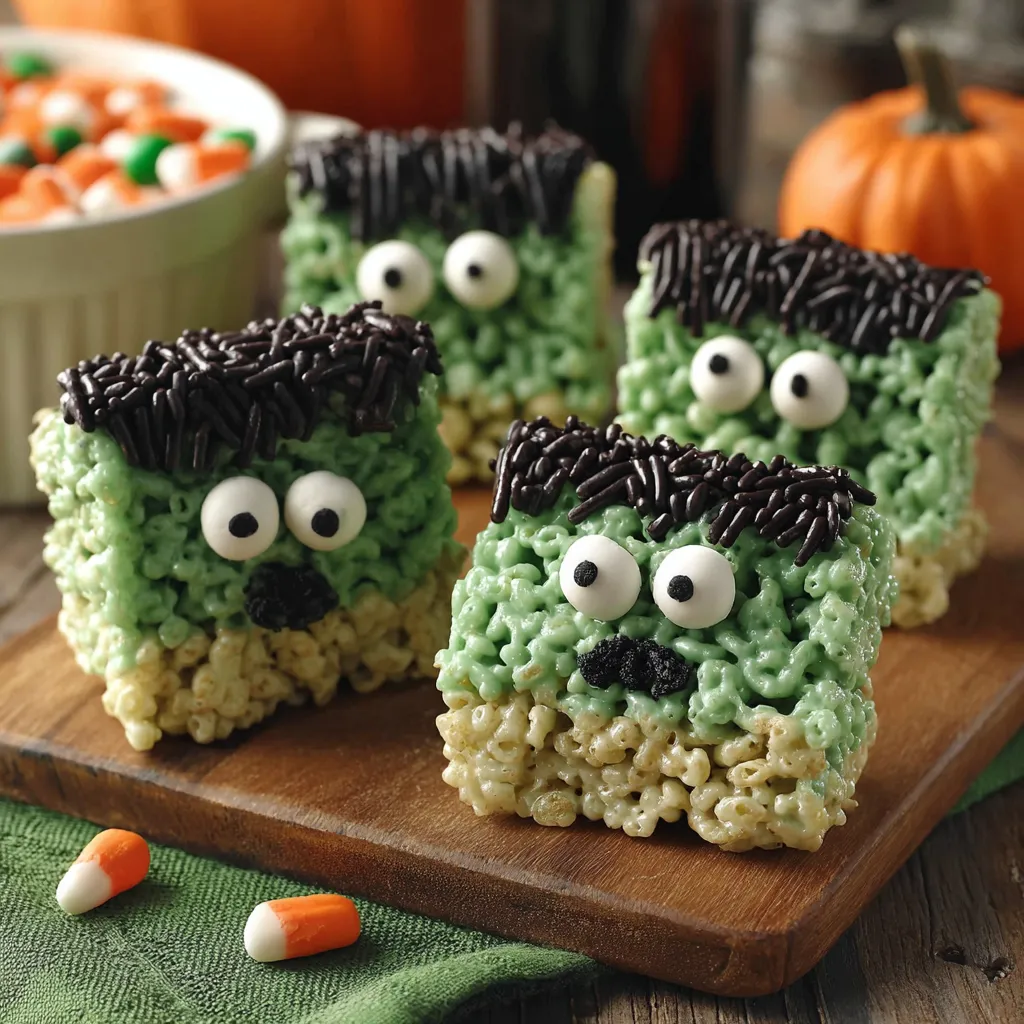
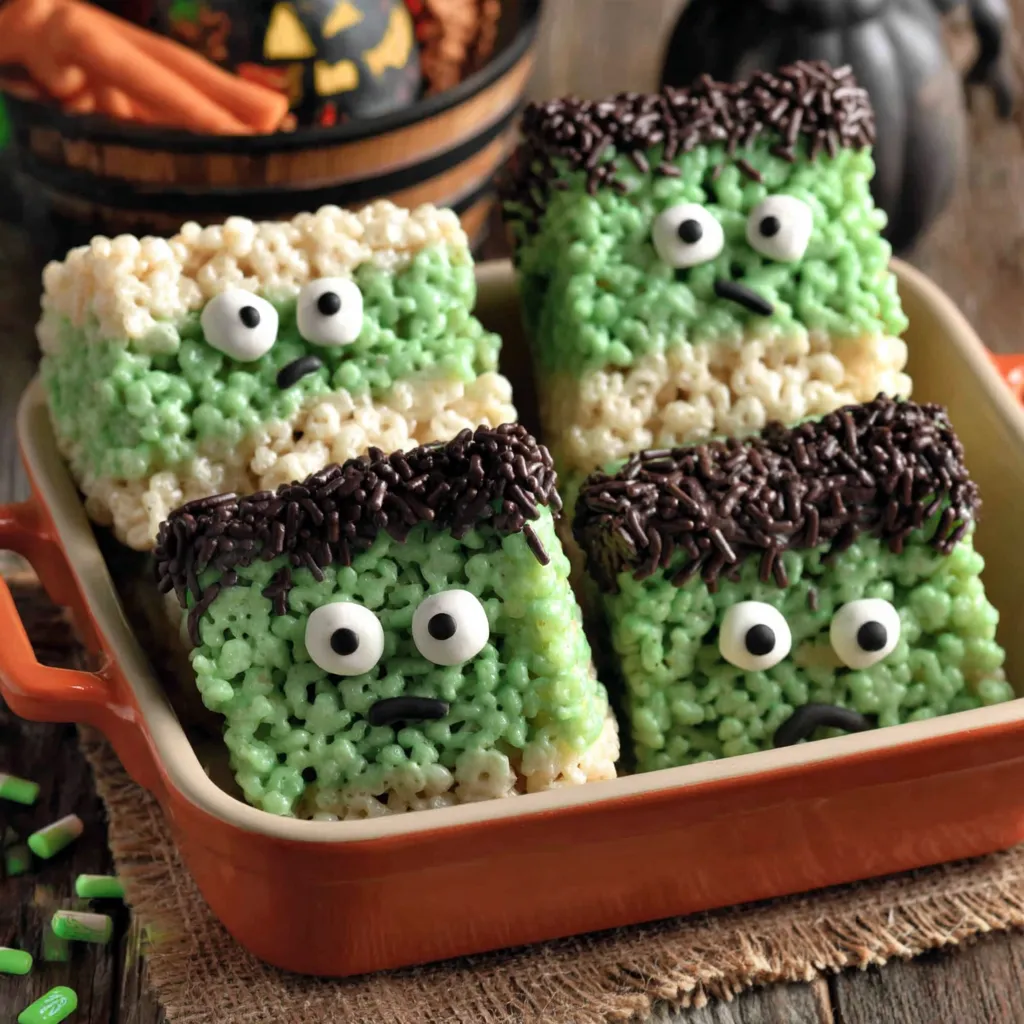
Playful Frankenstein-themed Rice Krispie treats coated in green candy melts, topped with royal icing eyes and stitched with black candy for a spooky, kid-friendly Halloween treat.
This Frankenstein Halloween Rice Krispie treat idea became my go-to party snack the first year my niece asked for a monster-themed birthday in October. I wanted something fast, playful, and sturdy enough for little hands to hold without falling apart. The combination of classic Rice Krispie crispness with a glossy green candy coating and simple piped "stitches" felt whimsical and just the right amount of spooky for a family-friendly celebration. I discovered this method after experimenting with candy melts and found adding a touch of vegetable shortening brings the coating to a perfect, dip-able consistency. The result is crunchy edges, chewy centers, and a bright, festive look that disappears fast from any Halloween table.
What makes these treats special is how little time and equipment they require—just a pot for melting, a dish to set them in, and a microwave-safe bowl for the melting candy. I like making the Rice Krispie layer the day before to let it set fully; then dipping and decorating becomes a relaxed, creative session with kids joining in for the final touches. Texture-wise, you retain the nostalgic chew of marshmallow-coated cereal while getting a smooth, slightly crisp candy shell on top. Memory-wise, these have become part of our October rituals: the green shine, the funny eyes, and the inevitable giggles when someone insists on creating a Frankenstein family with different sized bolts.
When I bring these to gatherings, they vanish quickly. One Halloween my sister stacked a tray of them by the front door and kids grabbed them as they came in—parents loved that they were individually sized and not overly sugary. The simplicity of the recipe means you can double or triple the batch without extra fuss.
My favorite thing about these is how customizable they are: swap green for purple for a witch theme or use different sprinkles to make mummies or monsters. At a recent bake sale, kids loved creating their own "frankie faces" and parents appreciated the individually decorated pieces that didn’t require plates or forks.
Store these in a single layer in an airtight container at room temperature for best texture—avoid stacking if the candy coating is still soft. For longer storage, individually wrap each treat in plastic wrap, then place them in a freezer-safe bag and freeze up to one month. To re-crisp after thawing, let them come to room temperature inside the wrapping to prevent moisture from condensing on the surface. Refrigeration is not recommended for extended time because it can make the cereal base chewy and the candy coating cloudy.
You can swap unsalted butter for 4 tablespoons of coconut oil or dairy-free margarine for a dairy-free version; add a touch more shortening if coating consistency needs adjustment. Vegetarian or vegan eaters can use gelatin-free marshmallows and vegan candy melts where available. If you don't have candy melts, tempered chocolate colored with oil-based food coloring works, though tempering requires more technique and yields a different sheen and snap.
Serve on a platter lined with wax paper or in individual clear cello bags tied with orange and black ribbon. Pair with hot chocolate or apple cider for a cozy Halloween spread. Garnish with edible glitter or metallic sprinkles for a party vibe. These are perfect for classroom parties, Halloween movie nights, or as lunchbox surprises during October.
Rice Krispie treats are a quintessential American no-bake dessert with roots in mid-20th-century convenience baking. Decorating them for holidays is a modern twist—adaptations like these Frankenstein faces blend nostalgic textures with playful decoration traditions, aligning with Halloween's long history of dressing food in costumes to delight children and celebrate the spooky season.
For other holidays, switch candy melt colors: pastel coatings and cute eyes for Easter bunnies, orange and black for classic Halloween, or red and green for Christmas elves. In colder months, consider adding a pinch of cinnamon into the marshmallow mix for a warm note, or fold in mini chocolate chips for extra indulgence.
Make the rice cereal base a day ahead and keep it wrapped tightly; the next day, melt candy melts and dip just before serving to maintain maximum sheen. If decorating in batches, set up an assembly line with dipping, sprinkling, and eye-placement stations to keep the process efficient—assign a station for piping stitches to a single person for consistent lettering and decoration.
These Frankenstein treats are a joyful, approachable way to bring personality to a party without needing pastry skills. Gather your family, put on a spooky playlist, and enjoy the creative process—there’s always room for one more silly face on the tray.
Press the Rice Krispie mixture firmly into the pan using buttered parchment to avoid compacting too much—this keeps treats light and chewy.
If candy melts thicken, add 1 teaspoon of vegetable shortening and stir until smooth for easier dipping.
Use a sharp, slightly warmed knife to cut treats cleanly—run under hot water, dry, and slice to reduce crumbling.
Allow candy coating to set at room temperature for the best shine; refrigerate only briefly if rushed to avoid condensation.
This nourishing frankenstein halloween rice krispie treats recipe is sure to be a staple in your kitchen. Enjoy every moist, high protein slice — it is perfect for breakfast or as a wholesome snack any time.
This Frankenstein Halloween Rice Krispie Treats recipe makes perfectly juicy, tender, and flavorful steak every time! Serve with potatoes and a side salad for an unforgettable dinner in under 30 minutes.
Butter a 9 x 13 inch casserole dish or line with parchment paper for easy removal.
In a large pot over low-medium heat, melt 4 tablespoons unsalted butter. Add the mini marshmallows and stir constantly until smooth and glossy to avoid scorching.
Remove from heat and pour in 6 cups Rice Krispie cereal. Fold with a spatula until all cereal is evenly coated with the marshmallow mixture.
Spoon mixture into the prepared dish and press flat using buttered parchment or a spatula. Let set for 30 minutes at room temperature.
Lift the set block from the dish and cut into various sized rectangles with a sharp knife for playful 'heads.'
In a double boiler, melt 10 oz green candy melts. If too thick for dipping, add 1 teaspoon vegetable shortening and stir until smooth.
Dip the top of each treat into the green coating, then into black jimmies sprinkles. Place royal icing eyes while coating is tacky.
Melt 3 oz black candy melts in 10–15 second intervals, transfer to a piping bag and pipe stitches. Allow to set completely before packaging.
Last Step: Please leave a rating and comment letting us know how you liked this recipe! This helps our business to thrive and continue providing free, high-quality recipes for you.
Leave a comment & rating below or tag
@royalmorsel on social media!

Juicy beef, sweet-charred peppers, and a silky queso drizzle turn these sliders into the ultimate crowd-pleasing bite for game day or weeknight fun.

Melt-in-your-mouth braised short ribs nestled over creamy garlic mashed potatoes, all in a rich, herb-scented sauce that feels like a warm hug.

Golden, garlicky pull-apart loaf swaddled in buttery herbs and stretchy mozzarella that begs to be shared warm from the oven.
Leave a comment & rating below or tag @royalmorsel on social media!
Enjoyed this recipe? Share it with friends and family, and don't forget to leave a review!
This recipe looks amazing! Can't wait to try it.
Comments are stored locally in your browser. Server comments are displayed alongside your local comments.

Join to receive our email series which contains a round-up of some of our quick and easy family favorite recipes.
