
>>

A rich, old-fashioned fudge studded with walnuts, melted chocolate, and marshmallow creme—an easy, crowd-pleasing treat perfect for holidays and gift boxes.
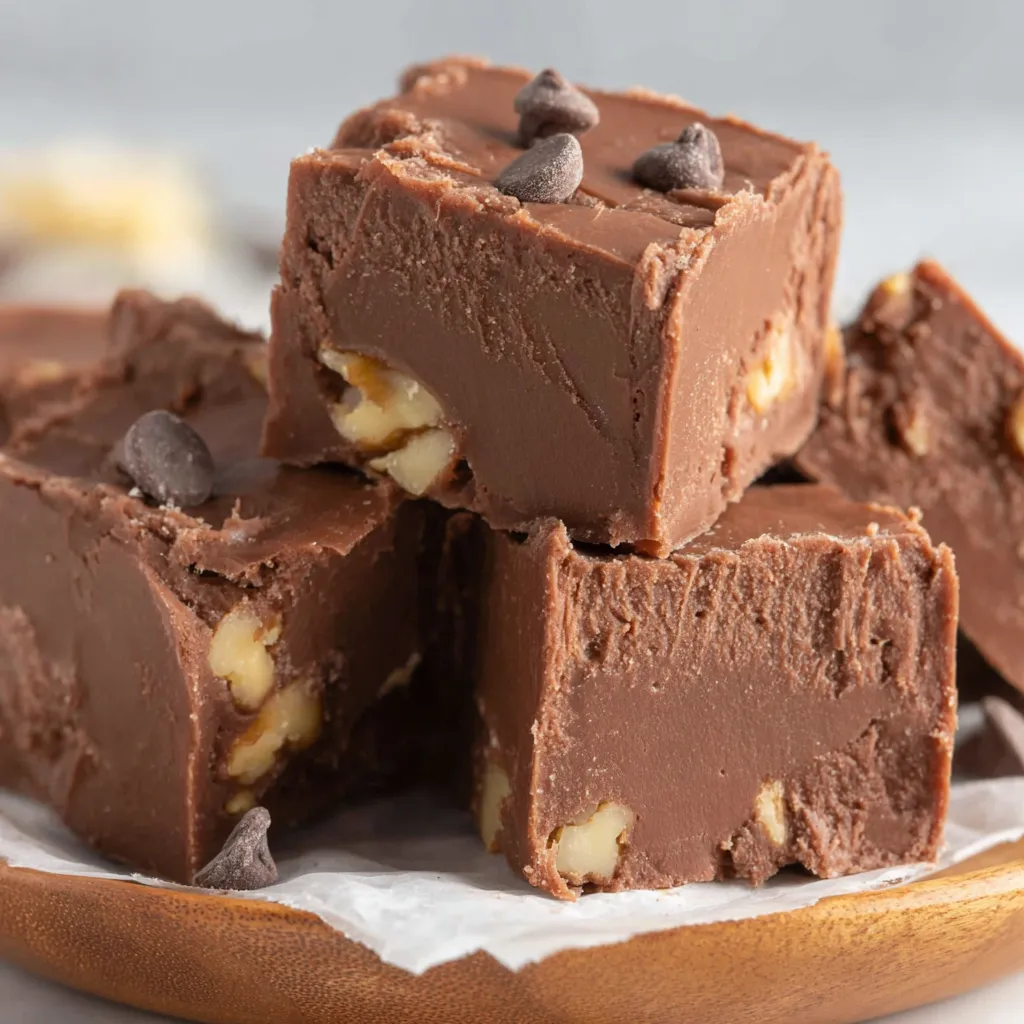
This Fantasy Fudge is the kind of confection that immediately transports me back to holiday kitchens: warm, fragrant, sticky-sweet, and impossible to resist. I first made this version during a December when I was determined to simplify holiday cookie trays by including one melt-in-your-mouth candy that even my picky relatives would accept. The combination of a firm, glossy sugar base with melted semi-sweet chocolate and marshmallow creme creates a silky texture that holds together well when sliced, while the toasted walnuts add a satisfying crunch. Every year since, this batch has been requested for parties, charitable bake sales, and as a small homemade gift tucked into a festive tin.
What makes this particular variation special is the marshmallow creme folded in at the end. It lightens the texture, keeps the fudge from becoming grainy, and gives the surface the faint sheen that people assume comes from professional chocolatiers. I use BlueBonnet margarine for its consistent melting behavior, Nestle Toll House semi-sweet chips because they melt smoothly without seizing, and Jet-Puff marshmallow creme for that classic fluffiness. The result is reliably luscious: chocolatey, slightly chewy, and nutty with every bite.
In my experience, friends comment on how professional the fudge looks when sliced cleanly, and family members always go back for seconds. I discovered a small trick while making it once for a bake sale: allowing the fudge to cool just slightly before smoothing with an offset spatula gave the edges a cleaner finish and reduced crumbs while slicing.
My favorite aspect of this confection is how reliably it delivers nostalgia. At potlucks it always disappears first, and friends often ask whether I used a special technique. The truth is simple attention to timing, a good pan, and quality chocolate make all the difference. I once brought a tray to a family reunion and watched three generations debate who remembered the original recipe—nothing warms a kitchen or starts a conversation like a tray of homemade sweets.
To maintain texture and flavor, store the confection in a single layer or with parchment between layers in an airtight container at room temperature for up to two weeks. If your kitchen is humid or warm, refrigerate in an airtight container to prevent stickiness; bring pieces to room temperature for 20–30 minutes before serving for the best chew. For long-term storage, freeze individual pieces on a baking sheet until solid, then transfer to a freezer-safe container with parchment between layers. Thaw overnight in the refrigerator and then sit at room temperature before presenting to restore the creamy mouthfeel.
If you prefer a different fat, you can substitute unsalted butter for margarine at a 1:1 ratio; note that butter will impart a richer dairy note and may slightly darken the color. For a darker, less sweet finish, replace semi-sweet chips with bittersweet or dark chocolate chips. If you need a nut-free version, omit the walnuts and add 1 cup of toasted sunflower seeds or crisped rice for texture. To make this with milk alternatives is challenging because evaporated milk contributes to structure; you can experiment with a concentrated canned coconut milk, but expect a coconut flavor and slightly different texture.
Serve chilled or at room temperature on a decorative tray lined with doilies for holidays. These small squares pair wonderfully with strong coffee or a robust black tea to cut the sweetness. For a festive presentation, drizzle a little melted white chocolate over the top before it sets, or press a few extra walnut pieces into the top for a rustic finish. Pack into small cellophane bags for gifts, tied with a ribbon and a homemade label detailing ingredients and date made.
This style of confection hails from mid-20th-century American home baking, when home cooks relied on pantry staples and canned goods to create indulgent sweets. Marshmallow creme became popular in the United States in the early 1900s and was adapted into many candy and frosting applications. Combining chocolate and marshmallow in a boiled sugar base reflects a blending of candy-making techniques with home dessert sensibilities that made such treats a holiday staple across many households.
Adapt this sweet for different seasons by changing nuts and flavorings: swap walnuts for pecans and add a pinch of cinnamon for autumn, or fold in dried cranberries and a little orange zest for a winter holiday twist. For spring and summer, omit nuts entirely and stir in 1 cup of toasted coconut flakes for a lighter, tropical profile. You can also dye a portion of the top layer with gel food coloring and marbelize for themed occasions.
Make a double batch and freeze in portioned boxes for up to three months so you always have a homemade treat ready. When prepping for events, do the candy stage the day before and allow it to set fully overnight; slice the following morning for cleaner cuts. Use a warmed, sharp knife and wipe between cuts to preserve neat edges. Label containers with the date and any allergen notes if you plan to give them away.
There is comfort in making something by hand that brings people together. This Fantasy Fudge is straightforward, dependable, and has become a small tradition in my household. I hope you find it as joyful to make as I do and that it earns a spot on your holiday tray or in your tin of homemade gifts.
Use a heavy-bottomed 3- to 4-quart saucepan to ensure even heating and reduce scorching.
Toast walnuts briefly before chopping to intensify flavor and remove moisture.
Warm your knife under hot water and dry between slices for clean, sharp edges.
Allow the fudge to cool slightly before smoothing the top for a neater finish.
Line the pan with parchment overhang to lift the set fudge out easily for slicing.
This nourishing fantasy fudge recipe is sure to be a staple in your kitchen. Enjoy every moist, high protein slice — it is perfect for breakfast or as a wholesome snack any time.
Yes. Freeze the squares on a baking sheet until solid, then transfer to a freezer-safe container with parchment between layers. Thaw overnight in the refrigerator before serving.
Boil the sugar mixture for exactly five minutes at a hard boil while stirring constantly; this timing helps prevent a grainy texture and produces the right set.
This Fantasy Fudge recipe makes perfectly juicy, tender, and flavorful steak every time! Serve with potatoes and a side salad for an unforgettable dinner in under 30 minutes.
Line a 9x13-inch straight-sided pan with parchment paper, leaving an overhang for easy removal after cooling.
In a heavy-bottomed 3- to 4-quart saucepan over medium heat, combine 3 cups granulated sugar, 3/4 cup margarine, and 2/3 cup evaporated milk. Stir constantly until the margarine melts and the mixture reaches a rolling, hard boil.
Once at a hard boil, continue stirring constantly and boil for exactly 5 minutes. Remove from heat immediately after timing ends to avoid overcooking.
Remove the pan from the heat and stir in 12 ounces semi-sweet chocolate chips until fully melted and the mixture is smooth and glossy.
Stir in the 7-ounce jar of marshmallow creme and 1 teaspoon vanilla until no streaks remain, then fold in 1 cup chopped walnuts evenly.
Pour into the prepared pan, smooth the top with an offset spatula, cool completely, then lift out and slice into 1x1-inch squares using a warm, sharp knife.
Last Step: Please leave a rating and comment letting us know how you liked this recipe! This helps our business to thrive and continue providing free, high-quality recipes for you.
Leave a comment & rating below or tag
@royalmorsel on social media!

Juicy beef, sweet-charred peppers, and a silky queso drizzle turn these sliders into the ultimate crowd-pleasing bite for game day or weeknight fun.

Melt-in-your-mouth braised short ribs nestled over creamy garlic mashed potatoes, all in a rich, herb-scented sauce that feels like a warm hug.

Golden, garlicky pull-apart loaf swaddled in buttery herbs and stretchy mozzarella that begs to be shared warm from the oven.
Leave a comment & rating below or tag @royalmorsel on social media!
Enjoyed this recipe? Share it with friends and family, and don't forget to leave a review!
This recipe looks amazing! Can't wait to try it.
Comments are stored locally in your browser. Server comments are displayed alongside your local comments.

Join to receive our email series which contains a round-up of some of our quick and easy family favorite recipes.
