
>>

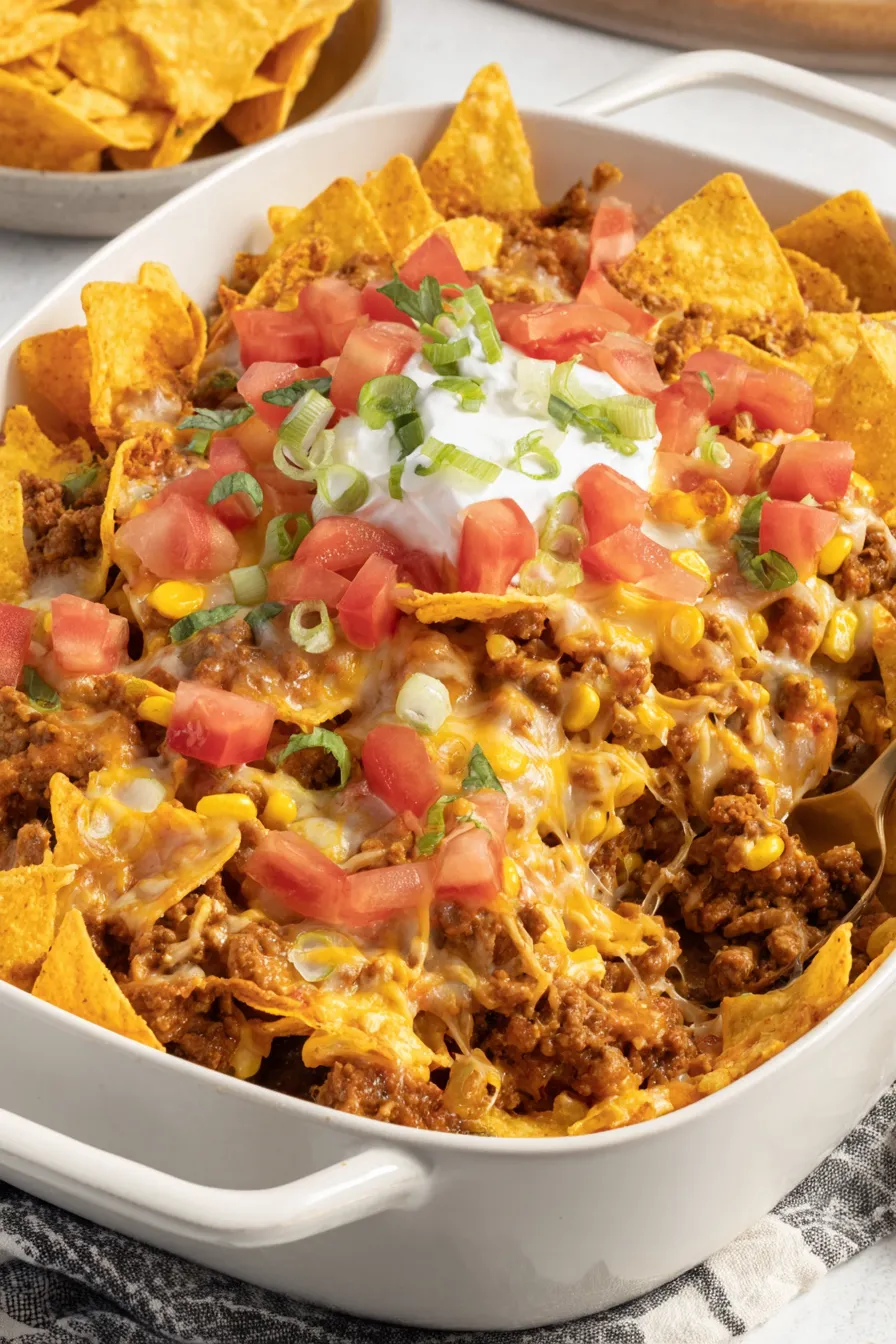
A hands-off, crowd-pleasing casserole layered with seasoned beef, creamy sour cream, melty cheese and crunchy Doritos — perfect for weeknights and potlucks.
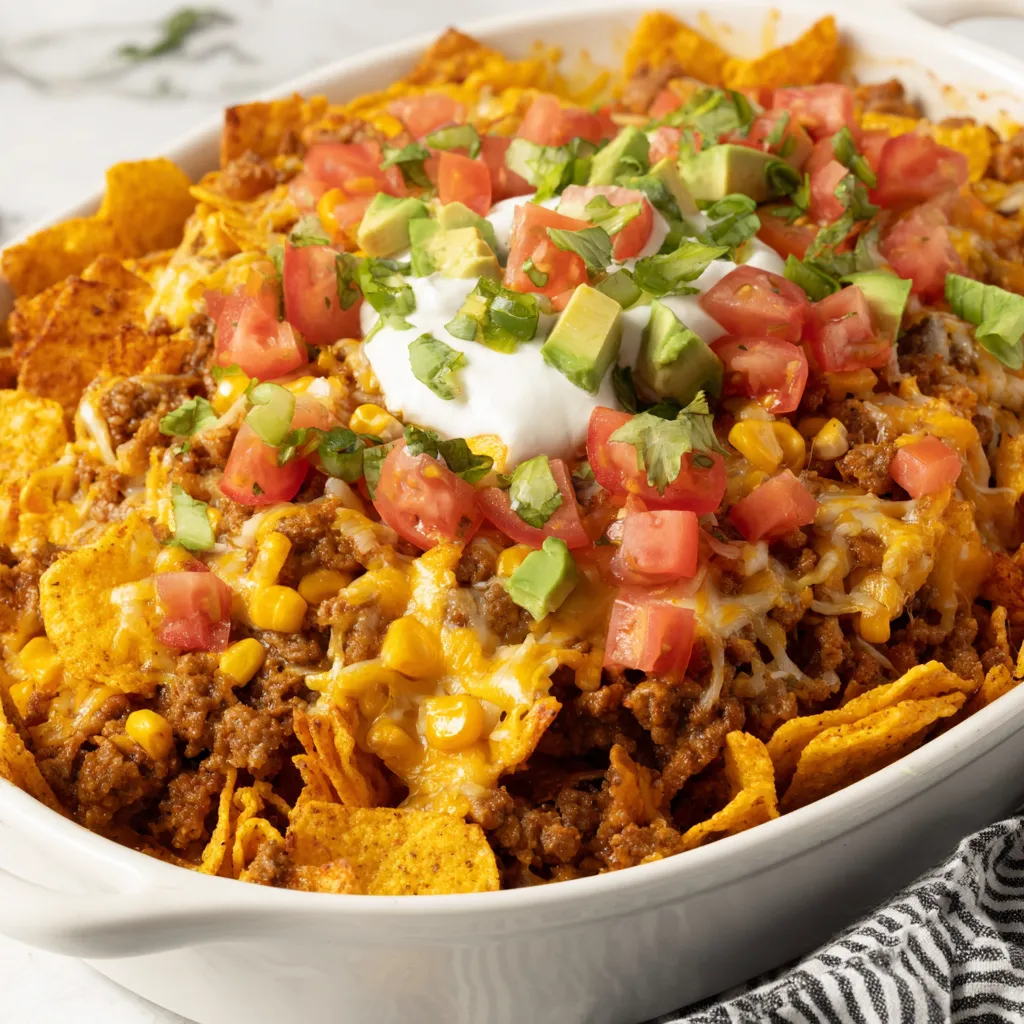
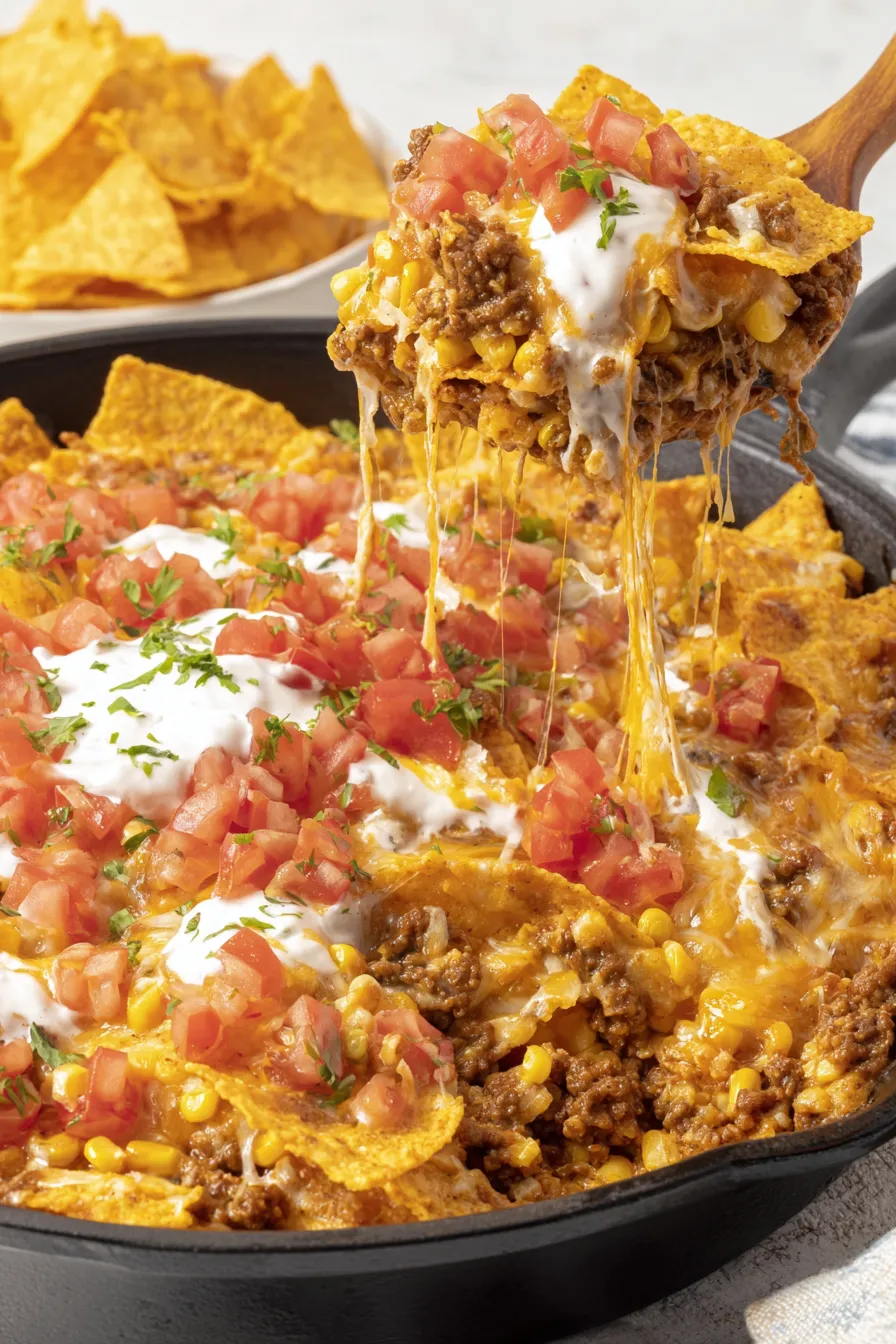
This Doritos Taco Casserole has been one of those accidental discoveries that turned regular weeknight dinners into something everyone races home for. I first put this together on a busy school night when I wanted the bold flavors of tacos without assembling individual shells. The finished dish is a contrast of textures: a creamy, seasoned beef mixture enriched with sour cream and melted cheese, topped with crunchy Dorito pieces that stay crisp enough to provide a satisfying bite. It’s comfort food with attitude — familiar taco flavors wrapped into a single, forgiving pan.
I remember the first time my family tried it: my teenager, who claims to be ‘too busy to like new food,’ asked for the recipe the next day. The tomatoes with green chiles bring a gentle brightness, the taco seasoning anchors the savory profile, and the Doritos add the nostalgic, crunchy edge that turns this into more than just a casserole — it’s a celebration of simple pantry ingredients. It’s perfect for nights when you want minimal fuss and maximum flavor, or when you need a shareable dish for potlucks and game day.
In my kitchen, this turned into an instant favorite during fall soccer season when I needed an easy, transportable dish for after-practice dinners. I’ve learned to keep the Doritos chips in two textures — fine crumbs folded into the base for binding and larger chunks on top for crunch — and that little trick makes a noticeable difference in the finished texture.
My favorite thing about this dish is how forgiving it is: if you swap the ground beef for turkey, add black beans or stir in leftover rice, it still sings. Family members have brought it to potlucks, and the recipe has created plenty of instant nostalgia — it’s reliably one of those dishes that brings people together and sparks conversation about food memories.
Store cooled portions in airtight containers in the refrigerator for 3–4 days. To freeze, cool completely and wrap tightly with plastic wrap followed by foil or place in freezer-safe containers; label with date and freeze up to 3 months. To reheat from frozen, thaw overnight in the refrigerator if possible, then reheat in a 350°F oven covered with foil until warmed through, about 25–35 minutes depending on portion size. If reheating single portions, cover loosely and microwave in 60-second intervals until hot, then briefly broil to refresh the topping if desired.
Swap ground beef for ground turkey or shredded rotisserie chicken for a lighter version; add a drained can of black beans for extra fiber and plant-based protein. Use Greek yogurt in place of sour cream one-for-one for a tangier, higher-protein option. For a gluten-free approach, confirm the Doritos package is labeled gluten-free or substitute with crushed corn tortilla chips. Reduce cheese slightly to lower fat, or use a part-skim Mexican blend without drastically changing texture.
Serve slices with crisp shredded lettuce, diced tomatoes, sliced avocado and a drizzle of extra sour cream or salsa. Complement the dish with cilantro-lime rice, a simple mixed greens salad, or charred corn on the cob. For parties, transfer the casserole to a warm slow cooker on low to keep it cozy and scoopable for guests. Garnish with lime wedges for a bright finish and pickled jalapeños for heat if you like a spicy contrast.
This dish is a playful American take on taco flavors, combining elements of Tex-Mex comfort food and convenience-cooking. Casseroles of this type rose in popularity as straightforward, feed-a-crowd dishes that use pantry staples and familiar snack chips for texture and flavor. It’s a modern comfort food cousin to layered Mexican casseroles that mix seasoned meat, cheese and tortillas — here, Doritos replace tortillas to create an instantly nostalgic, snack-driven twist.
Assemble the filling up to 24 hours in advance and store it in the refrigerator; wait to add the topping chips until baking day to maintain crunch. If prepping for the week, portion into individual microwave-safe containers and add fresh garnish just before eating. Use disposable foil pans when transporting to potlucks — they reheat directly in an oven — and pack a small bag of extra Doritos to sprinkle on top right before serving to revive crunch that can soften during transit.
Whether you’re feeding a family on a weekday or bringing a warm, shareable dish to friends, this Doritos Taco Casserole is an easy, indulgent crowd-pleaser. Give it a try, make it yours with favorite add-ins, and enjoy the smiles at the table.
Keep the Doritos in two textures: finely crushed folded into the filling and larger pieces on top for crunch.
Drain excess grease from the cooked beef to prevent the casserole from becoming oily.
Let the casserole rest 3–5 minutes after baking so it sets and slices cleanly.
This nourishing doritos taco casserole recipe is sure to be a staple in your kitchen. Enjoy every moist, high protein slice — it is perfect for breakfast or as a wholesome snack any time.
Yes. Assemble the casserole without the final topping and bake as directed, then add the Doritos and finish baking just before serving to preserve crunch.
Store leftovers in the refrigerator for 3–4 days or freeze for up to 3 months. Reheat covered in a 350°F oven until warmed through.
This Doritos Taco Casserole recipe makes perfectly juicy, tender, and flavorful steak every time! Serve with potatoes and a side salad for an unforgettable dinner in under 30 minutes.
Preheat the oven to 350°F and spray a 9x13-inch casserole dish with nonstick spray.
Finely crush 2 cups of Doritos until breadcrumb-like and reserve 1 cup loosely crushed for topping; set aside.
In a large skillet over medium-high heat, cook 1 pound ground beef with 1/2 diced onion until browned and onions are translucent, about 6–8 minutes; drain excess grease.
Stir in 1 teaspoon minced garlic and cook about 30–60 seconds until fragrant, careful not to let it burn.
Add 12 ounces frozen corn, 1 packet taco seasoning, 14.5-ounce can diced tomatoes with green chilies (not drained), and 2 cups finely crushed Doritos. Stir off heat until combined.
Remove skillet from heat, stir in 1 cup sour cream and 2 cups Mexican cheese blend until creamy and even.
Pour mixture into prepared dish and bake at 350°F for 5 minutes to warm through and start melting the cheese.
Top with remaining 1 cup cheese and 1 cup loosely crushed Doritos; bake another 5 minutes until cheese is melted and topping is warmed.
Let rest 3–5 minutes, then garnish with sliced green onions, diced tomatoes, shredded lettuce, avocado and extra sour cream before serving.
Last Step: Please leave a rating and comment letting us know how you liked this recipe! This helps our business to thrive and continue providing free, high-quality recipes for you.
Leave a comment & rating below or tag
@royalmorsel on social media!

Juicy beef, sweet-charred peppers, and a silky queso drizzle turn these sliders into the ultimate crowd-pleasing bite for game day or weeknight fun.

Melt-in-your-mouth braised short ribs nestled over creamy garlic mashed potatoes, all in a rich, herb-scented sauce that feels like a warm hug.

Golden, garlicky pull-apart loaf swaddled in buttery herbs and stretchy mozzarella that begs to be shared warm from the oven.
Leave a comment & rating below or tag @royalmorsel on social media!
Enjoyed this recipe? Share it with friends and family, and don't forget to leave a review!
This recipe looks amazing! Can't wait to try it.
Comments are stored locally in your browser. Server comments are displayed alongside your local comments.

Join to receive our email series which contains a round-up of some of our quick and easy family favorite recipes.
