
>>

Light, crunchy panko-coated chicken cutlets baked until golden and juicy, finished with a squeeze of lemon and fresh parsley for a simple weeknight favorite.
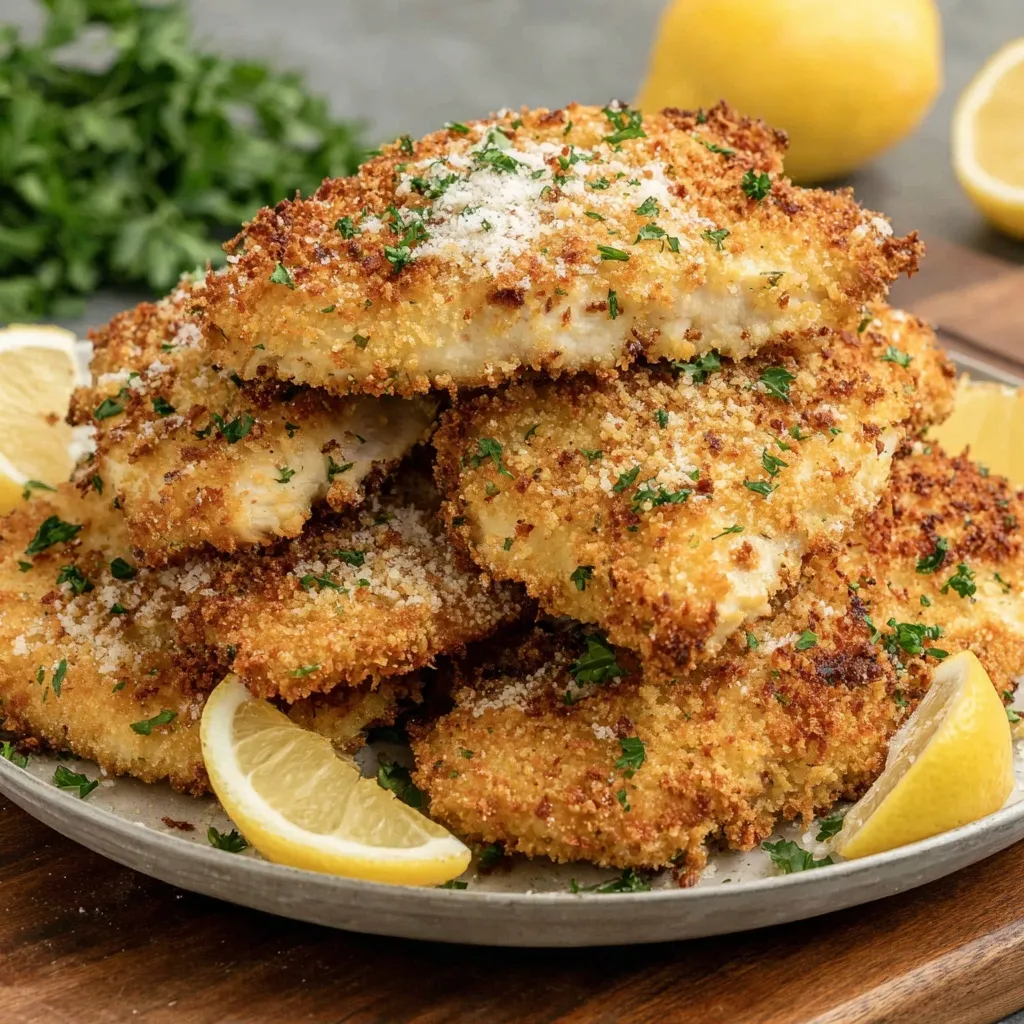
This panko chicken cutlet has been my go-to when I want something quick, crisp, and reliably comforting. I first put this version together on a busy weekday evening when I had a handful of pantry staples and a craving for something with a satisfying crunch. The combination of plain panko and grated Parmesan gives the crust a golden, airy crispness that contrasts with a juicy interior. It is a texture game that always wins around my table.
I learned the value of setup and patience with this method. Taking a few extra minutes to pat the chicken dry, set up three shallow dishes, and press the panko into the surface transforms the final result. Baking at a higher oven temperature locks in juices and encourages browning without standing at the stovetop. When my kids come home from activities, the kitchen smells bright and inviting, and they often reach for lemon wedges before I can serve. This version is simple enough for a weekday but elegant enough for unexpected guests.
In my house this recipe sparked a small ritual. I often prepare the breading station while the oven preheats and recruit a helper to press the panko onto the chicken. The result is fast plating, lots of compliments, and usually requests to make an extra batch for leftovers.
What I love most about this dish is how reliably it pleases everyone. The crust stays crisp even after a short rest and the lemon lift makes it feel fresh. I remember serving these at a small dinner party where guests layered slices into ciabatta with arugula and aioli, and everyone agreed it tasted like a restaurant sandwich but was much easier to pull off at home.
Store cooled cutlets in an airtight container in the refrigerator for up to four days. To keep the crust crisp, place paper towels between layers to absorb excess moisture and reheat in a 400 degrees Fahrenheit oven on a wire rack on a baking sheet for 6 to 8 minutes. For freezing, flash freeze the breaded cutlets arranged in a single layer until solid then transfer to a zip bag. Thaw overnight in the refrigerator for best texture or bake from frozen, adding a few extra minutes while monitoring for doneness.
If you need to swap ingredients the recipe is forgiving. Replace grated Parmesan with finely grated Pecorino Romano for a sharper bite or omit cheese and add a teaspoon of nutritional yeast for a dairy free twist. For a gluten free version use gluten free flour and gluten free panko. If you prefer a lower sodium option use reduced salt or omit the added teaspoon of salt and finish with a pinch of flaky sea salt at the table. For a richer crust swap olive oil for melted butter for more browning and a buttery flavor.
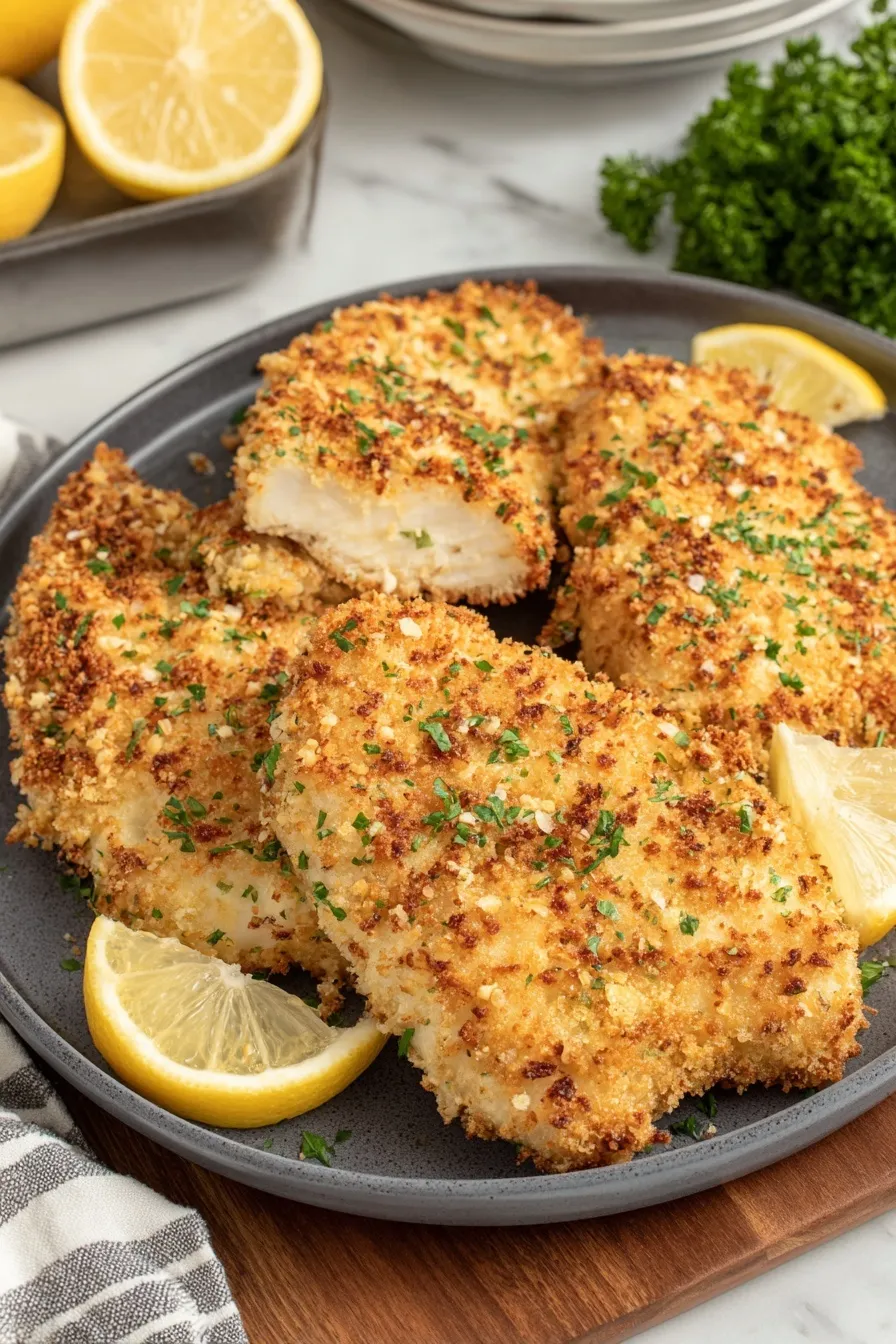
Serve cutlets with simple sides like roasted vegetables, a crisp green salad, or lemon garlic rice. For a casual meal slice the cutlets and place over wilted greens with a drizzle of vinaigrette. For a heartier option pair with mashed potatoes and steamed green beans. Garnish with chopped parsley and lemon wedges. These cutlets are also excellent layered in a sandwich with mayonnaise, lettuce, and tomato or transformed into a classic chicken parm by topping with marinara and mozzarella and giving a quick broil to melt the cheese.
The technique of breading and frying or baking meat is common across many cuisines. Panko breadcrumbs originate from Japan and are prized for their flaky, airy texture which yields a lighter crisp than traditional breadcrumbs. Combining panko with grated Parmesan borrows Italian umami into the light Japanese-style crumb, creating a hybrid that feels familiar yet elevated. This approach reflects how home cooking adapts techniques and ingredients from multiple traditions to create something both practical and delicious.
In spring and summer serve the cutlets with a fresh herb salad, new potatoes, and a cucumber dill yogurt. In autumn use roasted root vegetables and a sage brown butter drizzle. For winter holidays add warming spices to the flour mix such as a pinch of smoked paprika and serve alongside braised greens. Switch garnishes seasonally by using arugula and shaved fennel in the spring or roasted shallots and pomegranate in winter for a festive touch.
For efficient meal prep bread several batches and refrigerate on parchment lined trays for up to 24 hours. Bake just before serving or parbake and finish in the oven for a few minutes when ready to serve. Store slices in single serve containers for grab and go lunches. Keep lemon wedges and chopped herb garnishes separate until plating to preserve freshness. Investing in a good instant read thermometer will save time and eliminate guesswork.
This panko coated chicken cutlet feels like a small triumph every time I make it. Crisp on the outside, juicy inside, and versatile enough to work across many meals. Try it the next time you need a simple but impressive main, and make it your own with herbs, spices, or a favorite sauce.
Pat chicken dry before breading to help the coatings adhere and to avoid soggy crusts.
Press the panko into the surface to ensure even coverage and prevent patches after baking.
Use a wire rack on the baking sheet to promote even circulation and a crisp bottom crust.
Allow cutlets to rest 3 to 5 minutes before slicing to keep them juicy.
This nourishing crispy panko chicken cutlets recipe is sure to be a staple in your kitchen. Enjoy every moist, high protein slice — it is perfect for breakfast or as a wholesome snack any time.
Yes. Breaded cutlets can be frozen raw after breading on a tray until solid, then transferred to a freezer bag for up to three months. Bake from frozen adding 6 to 8 minutes to the original cooking time.
Use a probe or instant read thermometer and confirm the internal temperature in the thickest part reads 165 degrees Fahrenheit.
This Crispy Panko Chicken Cutlets recipe makes perfectly juicy, tender, and flavorful steak every time! Serve with potatoes and a side salad for an unforgettable dinner in under 30 minutes.
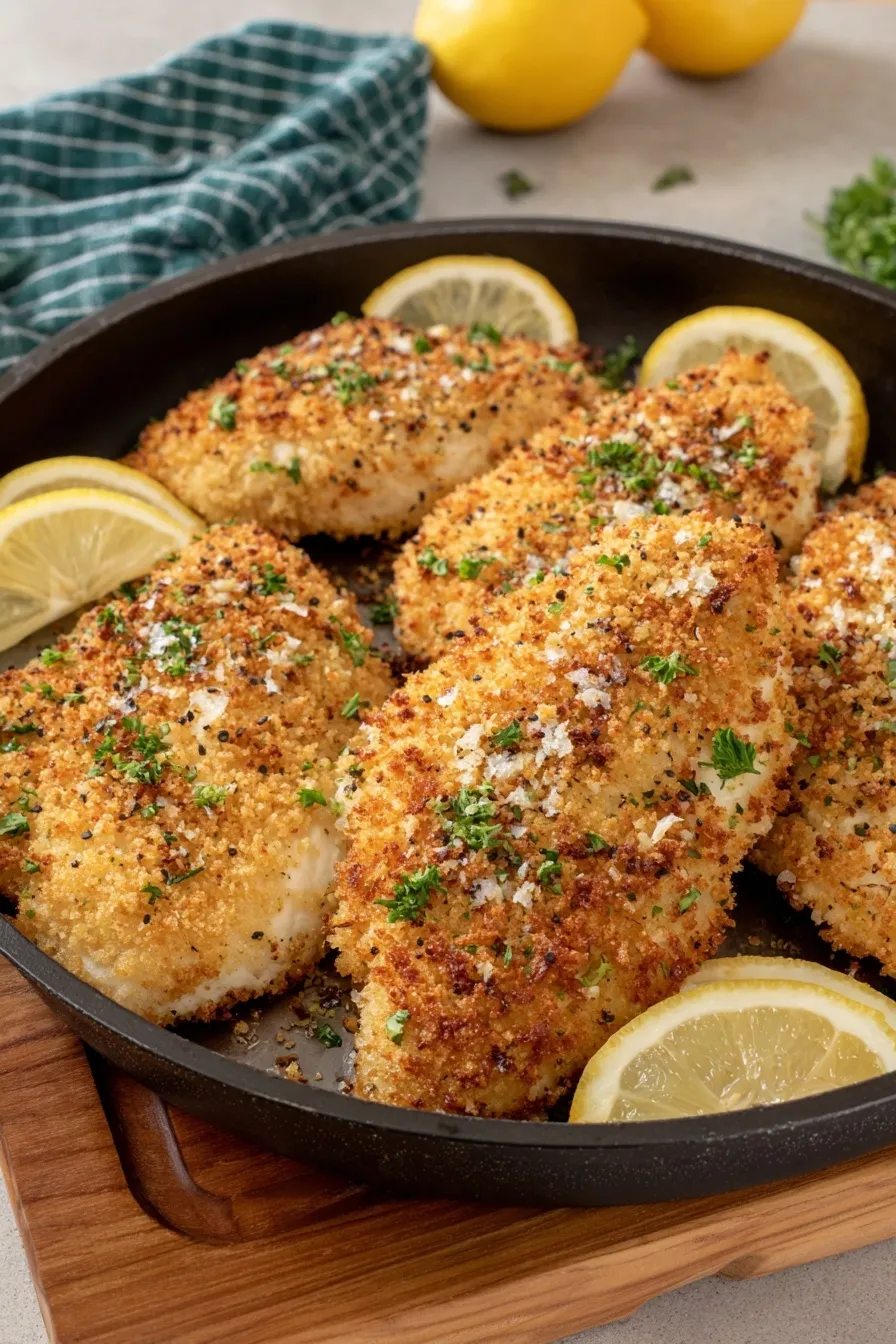
Preheat oven to 425 degrees Fahrenheit. Line a rimmed baking sheet with aluminum foil and set a wire rack on the sheet if available. Pat chicken dry and pound or trim to an even 3/4 inch thickness to ensure even cooking.
Arrange three shallow dishes. Combine flour, garlic powder, onion powder, salt, and black pepper in the first. Beat eggs in the second. Mix panko, grated Parmesan, and olive oil in the third until evenly moistened.
Coat each cutlet first in the flour mixture shaking off excess, dip in beaten egg allowing surplus to fall back, then press into the panko mixture to adhere the crumbs firmly. Place on the prepared sheet or wire rack.
Bake for 18 to 22 minutes until the crust is golden and an instant read thermometer inserted into the thickest part reads 165 degrees Fahrenheit. Rotate the pan halfway if needed for even browning.
Let cutlets rest 3 to 5 minutes before slicing. Garnish with chopped parsley and lemon wedges and serve hot.
Last Step: Please leave a rating and comment letting us know how you liked this recipe! This helps our business to thrive and continue providing free, high-quality recipes for you.
Leave a comment & rating below or tag
@royalmorsel on social media!

Juicy beef, sweet-charred peppers, and a silky queso drizzle turn these sliders into the ultimate crowd-pleasing bite for game day or weeknight fun.

Melt-in-your-mouth braised short ribs nestled over creamy garlic mashed potatoes, all in a rich, herb-scented sauce that feels like a warm hug.

Golden, garlicky pull-apart loaf swaddled in buttery herbs and stretchy mozzarella that begs to be shared warm from the oven.
Leave a comment & rating below or tag @royalmorsel on social media!
Enjoyed this recipe? Share it with friends and family, and don't forget to leave a review!
This recipe looks amazing! Can't wait to try it.
Comments are stored locally in your browser. Server comments are displayed alongside your local comments.

Join to receive our email series which contains a round-up of some of our quick and easy family favorite recipes.
