
Classic Homemade Hard Candy

Bright, translucent hard candy made with pantry staples—sugar, light corn syrup, and a splash of extract—perfect for gifts, parties, and nostalgic snacking.
This recipe for classic hard candy has been my go-to when I want bright, glassy sweets that crack delightfully under the teeth. I discovered this method while trying to recreate the candy my grandmother made for holiday plates; the aroma of heated sugar and citrus filled the kitchen and drew my neighbors in. The result is translucent pieces with a satisfying brittle texture that hold up well at room temperature and travel beautifully to parties and cookie exchanges.
What makes this version special is its simplicity and precision: three pantry ingredients form the base, and a careful boil to the hard-crack stage yields the correct texture every time. I learned early on that timing and a reliable candy thermometer are more important than fancy tools. With a few teaspoons of extract and a touch of food coloring, the pieces become festive and customizable. When served, they take me back to childhood afternoons and family gatherings where a small, sweet piece signaled celebration.
Why You'll Love This Recipe
- Fast and efficient: active prep takes about 15 minutes and the candy sets in under an hour, making it great for last-minute favors and gifts.
- Pantry-friendly ingredients: uses granulated sugar, light corn syrup, and water—no specialty items required.
- Customizable flavors: choose anise, lemon, orange, or other extracts for unique profiles that suit seasons and parties.
- Clear, glossy finish: the hard-crack stage delivers a transparent candy that looks professional and polished when cut into pieces.
- Make-ahead friendly: stores well at room temperature in a covered container or gift tins for easy entertaining.
- Kid-friendly activity (with supervision): older children can help choose colors and cut pieces once cooled, perfect for family traditions.
In my experience, the easiest wins come from a clean workspace and a pre-dusted pan: the sugar-lined mold gives the candy a smooth under-surface and makes handling simple. Family and guests always remark on the shine and the snap of each piece, and I love that every batch can be tailored with a different extract or color to match an event.
Ingredients
- Granulated sugar: 2 cups. Use regular granulated sugar for predictable melting; I prefer Domino or C&H for consistent results. Measure by spooning into a dry cup and leveling to avoid packing.
- Light corn syrup: 3/4 cup. Karo light corn syrup controls crystallization and keeps the candy clear. Do not substitute with high-fructose syrup if possible for best clarity.
- Water: 1/2 cup. Just enough to dissolve and help the syrup come to temperature evenly. Use room-temperature tap water or filtered water for best results.
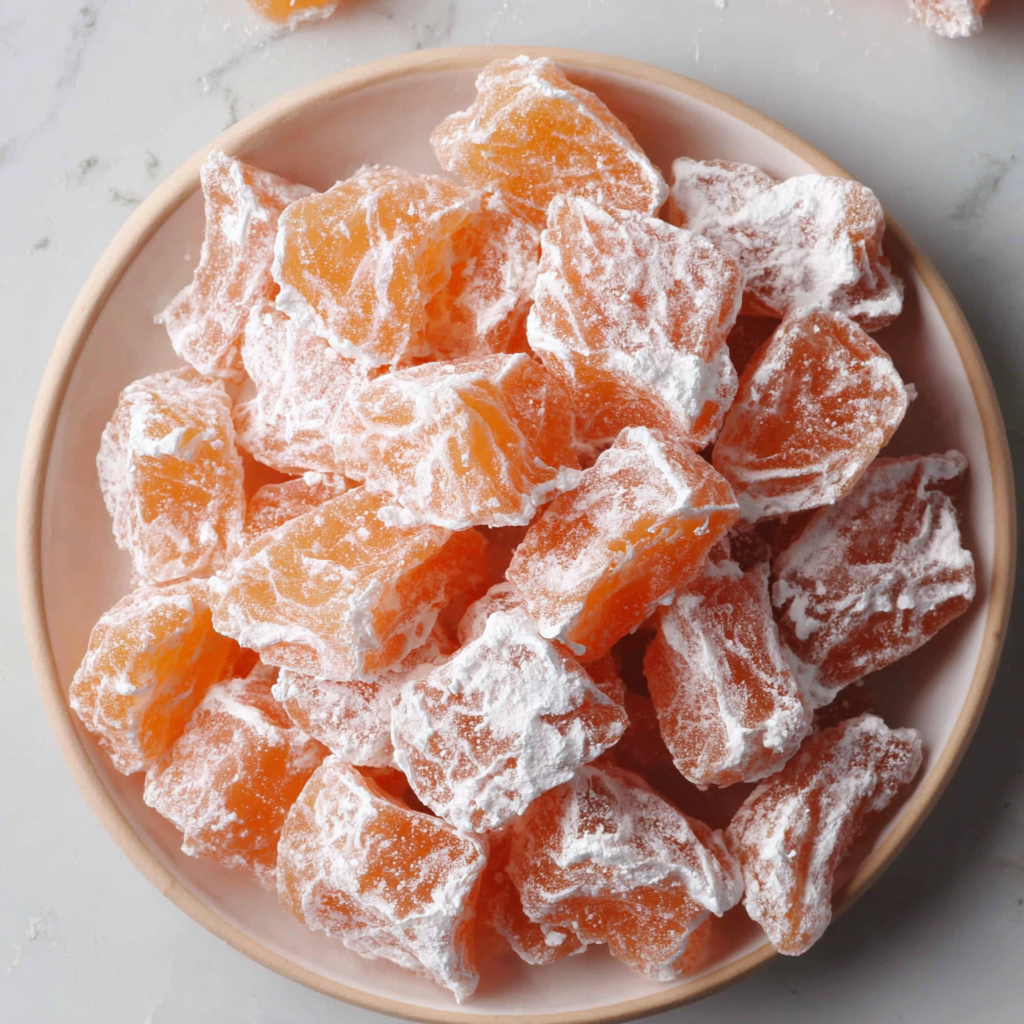
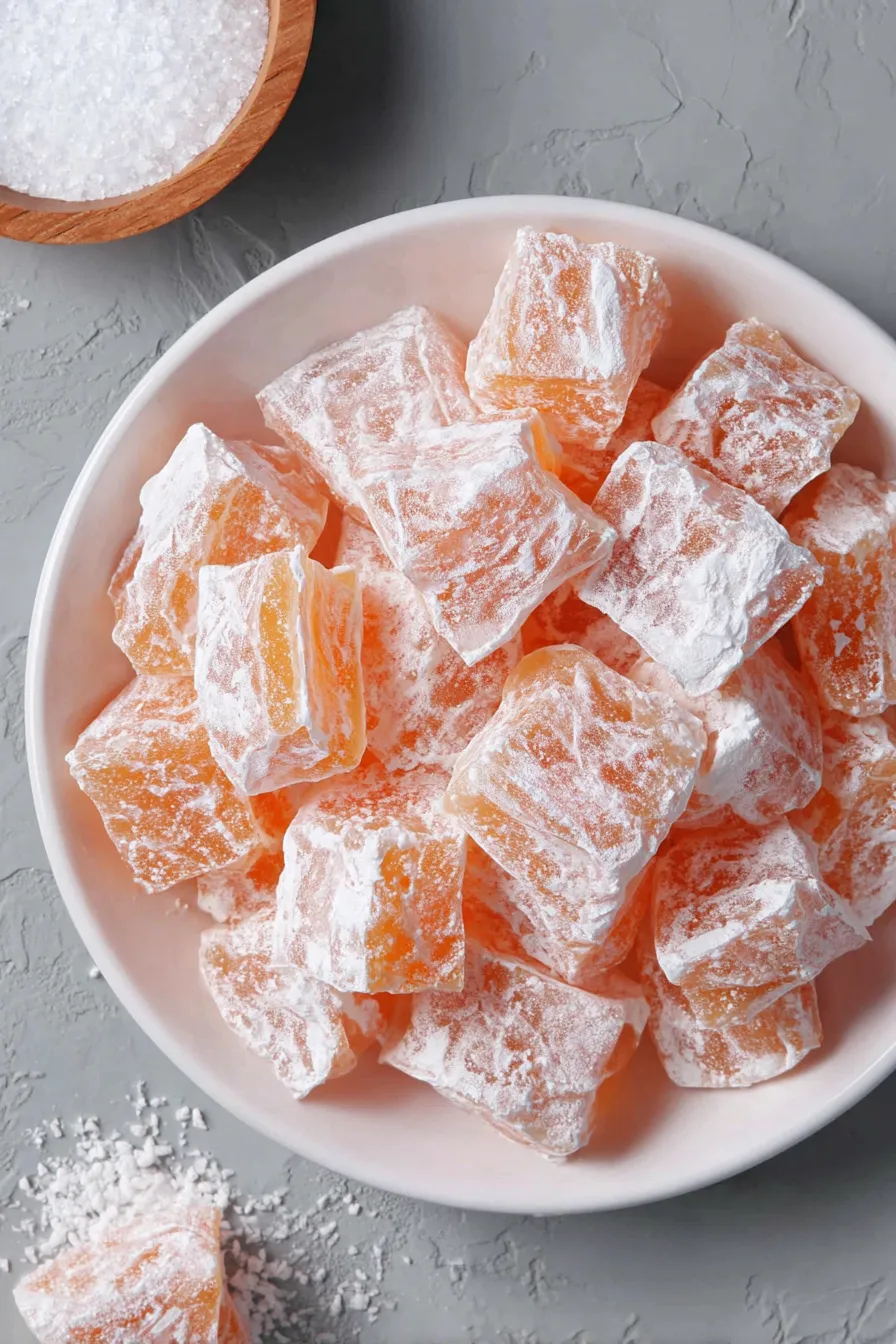
- Confectioners sugar: 5 to 6 cups. Used to line the pan and dust the finished candy; the powdered sugar prevents sticking and creates a smooth matte finish on the cut surfaces.
- Flavor extract: 1 to 2 teaspoons anise, lemon, or orange extract. Choose a high-quality extract such as Nielsen-Massey for more nuanced flavor; start with 1 teaspoon and add to taste.
- Food coloring: Red, yellow, or orange liquid food coloring (optional). A few drops will produce vibrant hues; gel colors will work but use sparingly to avoid altering texture.
Instructions
Prepare the Pan: Use a 15 x 10 x 1-inch rimmed baking sheet and spread 5 to 6 cups of confectioners sugar to a depth of about 1/2 inch. Take the handle of a wooden spoon and press a continuous curved-line indentation through the sugar; this will act as a shallow mold and guide for pouring. Set the pan aside in a draft-free area while you heat the syrup so the sugar stays evenly distributed. Combine Candy Ingredients: In a large, heavy-bottomed saucepan combine 2 cups granulated sugar, 3/4 cup light corn syrup, and 1/2 cup water. Place over medium heat and stir gently just long enough to wet the sugar—about 1 to 2 minutes. Use a heatproof spatula to scrape down sides if granules collect. Dissolve Sugar Crystals: Once the mixture comes to a boil, cover the saucepan with a lid and let it steam for 3 minutes without stirring. This steam helps dissolve stray sugar crystals on the sides, which reduces the risk of unwanted crystallization during the boil. Cook to Hard-Crack Stage: Remove the lid, increase heat to medium-high and continue cooking without stirring. Clip a reliable candy thermometer to the side of the pan and watch closely until the syrup reaches 300 degrees Fahrenheit. This is the hard-crack stage; the syrup will be very clear and runny. Expect this step to take 8 to 12 minutes depending on pan size and burner. Add Flavor and Color: Immediately remove the pan from heat. Allow bubbles to calm for 5 to 10 seconds, then stir in 1 to 2 teaspoons of your chosen extract. Add a few drops of food coloring and stir quickly but gently to distribute color evenly. Work swiftly—syrup begins to set fast as it cools. Pour into the Mold: Carefully pour the hot syrup into a glass measuring cup with a pouring lip for control, then pour the syrup into the pre-made indentation in the confectioners sugar. Pour along the curve in one steady motion to create an even ribbon of candy. Work over a protected surface and keep children away—this syrup causes severe burns. Coat and Cool: Immediately cover the poured candy generously with more confectioners sugar to prevent sticking. Let the candy cool completely at room temperature until firm to the touch, about 30 to 60 minutes depending on room conditions. Cut and Store: When cool, lift the candy from the sugar bed and use kitchen scissors to cut along the indentation into bite-sized pieces. If edges are tacky, toss briefly in additional confectioners sugar. Store pieces in an airtight container at room temperature; place parchment between layers to prevent sticking.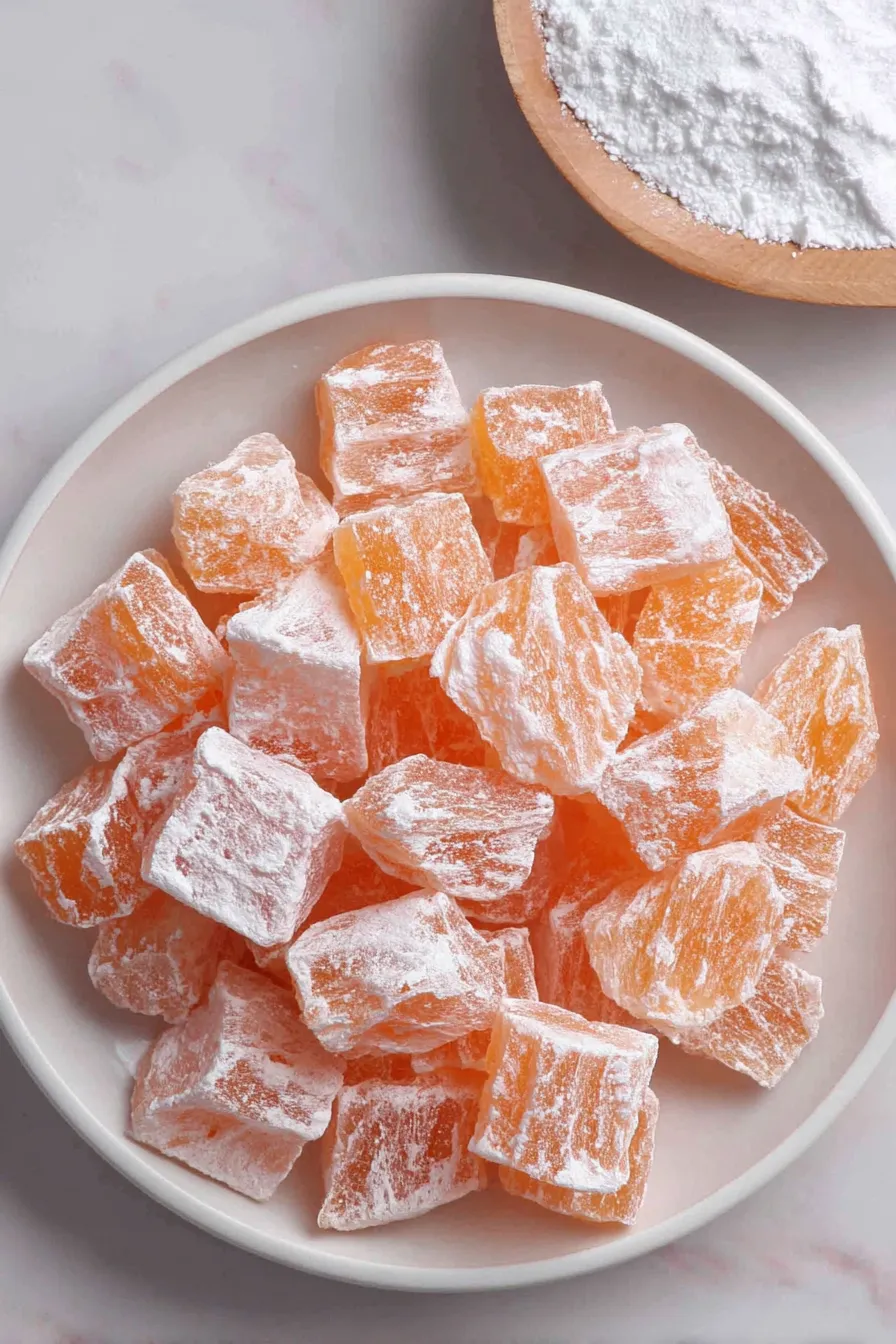
You Must Know
- Always use a candy thermometer: the difference between soft-ball and hard-crack stages is temperature, not time.
- Work quickly after adding extract and color; the syrup can set in under a minute once off the heat.
- Confectioners sugar is used as a mold and anti-stick; you will need 5 to 6 cups to form and dust properly.
- Store at room temperature in a dry place; humidity will soften the pieces and create stickiness.
- Supervise children and use heatproof gloves if you need to move hot syrup—this liquid sticks to skin and is very hot.
One of my favorite things about making these is how each small decision changes the character of the sweets: a teaspoon of anise gives a subtle licorice finish that adults love, while lemon extract brightens the flavor for kids. Over years of practice I learned to test drop sizes on a silicone mat when experimenting with new extracts; this keeps the main batch safe and helps dial in flavor balance without wasting candy.
Storage Tips
Store finished pieces in an airtight container at room temperature away from sunlight and heat sources. Line containers with parchment or wax paper and separate layers to prevent sticking. Properly stored, the pieces will keep for several weeks; if they become soft due to humidity, re-dusting with a little confectioners sugar can restore surface dryness. Avoid refrigeration, which can introduce condensation when brought back to room temperature.
Ingredient Substitutions
Light corn syrup is important to prevent crystallization; if you must substitute, use an equal amount of glucose syrup, but expect a slightly different gloss. Do not substitute honey—its flavor and water content alter clarity and setting. If you need a gluten-free assurance, verify that your confectioners sugar is processed in a gluten-free facility. For flavoring, pure citrus extracts yield brighter profiles than artificial oils, and powdered citric acid can be added sparingly for tartness.
Serving Suggestions
Arrange pieces in small glass bowls, candy tins, or cellophane bags tied with ribbon for gifts. For party tables, mix colors to match event themes and include small scoops for guests to fill favor bags. Garnish dessert plates with a couple of pieces alongside cookies or chocolate mints to offer a balance of textures and flavors. Pair lemon or orange pieces with tea, and anise pieces with espresso for a classic after-dinner treat.
Cultural Background
Hard, boiled sweets have a long tradition across many cultures, often made at home for holidays and celebrations. In the United States the modern candy thermometer and commercial corn syrup enabled consistent, clear candies during the 20th century. Flavorings like anise and citrus reflect regional tastes—anise is popular in Mediterranean sweets, while citrus flavors are common in American holiday confections. This recipe draws on that heritage to create a simple, timeless treat.
Seasonal Adaptations
Change extract and color for seasons: use peppermint and red for winter holidays, lemon and yellow for spring, orange and a hint of cinnamon for autumn. For Halloween, make small orange pieces and add black licorice pieces to the mix for contrast. For summer gatherings, lighter flavors like lime or grapefruit (use high-quality extracts) keep the candy refreshing. Always adjust extract amount when changing to stronger oils like peppermint.
Meal Prep Tips
Prepare the confectioners sugar-lined pan and measure all ingredients before heating—this mise en place makes the hot syrup steps safe and smooth. Work in batches if you're making large quantities; cool, cut, and store completed batches while preparing the next. Use a glass measuring cup for pouring control and keep a damp cloth nearby for quick cleanup of syrup drips before they harden. Label tins with flavor and date for gifting.
Making these translucent sweets is one of those simple pleasures that rewards care and attention. With a few pantry staples, a reliable thermometer, and a steady hand, you can create pieces that look store-bought and taste like tradition. Share them, tie them with ribbon, or keep them in a jar on the counter—the sparkle and snap never fail to bring a smile.
Pro Tips
Always use a candy thermometer clipped to the pan to ensure you reach 300 degrees Fahrenheit for a true hard-crack finish.
Pre-dust the pan with confectioners sugar and create a shallow indentation to form a neat mold and prevent sticking.
Work quickly after adding extract and color; the syrup cools rapidly and will begin to set in less than a minute.
Keep a small bowl of warm water nearby to rinse utensils immediately—hardened syrup is very difficult to remove once cold.
If a batch begins to crystallize, discard and start over with clean equipment; even tiny sugar crystals will seed crystallization.
This nourishing classic homemade hard candy recipe is sure to be a staple in your kitchen. Enjoy every moist, high protein slice — it is perfect for breakfast or as a wholesome snack any time.
FAQs about Recipes
How long do homemade hard candies keep?
Yes. Store in an airtight container at room temperature away from humidity for several weeks.
What temperature should the syrup reach?
Use a reliable candy thermometer and heat to 300 degrees Fahrenheit to reach the hard-crack stage.
Can I substitute corn syrup?
Light corn syrup is recommended to prevent crystallization and preserve clarity; glucose syrup can be used as a substitute.
Tags
Classic Homemade Hard Candy
This Classic Homemade Hard Candy recipe makes perfectly juicy, tender, and flavorful steak every time! Serve with potatoes and a side salad for an unforgettable dinner in under 30 minutes.
Ingredients
Candy Base
Finishing
Instructions
Prepare the Pan
Line a 15 x 10 x 1-inch rimmed baking sheet with 5 to 6 cups of confectioners sugar to a 1/2-inch depth and create a continuous curved indentation with a wooden spoon handle; set aside.
Combine Candy Ingredients
In a heavy-bottomed saucepan combine 2 cups granulated sugar, 3/4 cup light corn syrup, and 1/2 cup water. Heat over medium stirring gently until the sugar is moistened.
Dissolve Sugar Crystals
Once boiling, cover and cook undisturbed for 3 minutes to dissolve stray crystals on the sides, then remove the lid.
Cook to Hard-Crack Stage
Increase heat to medium-high and cook without stirring until a candy thermometer reads 300 degrees Fahrenheit; watch closely to avoid burning.
Add Flavor and Color
Remove from heat, let bubbles settle slightly, then stir in 1 to 2 teaspoons extract and a few drops of food coloring, mixing quickly but gently.
Pour into Mold
Pour the hot syrup into a glass measuring cup, then into the sugar-lined indentation in one steady motion. Cover with additional confectioners sugar to prevent sticking.
Coat and Cool
Allow the candy to cool at room temperature until completely firm, about 30 to 60 minutes depending on conditions.
Cut and Store
Lift from the sugar bed and cut into bite-sized pieces with kitchen scissors. Dust with extra confectioners sugar if needed and store in an airtight container at room temperature.
Last Step: Please leave a rating and comment letting us know how you liked this recipe! This helps our business to thrive and continue providing free, high-quality recipes for you.
Nutrition
Did You Make This?
Leave a comment & rating below or tag
@royalmorsel on social media!
Categories:
You might also like...

Cheeseburger Queso Sliders
Juicy beef, sweet-charred peppers, and a silky queso drizzle turn these sliders into the ultimate crowd-pleasing bite for game day or weeknight fun.

Short Ribs with Garlic Mash
Melt-in-your-mouth braised short ribs nestled over creamy garlic mashed potatoes, all in a rich, herb-scented sauce that feels like a warm hug.

Cheesy Garlic Pull-Apart Bread
Golden, garlicky pull-apart loaf swaddled in buttery herbs and stretchy mozzarella that begs to be shared warm from the oven.
Did You Make This?
Leave a comment & rating below or tag @royalmorsel on social media!
Rate This Recipe
Share This Recipe
Enjoyed this recipe? Share it with friends and family, and don't forget to leave a review!
Comments (1)
This recipe looks amazing! Can't wait to try it.
Comments are stored locally in your browser. Server comments are displayed alongside your local comments.

Hi, I'm Emma!
What's Popular

30-Minute Meals!
Join to receive our email series which contains a round-up of some of our quick and easy family favorite recipes.