
>>

Creamy peanut butter base topped with a glossy chocolate layer — easy, no-bake bars inspired by the beloved Buckeye candy. Perfect for holidays and potlucks.
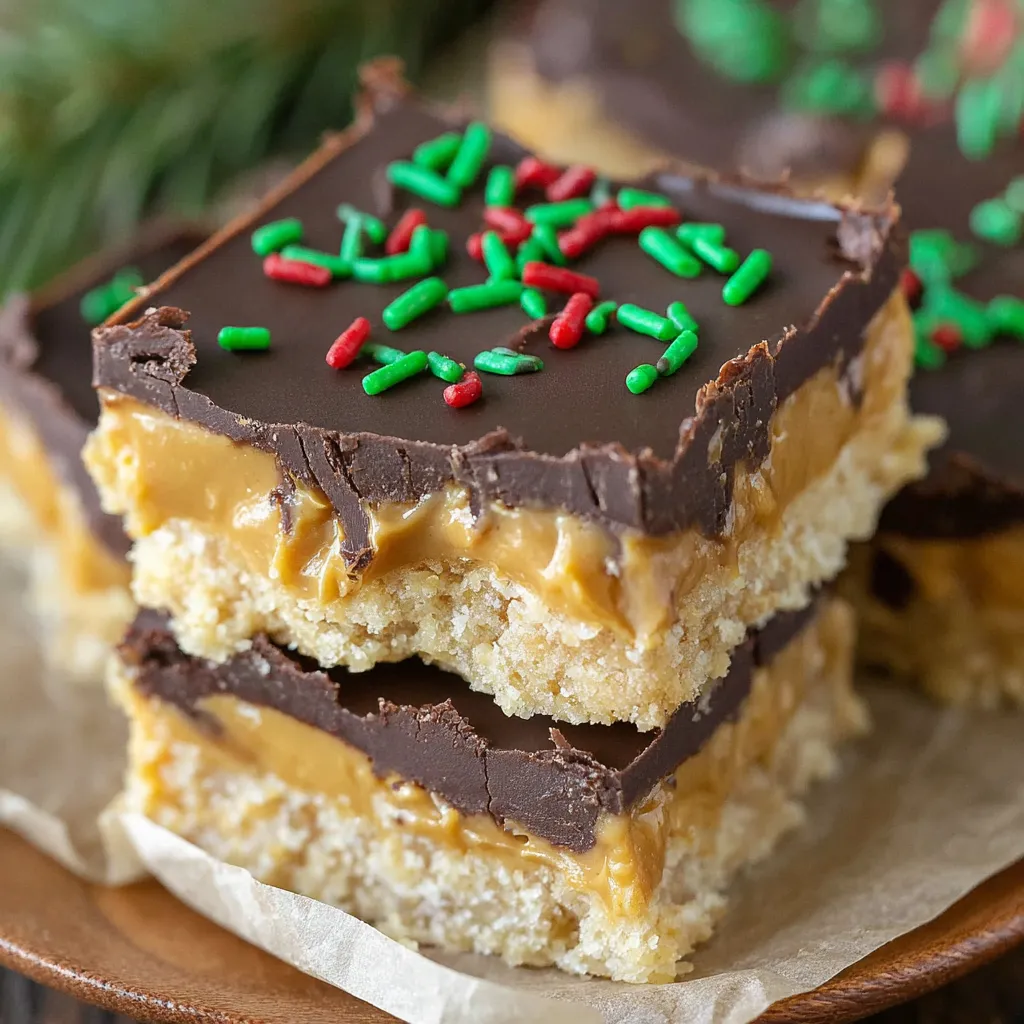
This is my favorite no-bake treat to bring to holiday gatherings and potlucks: a tray of creamy peanut butter bars covered in a shiny chocolate glaze. I first learned this version one December when I wanted the flavor of buckeye candies without the tedious dipping. The result is every bit as indulgent — rich, sweet, and with that unmistakable peanut-butter-to-chocolate contrast — but much quicker and easier to portion and serve. The texture is dense and fudgy from the powdered sugar and peanut butter, while the chocolate top adds a smooth, slightly crisp finish when set.
I remember making a pan for a family movie night; within minutes, someone said they tasted like “cookie-dough buckeyes” and returned for seconds. These bars keep well and travel beautifully, which is why they became my go-to for bake sales and last-minute desserts. The recipe uses pantry staples—creamy peanut butter, powdered sugar, butter, and chocolate chips—so it’s one of those recipes that magically appears when you want something comforting but don’t want to run to the store. If you’re a fan of classic buckeye flavors but are short on time, this will quickly become a favorite.
Personally, I love how forgiving this preparation is. One pan has become the centerpiece at both small family dinners and busy holiday buffets. The first time I swapped to dark chocolate for a grown-up crowd, the balance felt more sophisticated while still delivering the nostalgic peanut-and-chocolate hit everyone expects.
I particularly enjoy these chilled slightly — the chocolate gains a pleasant snap while the peanut layer stays dense and fudgy. At family potlucks, people call these “practical buckeyes” because they give the classic flavor without the mess of dipping each ball. The best part is how easy they are to scale: double the ingredients for a 9x13-inch tray when you need more.
Store the bars in a single layer in an airtight container lined with parchment to prevent sticking. Refrigerate if your kitchen is warm — at 40°F they will keep their shape and freshness for up to seven days. For longer storage, freeze tightly wrapped portions for up to three months; thaw overnight in the refrigerator to avoid condensation forming on the chocolate. When transporting, use a cooler or insulated bag to prevent melting. If stacking layers, separate them with parchment or wax paper.
If you’re avoiding dairy, substitute the 1/2 cup butter with 1/2 cup coconut oil (solid) or a vegan butter spread; note the base will be slightly softer at room temperature. For a lower-sugar version, reduce powdered sugar and add a tablespoon of honey or maple syrup — expect a softer texture. Natural peanut butter works, but stir thoroughly and consider chilling the mixture briefly before pressing to firm it up. Swap chocolate chips for a chopped chocolate bar for a richer top.
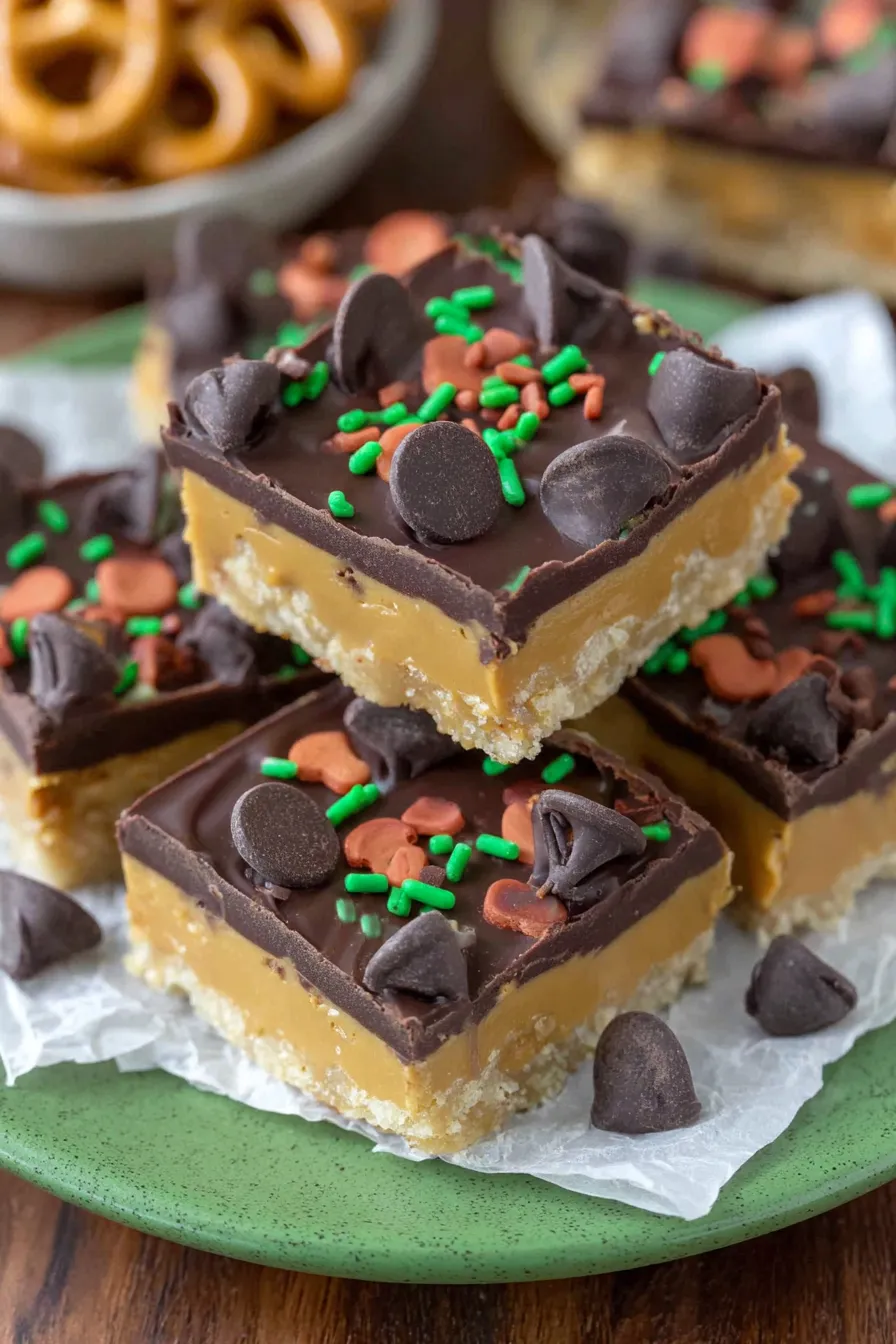
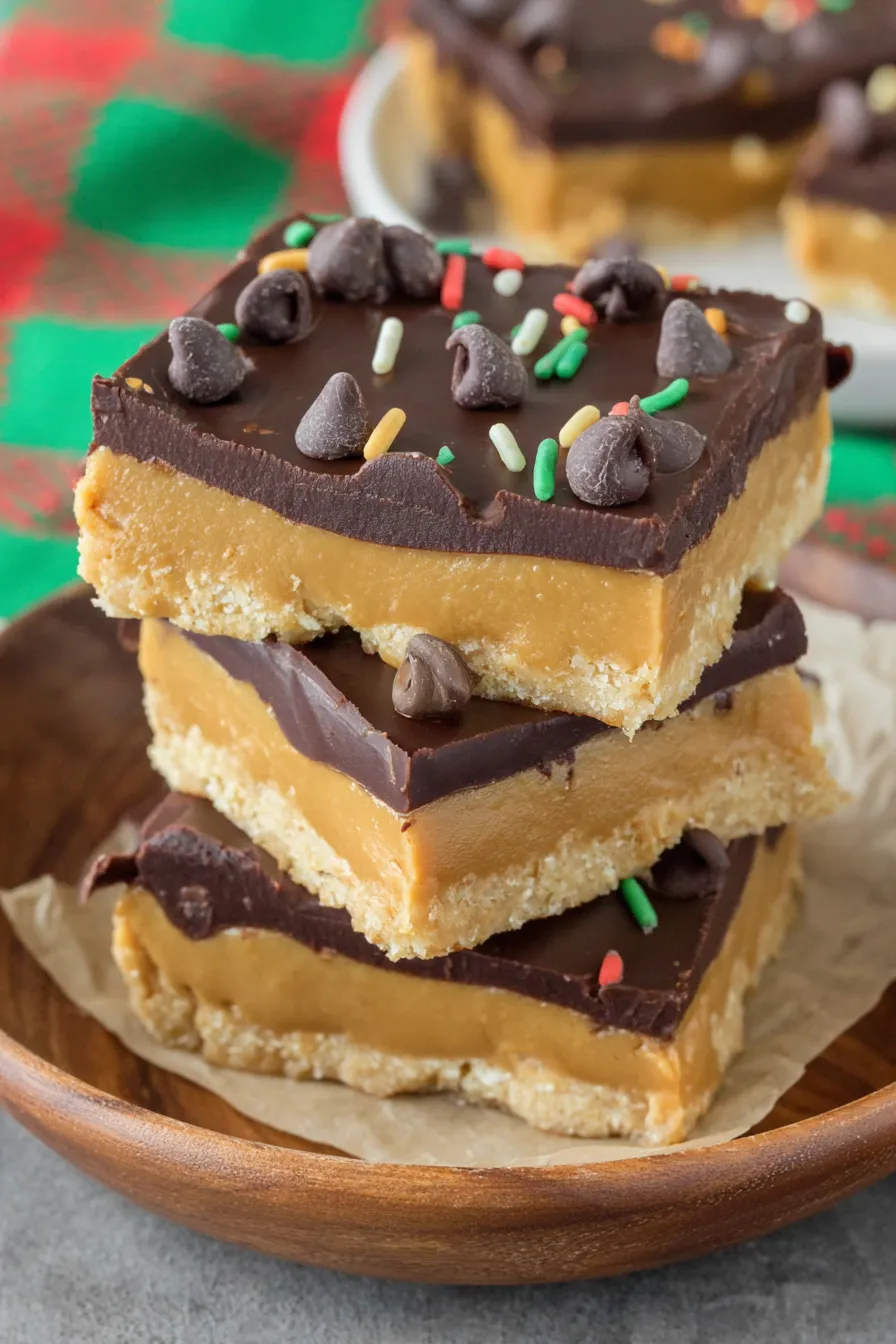
Serve chilled on a simple platter with a dusting of cocoa powder or a sprinkle of flaky sea salt to elevate the chocolate. These pair wonderfully with coffee or a robust black tea and make a festive addition to cookie trays. For a party, place small picks into each bar to make them easy to grab. Garnish with chopped roasted peanuts or swirl a bit of melted white chocolate on top for a two-tone effect.
These bars are inspired by buckeye confections — a candy named after the Ohio buckeye nut and a beloved regional treat, traditionally formed as peanut-butter balls partially dipped in chocolate. The bar version preserves the peanut-and-chocolate profile while offering a simpler, sliceable format that’s easier for serving large groups. Over time, home cooks adapted the original candy into tray bars for convenience, especially during holiday seasons and community bake sales.
In winter, add a pinch of cinnamon or espresso powder to the peanut layer for warmth and depth. For spring and summer gatherings, use milk chocolate and top with crushed salted pretzels for contrast. Around Halloween, dye drizzles of colored candy melts for a festive look. For holiday gift boxes, cut into smaller squares and wrap individually in parchment for a professional presentation.
Make the peanut base one to two days ahead and keep it refrigerated until ready to press into the pan; this firms the mixture and speeds assembly. Melt and spread the chocolate the night before if you need to save time on serving day, then keep the finished tray chilled. Use a sharp ruler or bench scraper to score the top lightly before chilling to guide even cuts later. For portion control, slice into smaller bites — a 9x9 pan can yield 24 small squares instead of 16 larger bars.
These bars are one of those recipes that make hosting easier without sacrificing nostalgia. Whether you’re feeding a crowd or tucking a few into lunchboxes, they deliver that classic peanut-and-chocolate satisfaction every time. I hope you enjoy making them as much as my family does — don't be surprised if they become a requested staple at your next gathering.
Press the peanut layer firmly and evenly into the pan for tidy, cohesive bars that cut cleanly.
Warm and dry the knife between each cut to get smooth chocolate edges without cracking.
If chocolate seizes while melting, add a small teaspoon of coconut oil and stir until smooth.
Line the pan with parchment overhang to lift the whole slab out for neat slicing and easy removal.
This nourishing classic buckeye bars recipe is sure to be a staple in your kitchen. Enjoy every moist, high protein slice — it is perfect for breakfast or as a wholesome snack any time.
Yes — you can use natural peanut butter, but stir well and consider chilling the base briefly before pressing to firm it up. The flavor will be more pronounced and less sweet.
Freeze up to 3 months in airtight packaging; thaw overnight in the refrigerator before serving.
This Classic Buckeye Bars recipe makes perfectly juicy, tender, and flavorful steak every time! Serve with potatoes and a side salad for an unforgettable dinner in under 30 minutes.
Beat softened butter and creamy peanut butter together until smooth, add powdered sugar in two batches and vanilla, mixing until cohesive and thick.
Line a 9x9-inch pan with parchment, transfer the peanut mixture, and press firmly and evenly into the pan for a smooth, compact layer.
Melt chocolate chips with coconut oil in 20–30 second microwave bursts, stirring between each interval until glossy and smooth, or use a double boiler.
Pour melted chocolate over the pressed base, spread evenly, let firm at room temperature then chill in the refrigerator for 45–60 minutes until fully set.
Lift set slab using parchment overhang, slice into 16 bars with a warm, dry knife, then refrigerate in an airtight container for up to 7 days or freeze for longer storage.
Last Step: Please leave a rating and comment letting us know how you liked this recipe! This helps our business to thrive and continue providing free, high-quality recipes for you.
Leave a comment & rating below or tag
@royalmorsel on social media!

Juicy beef, sweet-charred peppers, and a silky queso drizzle turn these sliders into the ultimate crowd-pleasing bite for game day or weeknight fun.

Melt-in-your-mouth braised short ribs nestled over creamy garlic mashed potatoes, all in a rich, herb-scented sauce that feels like a warm hug.

Golden, garlicky pull-apart loaf swaddled in buttery herbs and stretchy mozzarella that begs to be shared warm from the oven.
Leave a comment & rating below or tag @royalmorsel on social media!
Enjoyed this recipe? Share it with friends and family, and don't forget to leave a review!
This recipe looks amazing! Can't wait to try it.
Comments are stored locally in your browser. Server comments are displayed alongside your local comments.

Join to receive our email series which contains a round-up of some of our quick and easy family favorite recipes.
