
>>

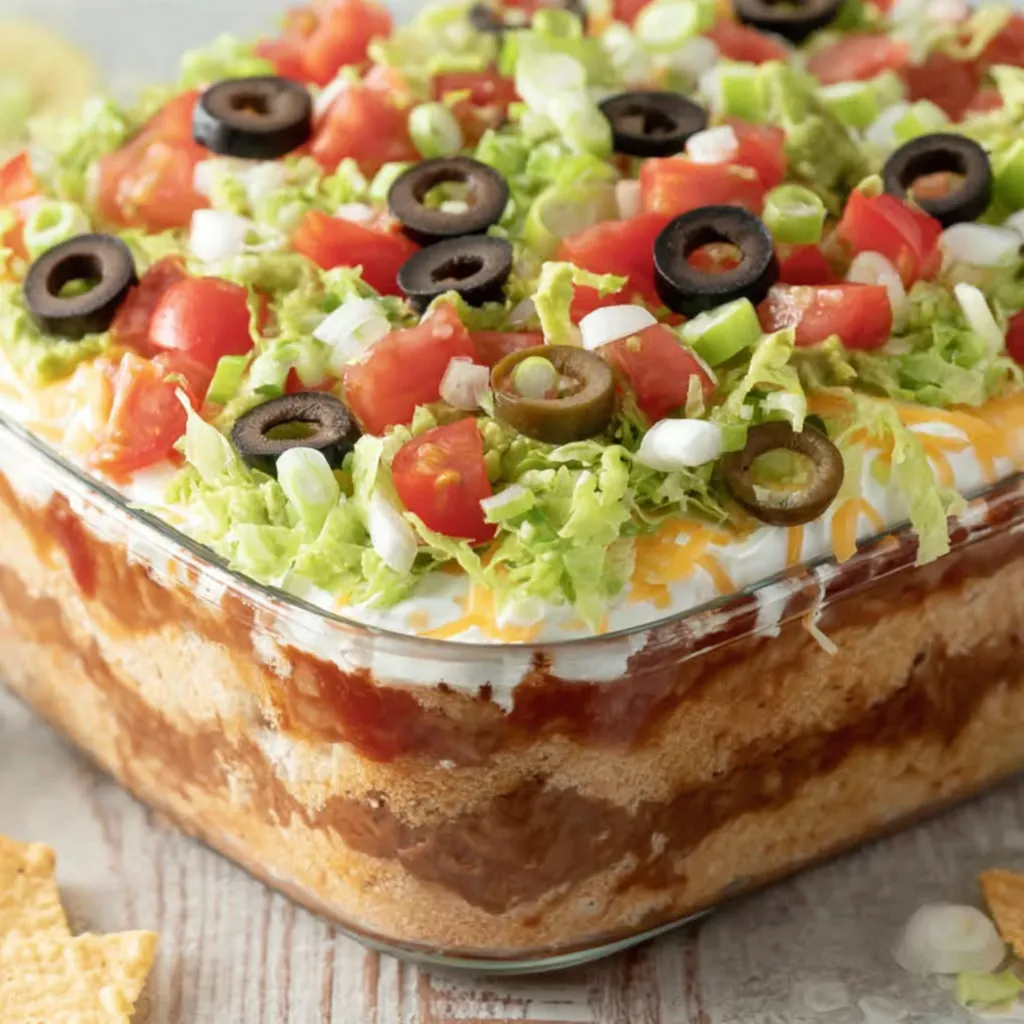
A crowd-pleasing layered dip with refried beans, guacamole, sour cream seasoned with taco mix, salsa, cheese, lettuce, olives, tomatoes and green onions — perfect for game day or potlucks.
This seven-layer dip has been my go-to party starter for years. I first put these layers together on a hot summer afternoon when guests arrived earlier than expected, and the pantry supplies I grabbed turned into a show-stopping tray of color and flavor. Texturally it balances creamy refried beans and guacamole with bright, juicy tomatoes and crisp lettuce; the mild salsa adds acidity while the seasoned sour cream ties everything together with a familiar taco-inspired zip. It’s the kind of dish that disappears quickly — kids love the cheesy top, and adults reach for more chips because each spoonful delivers a complete bite.
I keep a mental checklist of brands and little tricks that make this simple assembly taste unmistakably homemade. The recipe below uses two 16-ounce cans of refried beans (I like Old El Paso), a store-bought mild guacamole to save time, and a 16-ounce jar of chunky Pace salsa because of its texture after draining. Over the years I learned how to prevent watery layers, how long to chill so flavors marry, and which utensils give the cleanest layers when serving. This version reliably serves a crowd and is endlessly adaptable for dietary needs or seasonal produce swaps.
My family always asks for this on game day. Once I switched to draining the salsa through a mesh strainer it solved the problem of a soggy top layer — a small change with a big payoff. We often serve this with a mix of sturdy restaurant-style tortilla chips and sliced vegetables for variety.

I love how this dish always sparks nostalgia at family gatherings — my uncle claimed it on every Super Bowl table. The layered colors mean guests can pick their favorite part, and the combination of textures keeps people coming back. Small technique changes like draining salsa have been game-changers in my versions.
Store leftovers covered tightly in the refrigerator for up to 3 days. Because the lettuce and tomatoes soften over time, if you plan to make the tray more than 12 hours ahead, store the lettuce, tomatoes, and green onions separately and add them just before serving. Use an airtight container or press plastic wrap directly onto the cheese layer to limit air exposure. To serve again, bring the dish to the counter for 10–15 minutes to take the chill off — do not microwave, as that will wilt the lettuce and melt the cheese unevenly.

For dairy-free/dairy-sensitive guests, replace sour cream with full-fat coconut yogurt or a dairy-free sour cream alternative and swap fiesta cheese for a plant-based shredded cheese. To make it spicier, choose medium or hot salsa and use a spicy taco seasoning packet. If you want a fresher, lighter version, use black beans mashed with lime instead of refried beans — mix 2 cups cooked black beans with 1 tablespoon olive oil and a pinch of salt for a chunkier base.
Serve with sturdy, wide tortilla chips for easy scooping and a platter of sliced veggies for lighter options. For a party, place small bowls of extra salsa, cilantro, and lime wedges alongside. Pair the tray with margaritas or a light Mexican lager. Garnish with additional cilantro or a drizzle of hot sauce for those who like heat. For a festive garnish, add a ring of jalapeño slices around the edge.
This layered dip is rooted in Tex-Mex party cuisine that evolved in the United States, blending Mexican ingredients like beans, salsa, and cheese with American party traditions. The concept of layered shared dishes became popular in the mid-20th century as potlucks and televised sports events rose in prominence. Over time, regional tweaks have produced spicy, vegetarian, and internationally inspired variations.
In summer, swap roma tomatoes for sun-ripened heirloom tomatoes and add corn kernels for sweetness. In winter, use canned roasted green chilies and substitute the lettuce with shredded cabbage for longer storage life. Holiday adaptations can include a red-and-green garnish theme: use diced red peppers and chopped green bell peppers as additional toppers for festive flair.
Assemble layers up to 24 hours ahead but add the lettuce, tomatoes, and green onions just before serving to retain crispness. Pack individual portions in small airtight containers for grab-and-go party refills. Use a pastry bag to pipe the sour cream mixture for a neater, more professional layer if presentation matters. Keep a small jar of drained salsa on the side to spoon over individual servings for extra moisture if needed.
Whether you make this for a crowd or a casual family snack, the layered simplicity and reliable flavor make it a keeper. Tweak the heat, dairy content, and toppings to match your guests, and enjoy the way a simple tray becomes the centerpiece of a gathering.
Drain salsa and olives thoroughly to prevent watery layers.
Pat tomatoes dry with paper towels before adding to the tray.
Press plastic wrap directly onto the cheese layer to reduce air exposure during refrigeration.
Warm refried beans slightly so they spread smoothly without tearing the pan.
This nourishing classic 7-layer dip recipe is sure to be a staple in your kitchen. Enjoy every moist, high protein slice — it is perfect for breakfast or as a wholesome snack any time.
Yes — assemble up to 24 hours in advance, but add lettuce and tomatoes right before serving for best texture.
Drain the salsa well and pat tomatoes dry to prevent sogginess. Use full-fat sour cream for best texture.
This Classic 7-Layer Dip recipe makes perfectly juicy, tender, and flavorful steak every time! Serve with potatoes and a side salad for an unforgettable dinner in under 30 minutes.
Combine both cans of refried beans with 3 tablespoons water in a small bowl and stir until smooth. Warm briefly if needed to ease spreading.
Use a silicone or offset spatula to evenly press the beans into the bottom of a 9x13-inch baking dish creating a uniform base.
Dollop 1½ cups premade guacamole over the beans and gently spread to the edges without mixing the layers.
Whisk 2 cups sour cream with the 1-ounce taco seasoning packet until smooth, then spread over the guacamole.
Drain the 16-ounce salsa through a fine mesh strainer, spoon over the sour cream, and smooth into an even layer.
Sprinkle 2 cups shredded fiesta cheese, 2 cups shredded lettuce, drained olives, chopped tomatoes, and sliced green onions. Cover and chill 1 hour before serving.
Last Step: Please leave a rating and comment letting us know how you liked this recipe! This helps our business to thrive and continue providing free, high-quality recipes for you.
Leave a comment & rating below or tag
@royalmorsel on social media!

Juicy beef, sweet-charred peppers, and a silky queso drizzle turn these sliders into the ultimate crowd-pleasing bite for game day or weeknight fun.

Melt-in-your-mouth braised short ribs nestled over creamy garlic mashed potatoes, all in a rich, herb-scented sauce that feels like a warm hug.

Golden, garlicky pull-apart loaf swaddled in buttery herbs and stretchy mozzarella that begs to be shared warm from the oven.
Leave a comment & rating below or tag @royalmorsel on social media!
Enjoyed this recipe? Share it with friends and family, and don't forget to leave a review!
This recipe looks amazing! Can't wait to try it.
Comments are stored locally in your browser. Server comments are displayed alongside your local comments.

Join to receive our email series which contains a round-up of some of our quick and easy family favorite recipes.
