
>>

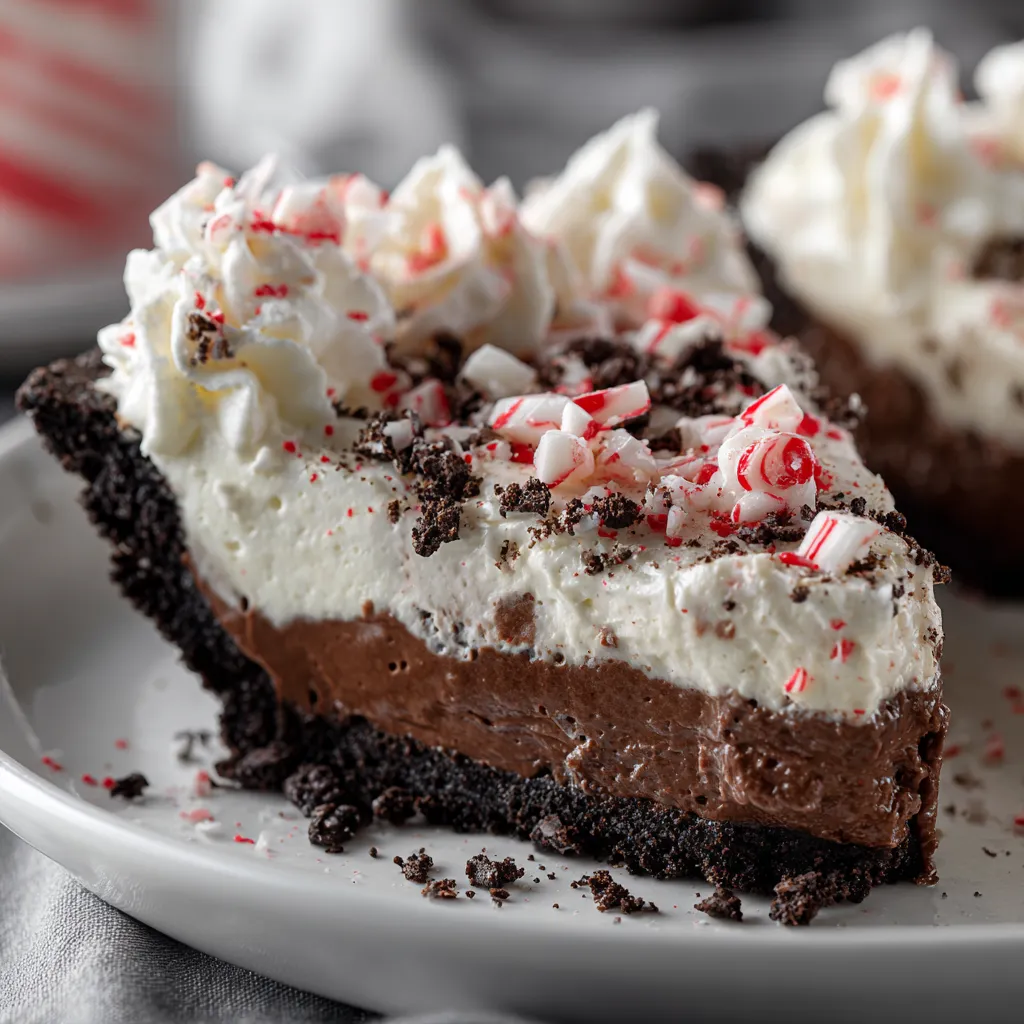
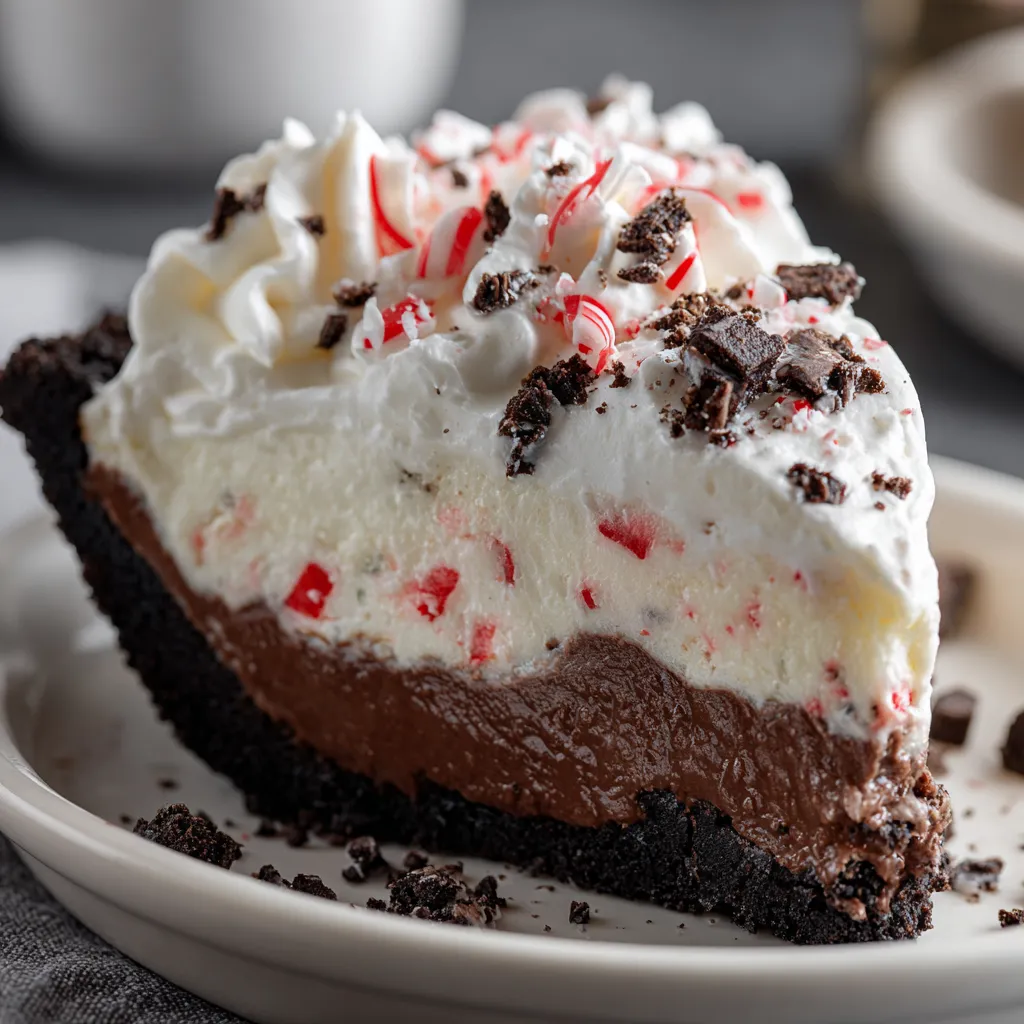
Silky peppermint cream nestled in a chocolate cookie crust, topped with whipped clouds and crushed candy canes. Festive, no-bake, and irresistibly minty.

Every time I bring this pie to a cookie exchange or tree-trimming night, the serving platter ends up spotless. My kids love the candy cane crunch on top, and the adults appreciate that it is not overly sweet. The make-ahead chill time has saved me on busy holiday weekends more than once. It is a reliable, festive finisher that always earns recipe requests.
The best part of this pie is the texture contrast, that crisp buttery chocolate crust against the cloud-like peppermint filling. I remember serving it after a long day of decorating and watching everyone pause mid-conversation for the first cool, minty bite. It is simple to make but feels special, the kind of dessert that lets you relax and enjoy your guests instead of hovering over the oven. When the candy cane crunch gives way to that silky interior, the whole table goes quiet for a moment in the best possible way.
Store the pie covered in the refrigerator for up to 3 days. A domed cake carrier or an inverted bowl works well to avoid smearing the topping. If making ahead, hold the whipped cream and candy cane garnish until just before serving to preserve the texture and color. The crust will gradually soften from the creamy filling, but it still slices nicely on day two. For longer storage, freeze the pie without the whipped topping, double-wrapped in plastic and foil, for up to 1 month. Thaw overnight in the refrigerator, then finish with whipped cream and garnishes before serving.
No Oreos? Use 2 1/4 cups chocolate wafer crumbs or chocolate graham cracker crumbs with the same 5 tablespoons melted butter. For a deeper chocolate note, stir 1 tablespoon unsweetened cocoa into the crumbs. If you need a mintier punch, add up to 1/4 teaspoon more peppermint extract, tasting as you go. Swap the cream cheese for neufchâtel for a slightly lighter texture, or use mascarpone for an ultra-silky, mellow profile. If red gel food coloring is unavailable, skip it or use a drop of liquid coloring; do not overdo it or the filling may loosen. Dairy-free alternatives will change the texture dramatically, so for best results stick with full-fat dairy in this version.
Serve chilled slices with hot coffee, peppermint tea, or a small pour of chocolate liqueur for the adults. For a dessert board, pair slices with shortbread, chocolate crinkle cookies, and fresh berries. Garnish each plate with a drizzle of chocolate sauce or a light snowfall of powdered sugar for a festive finish. If you are hosting a buffet, pre-slice the pie and tuck parchment between slices so guests can serve themselves neatly. A few fresh mint leaves make a simple, pretty garnish that hints at the flavor within.
This pie borrows from classic American no-bake desserts and the beloved holiday duo of chocolate and peppermint. Think grasshopper pie’s airy texture but with peppermint instead of crème de menthe, and the nostalgic pull of peppermint bark reimagined in pie form. Oreo crusts have anchored countless potluck pies since mid-century cookbooks popularized quick refrigerator desserts. This version keeps that spirit of simplicity while feeling dressed for the season with candy cane sparkle and chocolate curls, the kind of treat that fits right in alongside decorated cookies and spiced cakes.
For autumn gatherings, swap peppermint for 1 1/2 teaspoons vanilla extract and fold in a handful of chopped toffee; top with caramel drizzle. Springtime calls for a lemon twist: use 1 teaspoon lemon extract and 1 teaspoon finely grated lemon zest, then garnish with berries. For summer, mini pies in a muffin tin set quickly and travel well to picnics. During the holidays, add a thin layer of chocolate ganache to the crust before filling for extra sparkle and a firmer base, letting it set briefly in the fridge so it does not blend into the filling.
Make the crust and filling up to 24 hours ahead and chill uncovered for the first hour to firm the surface, then cover. Keep the whipped topping and garnishes separate until serving so everything stays fresh and crisp. For parties, assemble two pies at once; the mixing bowls are already out, and both fit easily in the refrigerator. To transport, chill thoroughly and place the pie in a carrier with ice packs underneath. Slice with a warm knife and wipe clean between cuts for pristine wedges worthy of a dessert table.
There is a special kind of joy in bringing a chilled, minty pie to the table and watching everyone lean in. Keep this one in your back pocket for busy weeks, festive weekends, and every moment that calls for a cool, chocolatey encore.
This Chocolate Peppermint Cream Pie recipe makes perfectly juicy, tender, and flavorful steak every time! Serve with potatoes and a side salad for an unforgettable dinner in under 30 minutes.
Combine crushed Oreos and melted butter until evenly moistened. Press firmly into a 9-inch pie dish, covering bottom and sides. Chill for 15 minutes to set.
Beat cold heavy cream to stiff peaks and refrigerate. Peaks should stand tall and glossy without drooping.
Beat softened cream cheese until smooth. Add powdered sugar and peppermint extract, then mix until fluffy. Blend in gel food coloring if using.
Gently fold whipped cream into the peppermint base until uniform and airy. Spread into chilled crust and smooth the top.
Refrigerate for at least 4 hours, preferably overnight, until firm enough to slice cleanly.
Top with whipped cream, crushed candy canes, and chocolate curls or mini chips just before serving.
Last Step: Please leave a rating and comment letting us know how you liked this recipe! This helps our business to thrive and continue providing free, high-quality recipes for you.
Leave a comment & rating below or tag
@royalmorsel on social media!

Juicy beef, sweet-charred peppers, and a silky queso drizzle turn these sliders into the ultimate crowd-pleasing bite for game day or weeknight fun.

Melt-in-your-mouth braised short ribs nestled over creamy garlic mashed potatoes, all in a rich, herb-scented sauce that feels like a warm hug.

Golden, garlicky pull-apart loaf swaddled in buttery herbs and stretchy mozzarella that begs to be shared warm from the oven.
Leave a comment & rating below or tag @royalmorsel on social media!
Enjoyed this recipe? Share it with friends and family, and don't forget to leave a review!
This recipe looks amazing! Can't wait to try it.
Comments are stored locally in your browser. Server comments are displayed alongside your local comments.

Join to receive our email series which contains a round-up of some of our quick and easy family favorite recipes.
