
>>

Golden seared chicken tossed with fragrant garlic and Italian seasoning, rolled into tortillas with melty cheddar for an easy weeknight favorite.
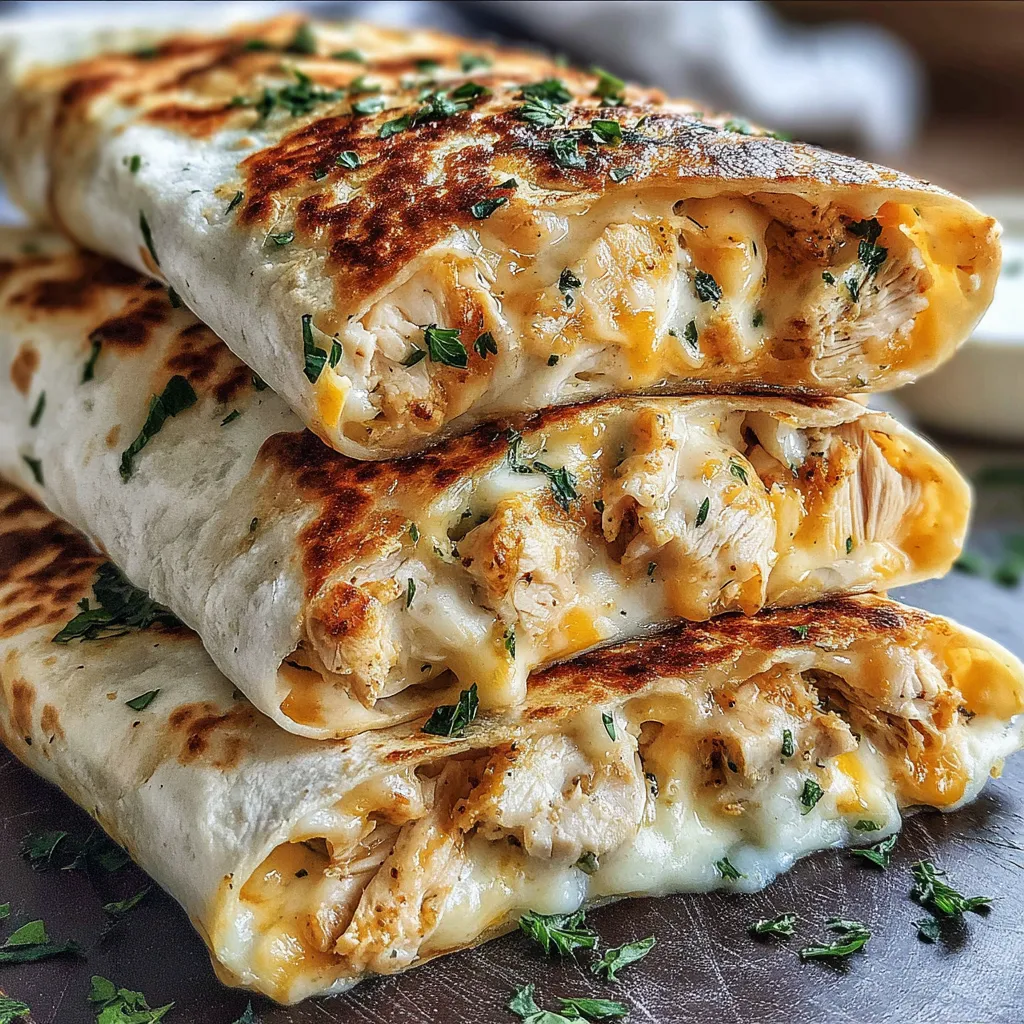
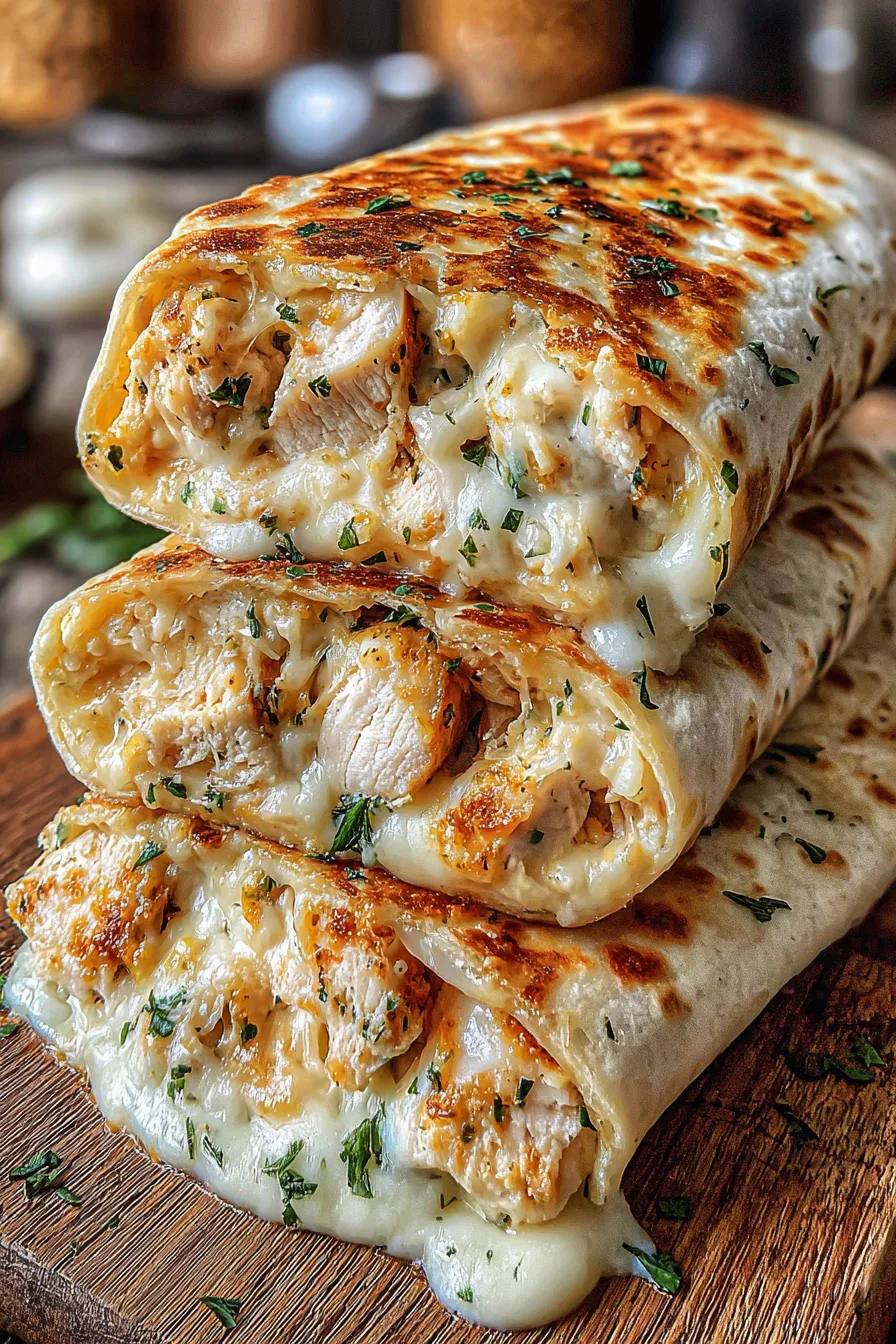
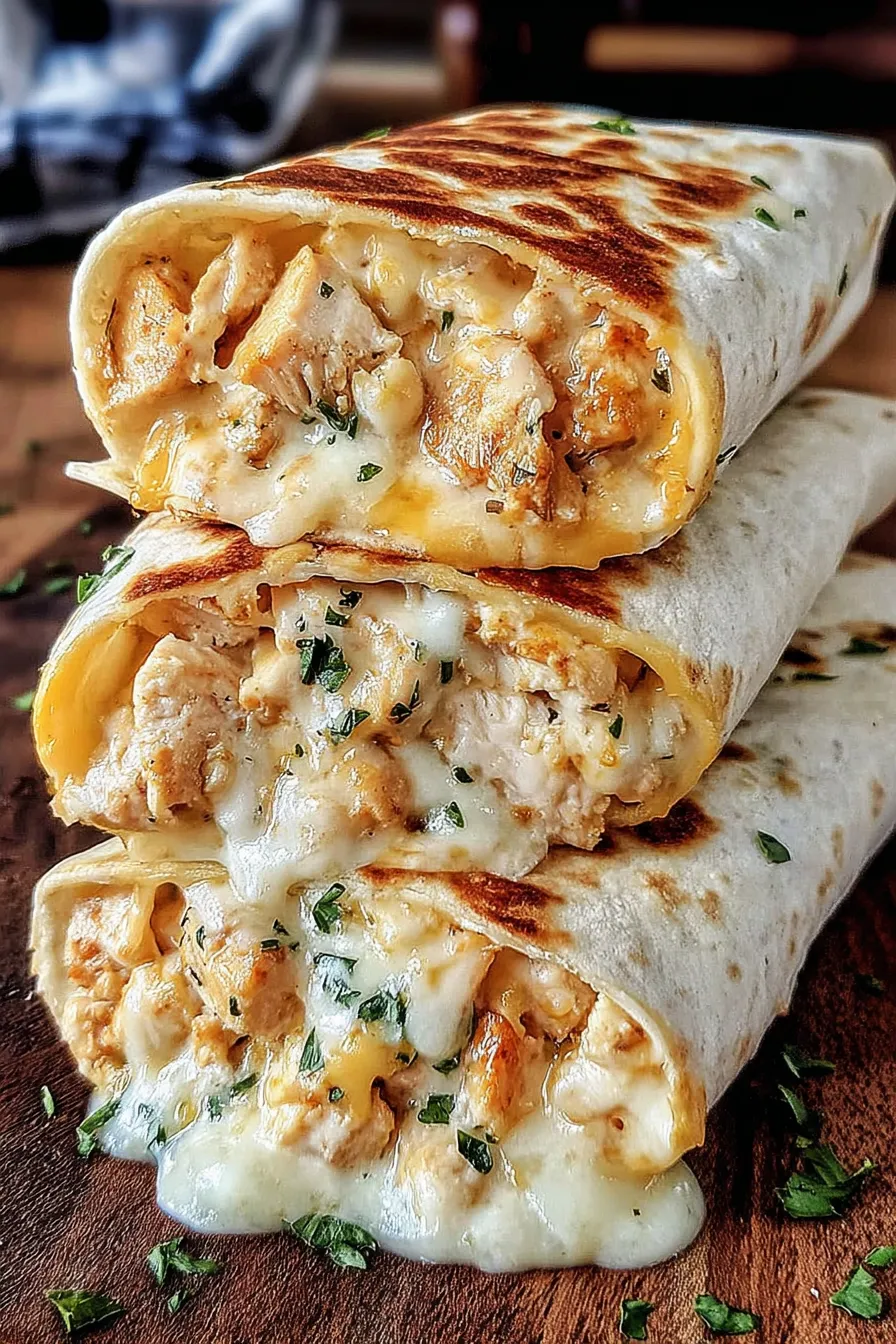
This cheesy garlic chicken wrap has been one of those weeknight heroes in my kitchen ever since I first cobbled it together on a rainy Thursday. I had three chicken breasts in the fridge and a craving for something warm, cheesy, and handheld. The combination of quickly seared chicken, a punch of fresh garlic, and heaps of mild cheddar tucked into large flour tortillas hit every comfort-food note. It’s simple enough for a busy evening yet satisfying enough that my family asks for it again and again.
I discovered the best method for this dish after a few experiments: sear the chicken to develop a golden crust, let it rest so the juices redistribute, then shred it and warm it back through with garlic so every bite is fragrant. Rolling and baking the wraps gives the tortillas a gentle crisp and ensures the cheese melts uniformly. The texture is a lovely contrast—tender poultry, gooey cheese, and a toasty outer shell—and it’s become my go-to for casual dinners, potlucks, and when friends drop by unexpectedly.
In my house these wraps are the unofficial “easy dinner” that arrives whenever schedules collide. I once brought a tray to a late-night study session and it disappeared within minutes—proof that crisped tortillas and warm cheddar are universally beloved.
My favorite thing about these wraps is how adaptable they are. Once, short on tortillas, I served the filling over a bed of greens with warm shredded cheddar on top and it felt like a brand-new dish. The garlic and Italian seasoning are the anchors; everything else is negotiable.
Cool the wraps to room temperature before refrigerating to avoid excess condensation. Store in an airtight container or wrap individually in foil for up to 3 days. For freezing, wrap tightly in plastic wrap and then foil to prevent freezer burn; defrost in the refrigerator overnight and reheat at 350°F for 10–15 minutes until piping hot. When reheating from frozen, add a few minutes and loosely cover with foil to keep the tortilla from over-browning before the center warms through.
Swap cheddar for Monterey Jack or shredded mozzarella for a milder melt. Use cooked rotisserie chicken instead of searing breasts to save time—shred and toss with warmed garlic just the same. For a gluten-free option, choose certified gluten-free tortillas or lettuce leaves; note that lettuce will change the texture and make it more of a wrap salad. To reduce sodium, skip added salt on the chicken and rely on a lower-sodium cheese.
Serve the wraps with a crisp side salad, pickled vegetables, or a light slaw to cut through the richness. For dipping, offer salsa, ranch, or a simple yogurt-chive sauce. These are perfect for casual dinners, packed lunches, or game-day platters—slice into halves and arrange on a board with fresh herbs and a bowl of salsa for sharing.
Handheld wraps have a global history of turning leftovers into portable meals, and this version blends American comfort flavors—cheddar and pan-seared chicken—with a straightforward assembly method. While not tied to a specific regional tradition, the approach reflects classic home-cooking values: efficient, tasty, and adaptable using pantry staples and simple techniques.
In spring and summer, add thinly sliced cucumbers, cherry tomatoes, or a handful of fresh herbs for brightness. In cooler months, fold in roasted vegetables like bell peppers or caramelized onions and swap cheddar for a sharp aged variety for deeper flavor. For holiday gatherings, offer a platter of variations—some with cranberry salsa or a smear of cranberry chutney for a festive twist.
Cook and shred the chicken up to two days ahead and store in the refrigerator. Keep cheese in a separate container and assemble the wraps the night before; cover tightly and bake on the day you plan to eat. If assembling for lunches, bake first, cool, and wrap individually—this makes them easy to reheat quickly at work or school.
These wraps are an invitation to make the recipe your own. Whether you stick to the simple trio of garlic, chicken, and cheddar or build on it with sauces and veggies, the technique stays the same and reliably produces comforting results. Gather your tortillas and a warm skillet, and you’ll have a satisfying meal in under an hour.
Pat chicken dry before searing to achieve a golden crust and better flavor development.
Let chicken rest for at least 5 minutes after cooking to keep it juicy when shredded.
Shred cheese from a block when possible; it melts more evenly than pre-shredded varieties.
Warm tortillas briefly in the microwave or on a dry skillet to make rolling easier and prevent tearing.
This nourishing cheesy garlic chicken wraps recipe is sure to be a staple in your kitchen. Enjoy every moist, high protein slice — it is perfect for breakfast or as a wholesome snack any time.
Yes. Fully cooked wraps can be frozen for up to 2 months. Wrap tightly in plastic and foil. Reheat in a 350°F oven until warmed through.
Use a meat thermometer and ensure the thickest part of the chicken reads 165°F before removing from the skillet.
This Cheesy Garlic Chicken Wraps recipe makes perfectly juicy, tender, and flavorful steak every time! Serve with potatoes and a side salad for an unforgettable dinner in under 30 minutes.
Preheat oven to 400°F (200°C). Lightly grease a baking dish with nonstick spray or a thin oil coating so wraps do not stick during baking.
Pat chicken dry, season with salt and pepper. Heat 2 tablespoons olive oil in a skillet over medium. Sear chicken 5–7 minutes per side until golden and internal temperature reaches 165°F (74°C).
Transfer cooked chicken to a cutting board and let rest 5 minutes. Shred with two forks or slice thinly for even filling texture.
Sauté minced garlic in the skillet over medium-low for about 1 minute until fragrant. Return shredded chicken to the pan, add 1 teaspoon Italian seasoning, and toss to warm and distribute flavors.
Divide the chicken among tortillas, top each with about 1/2 cup shredded cheddar, fold sides in and roll tightly with seam underneath to seal.
Place wraps seam-side down in the baking dish and bake 10–15 minutes until heated through and cheese melts. For extra crispness, broil 1–2 minutes watching carefully.
Last Step: Please leave a rating and comment letting us know how you liked this recipe! This helps our business to thrive and continue providing free, high-quality recipes for you.
Leave a comment & rating below or tag
@royalmorsel on social media!

Juicy beef, sweet-charred peppers, and a silky queso drizzle turn these sliders into the ultimate crowd-pleasing bite for game day or weeknight fun.

Melt-in-your-mouth braised short ribs nestled over creamy garlic mashed potatoes, all in a rich, herb-scented sauce that feels like a warm hug.

Golden, garlicky pull-apart loaf swaddled in buttery herbs and stretchy mozzarella that begs to be shared warm from the oven.
Leave a comment & rating below or tag @royalmorsel on social media!
Enjoyed this recipe? Share it with friends and family, and don't forget to leave a review!
This recipe looks amazing! Can't wait to try it.
Comments are stored locally in your browser. Server comments are displayed alongside your local comments.

Join to receive our email series which contains a round-up of some of our quick and easy family favorite recipes.
