
Cheesecake-Stuffed Apple Hand Pies

Crisp, golden hand pies filled with warm cinnamon apples and a sweet cream cheese center — a perfect portable dessert for gatherings and cozy nights.
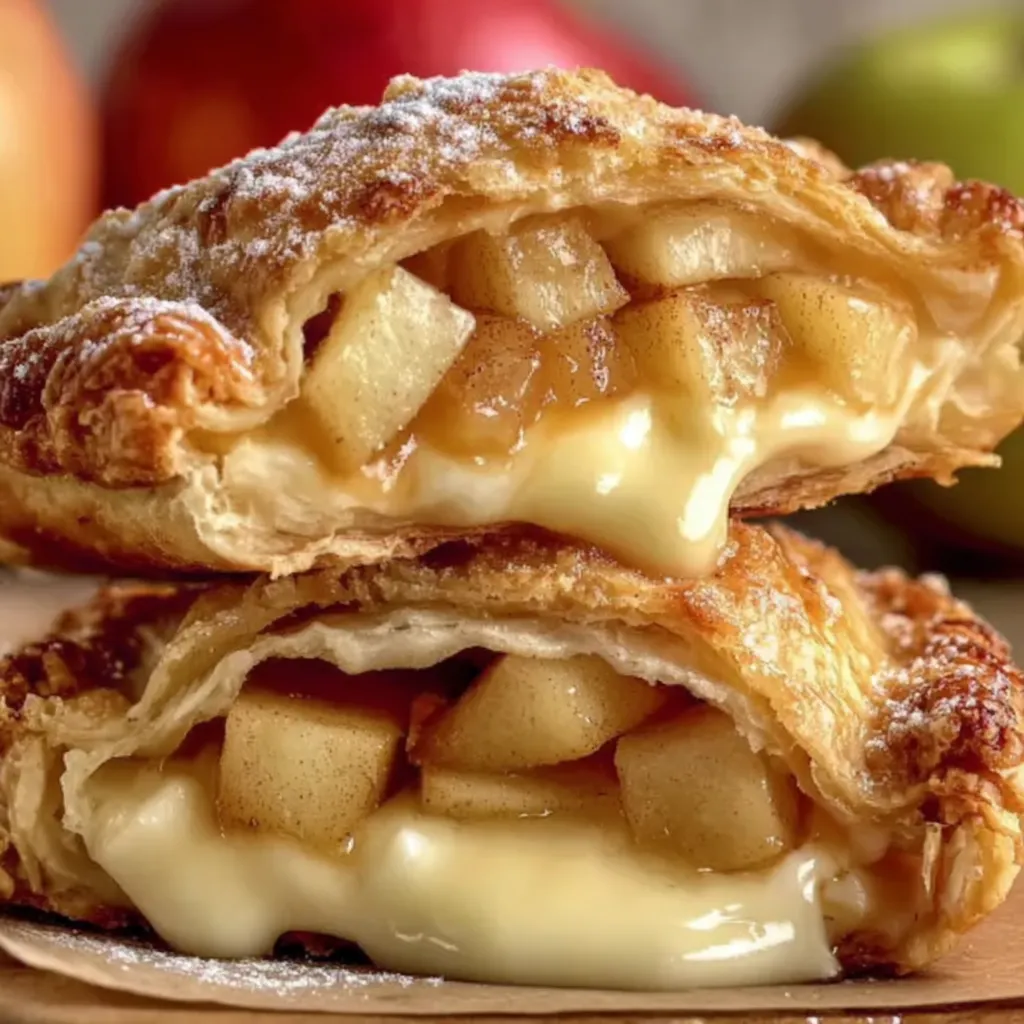
This little handheld treat became a favorite during a rainy weekend when I wanted something comforting but portable. I first combined caramelized apples with a creamy sweet cheese filling while experimenting with empanada wrappers one autumn; the result was a beautiful contrast of hot spiced fruit and cool, tangy cream cheese inside a golden crust. The texture is irresistible — tender apple pieces softened but still with a gentle bite, and a cheesecake-like center that melts into the pastry. These pies have since shown up at bake sales, neighborhood potlucks, and weekday dessert rotations.
What makes these special is the balance of temperatures and textures. The apple filling cooks down to a glossy, slightly thickened compote while the cream cheese mixture keeps its velvety body even after a brief fry. I prefer Honeycrisp for their fruity sweetness or Granny Smith for a brighter edge; both hold shape when cooked. Every bite brings a nostalgic, pie-shop quality — perfect with a drizzle of caramel or a dusting of sugar. These hand pies are quick enough for a weeknight treat and festive enough for holidays.
Why You'll Love This Recipe
- Ready in about 35 minutes from start to finish: quick caramelized filling, a simple cheesecake center, and a fast-fry finish for golden, crisp pockets.
- Uses pantry and fridge staples: cream cheese, sugar, cinnamon, a little cornstarch, and store-bought dough or wrappers — no complicated pastry work.
- Portable and crowd-pleasing: hand-held format makes them ideal for gatherings, school lunches, or picnics; they reheat beautifully in a toaster oven.
- Make-ahead friendly: apple filling and cheesecake mixture can be prepared a day ahead and assembled later to save time.
- Customizable: swap apples for pear, add toasted nuts, or use baked (not fried) method for a lighter version.
My family’s reaction the first time I served these was telling: everyone reached for seconds before I’d even cleared the plating. Over the years I’ve fine-tuned the apple cooking time and the cornstarch amount so the filling won’t run, and I’ve learned small tips—like chilling the cream cheese filling briefly so it holds up during frying—that reliably elevate the final result.
Ingredients
- Apples (2 medium): Use firm varieties such as Honeycrisp for a sweet, aromatic finish or Granny Smith for bright acidity. Peel and cut into roughly 1/2-inch chunks so they soften without turning to mush.
- Melted butter (2 tablespoons): Adds richness and helps the brown sugar caramelize; use unsalted so you control the seasoning.
- Light brown sugar (2 tablespoons): Provides molasses notes that deepen the apple flavor and help create a glossy sauce.
- Ground cinnamon (1/2 teaspoon) and nutmeg (a pinch, optional): Classic warming spices; freshly ground nutmeg will make a subtle difference if you have it.
- Cornstarch slurry (1 teaspoon cornstarch + 1 tablespoon water): Thickens the apple juices so the filling is saucy but not runny when enclosed in dough.
- Cream cheese (4 ounces, room temperature): Full-fat gives the best texture and flavor for the cheesecake center; let it come to room temperature to avoid lumps.
- White granulated sugar (2 tablespoons): Sweetens the cream cheese without overpowering the apples; adjust slightly to taste.
- Vanilla extract (1/2 teaspoon): Adds depth to the cream cheese filling and bridges the fruit and dairy flavors.
- Store-bought pie crusts, biscuit dough, or empanada wrappers (1 package): Any of these work — pie crust gives a flakier finish while empanada wrappers are thinner and crisp quickly. Choose your preferred texture.
- Neutral frying oil (enough for 1–2 inches depth): Vegetable, canola, or peanut oil at 350°F (175°C) crisps the exterior without imparting flavor.
- Cinnamon-sugar coating (1/4 cup sugar + 1 teaspoon cinnamon): Mix while pies are hot so the coating adheres beautifully to the pastry.
- Optional toppings: Warm caramel sauce, powdered sugar, or a sprinkle of flaky sea salt for contrast.
Instructions
Prepare the Apple Filling: Melt 2 tablespoons of butter in a small saucepan over medium heat. Add 2 chopped apples (about 2 medium), 2 tablespoons light brown sugar, 1/2 teaspoon ground cinnamon, and a small pinch of nutmeg if using. Cook for about 5–7 minutes, stirring occasionally, until the apples start to soften but still hold shape. Stir in the cornstarch slurry (1 teaspoon cornstarch mixed with 1 tablespoon water) and cook 1–2 more minutes until the juices thicken and become glossy. Remove from heat and let cool to room temperature; overly hot filling will melt the cream cheese filling and make sealing messy. Make the Cheesecake Center: Place 4 ounces of room-temperature cream cheese in a bowl with 2 tablespoons granulated sugar and 1/2 teaspoon vanilla extract. Beat with a spatula or small whisk until completely smooth and free of lumps, about 1–2 minutes. Chill in the refrigerator for 10–15 minutes to firm up slightly — this helps the filling hold a soft shape during frying. Roll and Portion the Dough: Unroll your store-bought dough or lay out wrappers on a lightly floured surface. Cut or stretch into circles about 4–5 inches across. Keep the unused dough covered so it doesn’t dry out. Work quickly so the dough remains pliable and seals easily. Assemble the Pockets: Place a spoonful (about 1 tablespoon) of the chilled cream cheese mixture in the center of each circle, then top with roughly 1–1 1/2 tablespoons of the cooled apple filling. Do not overfill — leave a 1/2-inch rim for sealing. Lightly brush the rim with water or a beaten egg to help adhesion. Fold the dough to form a half-moon and press the edges with a fork to seal. If desired, crimp the edge decoratively. If any filling leaks, wipe it away and reseal to prevent oil splatter. Chill Briefly: For a cleaner fry, place assembled pockets on a baking sheet and chill in the refrigerator for 10 minutes; this firms the dough and cream cheese, reducing the chance of the filling oozing during frying. Fry Until Golden: Heat 1–2 inches of neutral oil in a deep skillet to 350°F (175°C). Use a thermometer to maintain temperature. Fry pies in batches, flipping after about 2–3 minutes, until both sides are evenly golden brown and crisp, about 4–6 minutes total per pie. Avoid overcrowding the pan which drops oil temperature. Transfer to paper towels to drain. Coat and Serve: While still warm, roll each pie in the cinnamon-sugar mixture (1/4 cup sugar mixed with 1 teaspoon cinnamon) so it adheres to the hot surface. Serve warm with optional caramel drizzle or powdered sugar. If storing, allow to cool completely before sealing in an airtight container.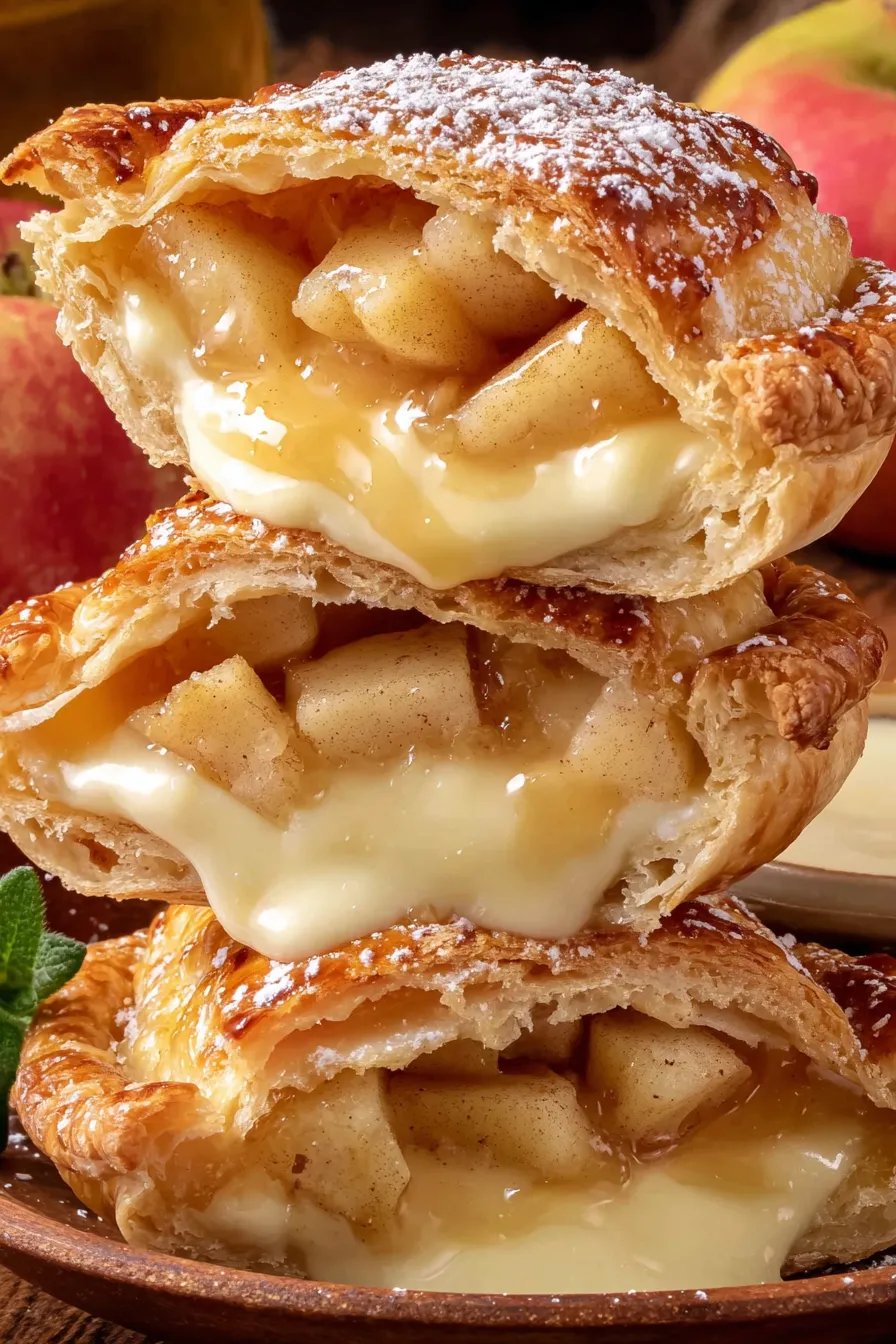
You Must Know
- These pockets are high in dairy and gluten; they are not suitable for those with allergies to either ingredient unless adapted.
- They freeze well: place uncooked sealed pies on a tray to flash-freeze, then transfer to a sealed bag for up to 3 months; fry from frozen and add a minute or two to cooking time.
- Maintain oil temperature at 350°F (175°C) for an even, non-greasy finish; a kitchen thermometer is invaluable here.
- Because the filling is slightly saucy, sealing and chilling help prevent leaks — don’t skip the brief chill.
What I love most about these is how they always evoke cozy memories — the smell of apples and cinnamon fills the house, and the fried pastry gives them the indulgent warmth of a fair treat. A small adjustment in technique (chilling the assembled pies) transformed them from messy to perfect, and now they are a staple whenever apples are in season or when friends drop by unexpectedly.
Storage Tips
Store cooled pies in an airtight container at room temperature for up to 24 hours; beyond that, refrigerate for up to 3 days. For longer storage, freeze un-fried sealed pies on a baking sheet until solid, then transfer to a freezer bag for up to 3 months. To reheat fried pies, warm them in a 350°F (175°C) oven or toaster oven for 8–10 minutes to re-crisp the pastry. Avoid microwaving, which will make the crust soggy.
Ingredient Substitutions
If you prefer a baked version, brush the assembled pies with an egg wash and bake at 375°F (190°C) for 15–20 minutes until golden. Swap cream cheese for mascarpone for a milder, silkier center, or use ricotta blended with a tablespoon of sugar for a grainier, lighter variation. For a gluten-free version, use certified gluten-free pastry or wrappers; expect a slightly different texture. Replace white sugar with coconut sugar for a deeper, caramel note, but color will be darker.
Serving Suggestions
Serve warm with a drizzle of salted caramel, a scoop of vanilla ice cream, or a simple dusting of powdered sugar. Pair with coffee or a chai latte for autumn mornings, or offer alongside mulled cider at holiday gatherings. Garnish with a few toasted pecans and a light pinch of flaky sea salt to elevate the sweetness with crunchy texture and contrast.
Cultural Background
Hand pies are a global comfort food — from British pasties to Latin American empanadas — and stuffing them with sweet fillings is a natural evolution. Combining apples and cream cheese creates a hybrid of classic American apple pie and New York–style cheesecake, a union of two beloved traditions that yields something playful and portable. Fried versions evoke state-fair treats, while baked ones nod to home-baked turnovers.
Seasonal Adaptations
In autumn, use spiced apple varieties and add a pinch of ground cloves; in winter, incorporate pear or cranberry for brightness. During summer, swap apples for peaches or berries and reduce cooking time for juicier fruit. For holiday parties, fold in 1 tablespoon of bourbon into the apple filling for warmth and boozy depth, or sprinkle the finished pies with edible gold dust for festive sparkle.
Meal Prep Tips
Prepare the apple filling and cheesecake mixture a day ahead and refrigerate in separate airtight containers. Assemble pies the day you plan to serve for best texture. If you’re feeding a crowd, flash-freeze assembled pies on trays, then fry or bake from frozen in batches. Use parchment-lined baking sheets for easy cleanup, and keep an oven at low temperature (200°F/95°C) to hold finished pies warm without overcooking.
These cheesecake-stuffed apple hand pies are a small indulgence that bring big smiles. With a few smart steps—controlling oil temperature, chilling fillings, and using the right apples—you’ll get consistent results every time. Enjoy the process, and don’t be surprised if they become your new seasonal favorite.
Pro Tips
Chill assembled pockets for 10 minutes before frying to reduce filling leakage.
Use a thermometer to maintain oil at 350°F (175°C) for a crisp, non-greasy finish.
Flash-freeze uncooked pies before transferring to freezer bags to prevent sticking.
This nourishing cheesecake-stuffed apple hand pies recipe is sure to be a staple in your kitchen. Enjoy every moist, high protein slice — it is perfect for breakfast or as a wholesome snack any time.
Tags
Cheesecake-Stuffed Apple Hand Pies
This Cheesecake-Stuffed Apple Hand Pies recipe makes perfectly juicy, tender, and flavorful steak every time! Serve with potatoes and a side salad for an unforgettable dinner in under 30 minutes.
Ingredients
Apple filling
Cheesecake filling
Dough and frying
Coating and toppings
Instructions
Prepare the apple filling
Melt butter over medium heat, add apple chunks, brown sugar, cinnamon, and nutmeg; cook 5–7 minutes until softened. Stir in cornstarch slurry and cook 1–2 minutes until thickened. Cool to room temperature.
Make the cheesecake center
Beat room-temperature cream cheese with sugar and vanilla until smooth; chill 10–15 minutes to firm slightly for easier assembly.
Roll and portion the dough
Stretch or cut dough into 4–5 inch circles, keeping unused dough covered to prevent drying. Portion fillings onto each circle without overfilling.
Assemble and seal
Top each dough circle with 1 tablespoon cheesecake mixture and 1–1 1/2 tablespoons apple filling. Moisten edges and fold into a half-moon, crimping with a fork; chill 10 minutes.
Fry until golden
Heat oil to 350°F (175°C) and fry pies in batches for 2–3 minutes per side until evenly golden. Drain on paper towels.
Coat and serve
While still warm, roll pies in cinnamon-sugar mix or drizzle with caramel. Serve warm or reheat in a 350°F oven to re-crisp.
Last Step: Please leave a rating and comment letting us know how you liked this recipe! This helps our business to thrive and continue providing free, high-quality recipes for you.
Nutrition
Did You Make This?
Leave a comment & rating below or tag
@royalmorsel on social media!
Categories:
You might also like...

Cheeseburger Queso Sliders
Juicy beef, sweet-charred peppers, and a silky queso drizzle turn these sliders into the ultimate crowd-pleasing bite for game day or weeknight fun.

Short Ribs with Garlic Mash
Melt-in-your-mouth braised short ribs nestled over creamy garlic mashed potatoes, all in a rich, herb-scented sauce that feels like a warm hug.

Cheesy Garlic Pull-Apart Bread
Golden, garlicky pull-apart loaf swaddled in buttery herbs and stretchy mozzarella that begs to be shared warm from the oven.
Did You Make This?
Leave a comment & rating below or tag @royalmorsel on social media!
Rate This Recipe
Share This Recipe
Enjoyed this recipe? Share it with friends and family, and don't forget to leave a review!
Comments (1)
This recipe looks amazing! Can't wait to try it.
Comments are stored locally in your browser. Server comments are displayed alongside your local comments.

Hi, I'm Emma!
What's Popular

30-Minute Meals!
Join to receive our email series which contains a round-up of some of our quick and easy family favorite recipes.