
Carmelitas

Chewy oat cookie base layered with melty milk chocolate and a ribbon of golden caramel — a nostalgic bar everyone will reach for.
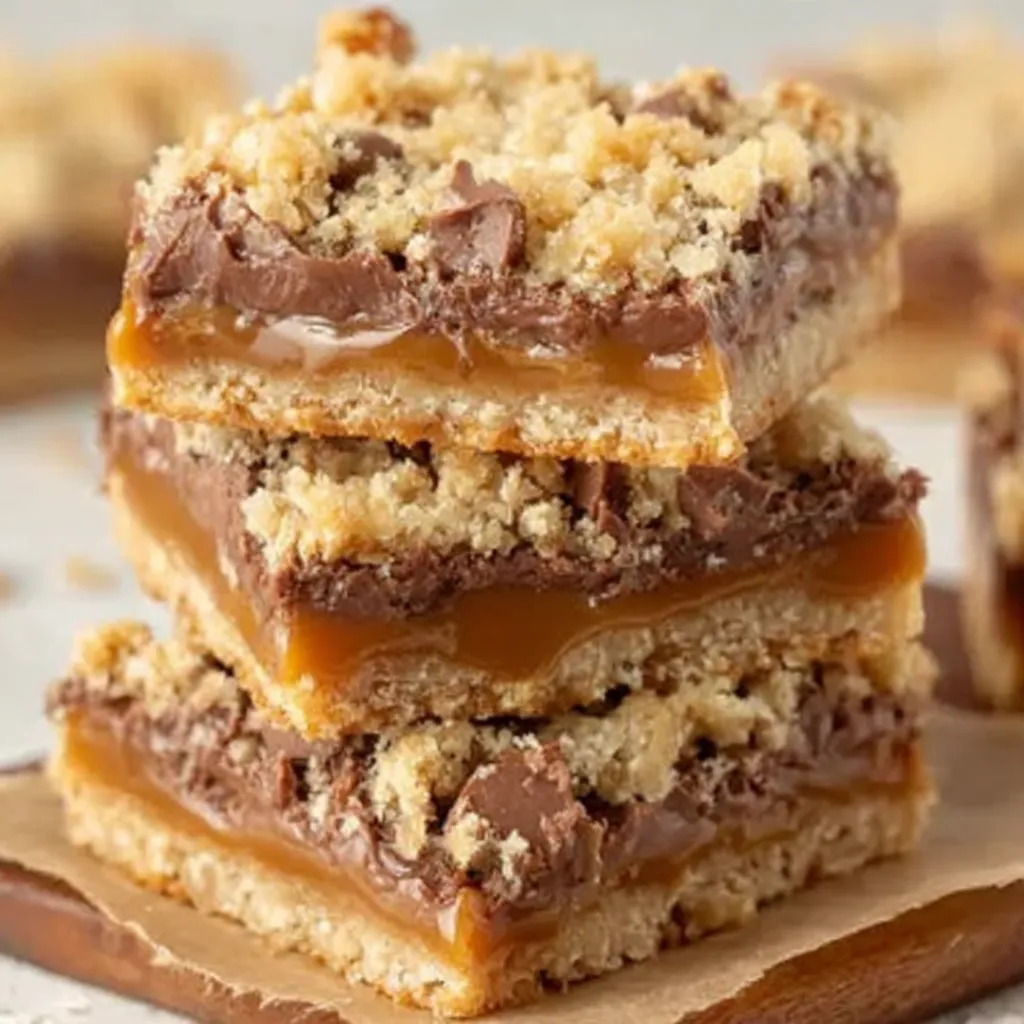
This caramel-topped oat bar has been a weekday pick-me-up and holiday potluck hero in my kitchen for years. I first stumbled on this combination during a lazy Sunday baking session when I wanted something faster than a pie but more special than a cookie. The contrast of a tender, slightly crumbly oat base, a glossy pool of melted chocolate, and a rich caramel ribbon is what makes these carmelitas unforgettable. They slice neatly, travel well, and bring that exact balance of sweet and buttery texture that keeps everyone asking for the recipe.
I make these when I want a simple, comforting treat that feels a little indulgent without a lot of fuss. The method is straightforward: press half the oat cookie mixture into a pan, bake until set, top with chocolate, pour warm caramel over, and finish with the remaining crumbly oat streusel. The first time I brought them to a neighborhood gathering, someone asked for the recipe on the spot and another guest jokingly said they tasted like a childhood memory. That’s the kind of reaction these bars reliably produce.
Why You'll Love This Recipe
- Ready with only about 20 minutes of active hands-on time and a short bake; total time under an hour before chilling, perfect for weeknight baking or last-minute guests.
- Uses pantry staples — rolled oats, all-purpose flour, brown sugar, butter, and a small stash of wrapped caramels — so it’s a great go-to when you haven’t planned ahead.
- Make-ahead friendly: chill completely, slice, then store in an airtight container for several days or freeze for longer storage.
- Crowd-pleasing layers: the oat base gives chewiness and structure, milk chocolate adds creaminess, and the caramel provides a silky, chewy center.
- Flexible: swap the chocolate variety or use salted butter if you prefer a deeper savory balance.
In my kitchen these bars double as a dessert and an afternoon treat with coffee. Family members who claim not to like traditional caramel suddenly become fans, and the bars have survived potlucks, bake sales, and birthday trays without complaint. I love how simple technique — melting caramels with cream and letting gravity do the work — yields such a polished result.
Ingredients
- All-purpose flour: 1 1/2 cups. Use a reputable brand like King Arthur or Gold Medal for consistent texture; spoon and level when measuring for accurate results.
- Old-fashioned rolled oats: 1 1/2 cups. Choose whole rolled oats rather than quick-cooking for better chew and structure in the base.
- Salted butter: 1 cup, melted. Salted butter adds flavor depth; if using unsalted, add an extra 1/4 teaspoon kosher salt to the base.
- Light brown sugar: 3/4 cup, packed. Brown sugar keeps the base moist and contributes to the caramel flavor; packed firmly when measuring.
- Pure vanilla extract: 2 teaspoons. A good vanilla (Nielsen-Massey or similar) brightens the caramel and chocolate.
- Baking soda: 1 teaspoon. Provides a slight lift and tender crumb.
- Kosher salt: 1/2 teaspoon. Balances sweetness and enhances flavors.
- Milk chocolate chips: 1 1/2 cups. Ghirardelli or Nestlé are both fine; milk chocolate gives a creamy, mellow coating.
- Individually wrapped caramels: 11 ounces, unwrapped for melting. Kraft caramels work well and are easy to find.
- Heavy cream: 1/2 cup. Adds silkiness to the caramel and prevents graininess when melting.
Instructions
Preheat and prepare the pan:Preheat the oven to 350°F. Line a 9x9-inch baking dish with parchment paper, leaving a 2-inch overhang on opposite sides so you can lift the bars out easily. Lightly spray the parchment with nonstick spray to ensure the bottom releases cleanly after baking.Mix the base:In a large bowl, combine 1 1/2 cups all-purpose flour, 1 1/2 cups old-fashioned oats, 3/4 cup packed light brown sugar, 1 teaspoon baking soda, and 1/2 teaspoon kosher salt. Pour in 1 cup melted salted butter and 2 teaspoons pure vanilla extract. Stir with a sturdy spoon until just combined; the mixture should be crumbly but hold together when pressed.Form and par-bake bottom layer:Press half of the oat mixture evenly into the bottom of the prepared pan using the back of a measuring cup to compact it. Bake for 10 minutes until set and beginning to color at the edges — this stabilizes the base so it won’t sink when you add the chocolate and caramel.Melt the caramel:While the base bakes, unwrap 11 ounces of individually wrapped caramels. In a small heavy-bottomed saucepan over medium heat, combine the caramels and 1/2 cup heavy cream, stirring constantly until completely melted and smooth, about 4 to 6 minutes. If short on time, microwave the caramels and cream in a microwave-safe bowl in 30-second bursts, stirring between bursts until smooth.Layer the chocolate:Remove the hot base from the oven and immediately sprinkle 1 1/2 cups milk chocolate chips evenly over it. The residual heat will soften the chips and help them form a glossy layer beneath the caramel.Pour the caramel:Once the caramel is smooth, pour it evenly over the chocolate chips. Work quickly and gently tilt the pan if needed so the caramel distributes in a thin layer without dislodging the chocolate chips too much.Top with remaining crumble:Sprinkle the remaining oat mixture over the caramel. Don’t worry if there are small gaps; the edges will close as the top browns. Press lightly with fingertips if you prefer a slightly firmer top.Bake until golden:Bake for 20 minutes or until the top is golden brown and firm to the touch. You want the caramel to be set but still chewy. Let the pan cool for 10 minutes on a wire rack, then refrigerate for 1 1/2 to 2 hours until completely cool and firm for clean slicing.Slice and serve:Use the parchment overhang to lift the bars from the pan onto a cutting board. Slice into 16 equal pieces with a sharp knife warmed under hot water and wiped dry for neat edges.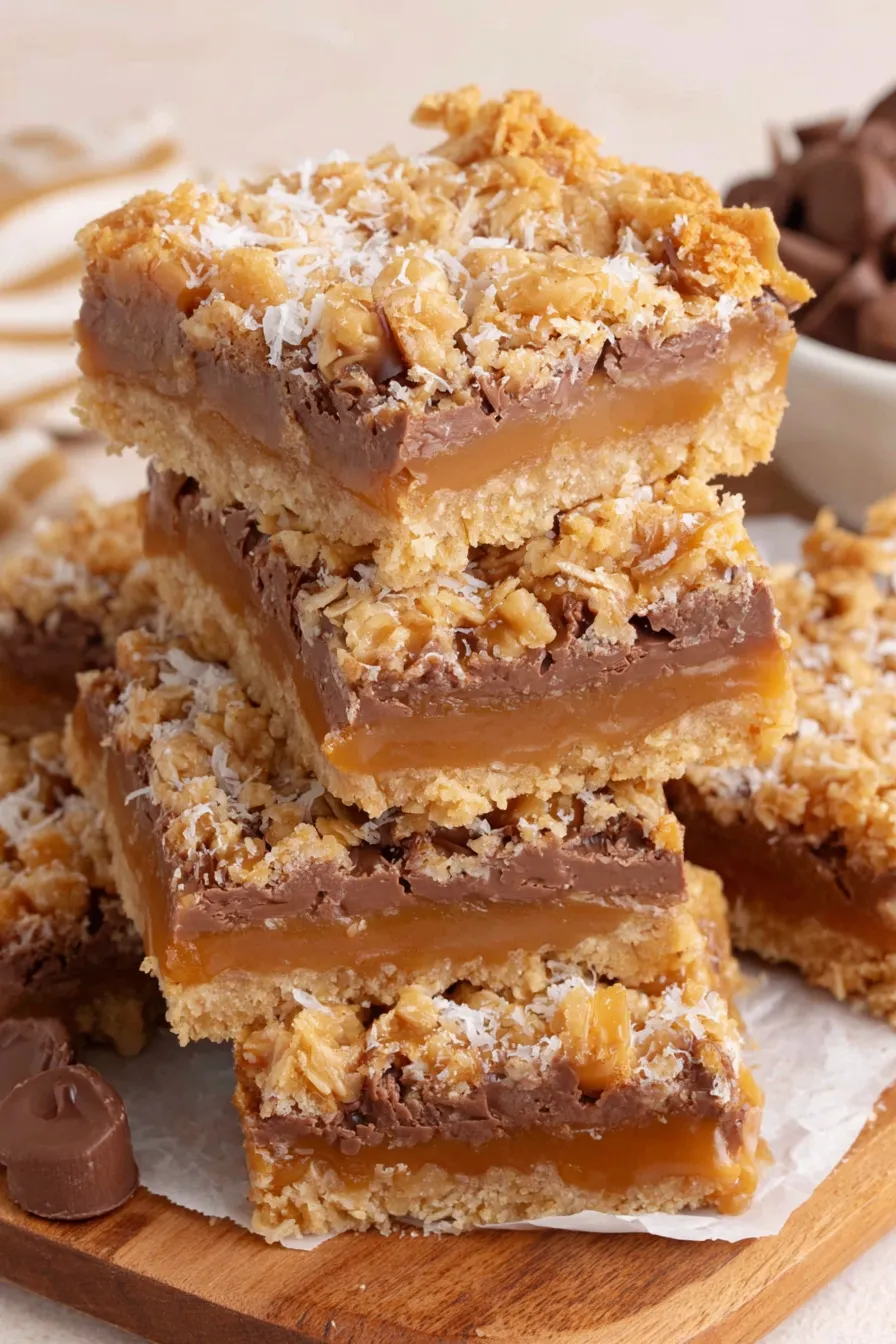
You Must Know
- These bars are not shelf-stable at room temperature for long — keep refrigerated for up to 5 days or freeze for up to 3 months.
- Use old-fashioned rolled oats for the best chew; quick oats will create a softer crumb and may compact too much.
- If the caramel seizes or becomes grainy, stir in an extra tablespoon of cream off the heat until smooth.
- To slice cleanly, chill fully and run a sharp knife under hot water, dry it, then cut; wipe the blade between cuts.
My favorite thing is how reliably these bars perform: the base gives structure, the chocolate softens but stays creamy, and the caramel remains luxuriously chewy. I’ve served them at summer barbecues and winter bake sales; both times the bars disappear first. Neighbors now expect a pan when I say I’m bringing dessert.

Storage Tips
Store cooled bars in an airtight container in the refrigerator for up to 5 days; layer parchment or wax paper between layers to prevent sticking. For longer storage, wrap individual bars tightly in plastic wrap, then place in a freezer-safe bag for up to 3 months. Thaw in the refrigerator overnight before serving. Room temperature storage is fine for short windows (a few hours) if serving immediately, but refrigeration ensures cleaner slices and keeps the caramel from sweating.
Ingredient Substitutions
If you need to adapt, use dark chocolate or semisweet chips for less sweetness and more cocoa depth; white chocolate works too but will be very sweet. For a dairy-free version, use dairy-free chocolate and a vegan caramel alternative; note texture will differ slightly. Swap half the all-purpose flour for whole wheat pastry flour for a nuttier flavor and slightly denser texture. If you only have quick oats, reduce the melted butter by 1 tablespoon to prevent an overly loose crumb.
Serving Suggestions
Serve bars slightly chilled or at cool room temperature with a scoop of vanilla ice cream for an elegant dessert. They pair beautifully with strong coffee or black tea as an afternoon treat. For parties, arrange on a platter dusted lightly with cocoa powder or flaky sea salt sprinkled on top of each bar for a sophisticated contrast.
Cultural Background
The concept of layered oat bars with caramel and chocolate is rooted in American home baking traditions that favor versatile, pantry-based sweets. Variations like seven-layer bars or magic cookie bars use similar layering techniques; carmelitas are a more focused version featuring a buttery oat base and a central caramel ribbon. These kinds of bars became popular due to their portability and simple assembly — ideal for bake sales and potluck culture.
Seasonal Adaptations
In autumn, stir 1/2 teaspoon ground cinnamon and a pinch of nutmeg into the oat base and use salted caramel for a warming spice profile. For summer, swap the chocolate for chopped roasted pecans and drizzle a citrus-infused caramel for brightness. Around holidays, cut bars into smaller bite-size squares and top with a dusting of chopped toasted almonds or a sprinkling of crushed peppermint for festive flair.
Meal Prep Tips
To prep ahead, assemble through the bake step and refrigerate the cooled, uncut slab for up to 24 hours before slicing and serving. Alternatively, bake and freeze the entire slab tightly wrapped; thaw in the refrigerator, then slice. If making multiple pans, rotate baking time by a few minutes depending on your oven; look for a uniformly golden top as the best doneness indicator.
These bars are a blend of comfort and convenience — perfect for sharing and simple enough for a relaxed weeknight bake. Give them a try and make them your own by swapping chocolate types or adding a sprinkle of sea salt on top for contrast.
Pro Tips
Warm a sharp knife under hot water and dry it before slicing for clean edges; wipe between cuts.
If the caramel begins to thicken while working, stir in a tablespoon of warm cream to loosen it.
Press the bottom layer firmly so the bars hold together when sliced; use the bottom of a measuring cup for even pressure.
Chill thoroughly before slicing to avoid sticky, messy pieces.
This nourishing carmelitas recipe is sure to be a staple in your kitchen. Enjoy every moist, high protein slice — it is perfect for breakfast or as a wholesome snack any time.
FAQs about Recipes
Can I freeze these bars?
Yes, fully cooled bars freeze very well for up to 3 months when wrapped tightly. Thaw in the refrigerator overnight before slicing.
Which oats should I use?
Use old-fashioned rolled oats for the best texture; quick oats will yield a softer, denser base.
Tags
Carmelitas
This Carmelitas recipe makes perfectly juicy, tender, and flavorful steak every time! Serve with potatoes and a side salad for an unforgettable dinner in under 30 minutes.
Ingredients
Cookie Base
Chocolate and Caramel Layer
Instructions
Preheat and prepare pan
Preheat oven to 350°F. Line a 9x9-inch baking dish with parchment paper leaving a 2-inch overhang and lightly grease the parchment.
Combine dry and wet ingredients
In a large bowl combine flour, rolled oats, brown sugar, baking soda, and kosher salt. Stir in melted butter and vanilla until just combined into a crumbly mixture.
Press and par-bake base
Press half of the oat mixture firmly into the prepared pan and bake for 10 minutes until set and slightly colored at the edges.
Melt caramels
Unwrap caramels. In a heavy-bottomed saucepan over medium heat, stir caramels with heavy cream until fully melted and smooth. Alternatively microwave in 30-second bursts.
Add chocolate layer
Remove the base from the oven and sprinkle milk chocolate chips evenly over the hot crust to soften the chips.
Pour caramel over chocolate
Pour the warm, smooth caramel over the softened chocolate chips, spreading gently if necessary for even coverage.
Top with remaining crumble and bake
Sprinkle the remaining oat mixture over the caramel and bake for 20 minutes until the top is golden and firm to the touch.
Chill and slice
Cool 10 minutes, then refrigerate 1 1/2 to 2 hours until firm. Lift out using parchment overhang and slice into 16 pieces with a warm, dry knife.
Last Step: Please leave a rating and comment letting us know how you liked this recipe! This helps our business to thrive and continue providing free, high-quality recipes for you.
Nutrition
Did You Make This?
Leave a comment & rating below or tag
@royalmorsel on social media!
Categories:
You might also like...

Cheeseburger Queso Sliders
Juicy beef, sweet-charred peppers, and a silky queso drizzle turn these sliders into the ultimate crowd-pleasing bite for game day or weeknight fun.

Short Ribs with Garlic Mash
Melt-in-your-mouth braised short ribs nestled over creamy garlic mashed potatoes, all in a rich, herb-scented sauce that feels like a warm hug.

Cheesy Garlic Pull-Apart Bread
Golden, garlicky pull-apart loaf swaddled in buttery herbs and stretchy mozzarella that begs to be shared warm from the oven.
Did You Make This?
Leave a comment & rating below or tag @royalmorsel on social media!
Rate This Recipe
Share This Recipe
Enjoyed this recipe? Share it with friends and family, and don't forget to leave a review!
Comments (1)
This recipe looks amazing! Can't wait to try it.
Comments are stored locally in your browser. Server comments are displayed alongside your local comments.

Hi, I'm Emma!
What's Popular

30-Minute Meals!
Join to receive our email series which contains a round-up of some of our quick and easy family favorite recipes.