
>>

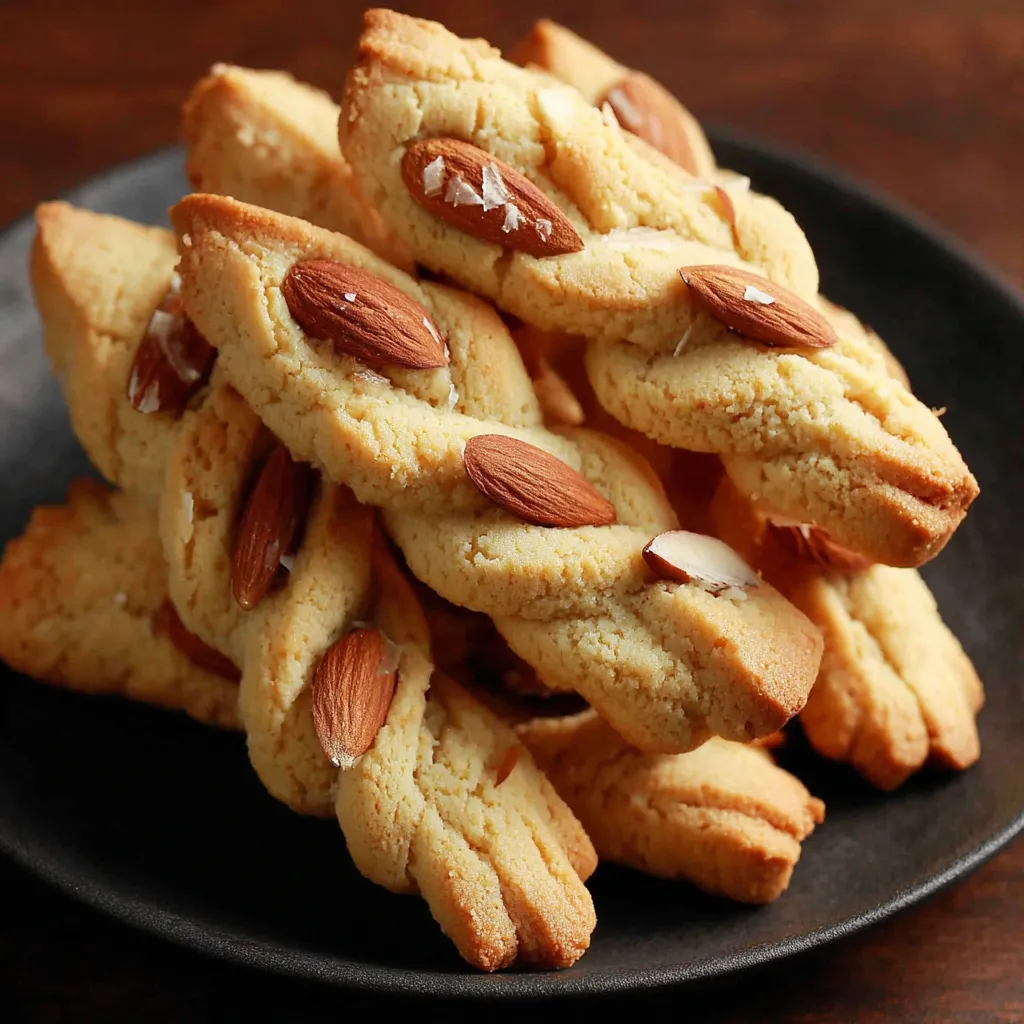
Buttery cinnamon shortbread shaped into eerie witches fingers with almond nails, delightfully crisp after chilling and perfect for spooky Halloween treats.

My family always hovers near the oven when these go in, drawn by the caramel notes of brown sugar mingling with cinnamon. Over the years, I have learned that a well-chilled tray yields the cleanest edges and the best snap. Even the skeptics who “don’t like cute food” end up asking for a second finger.
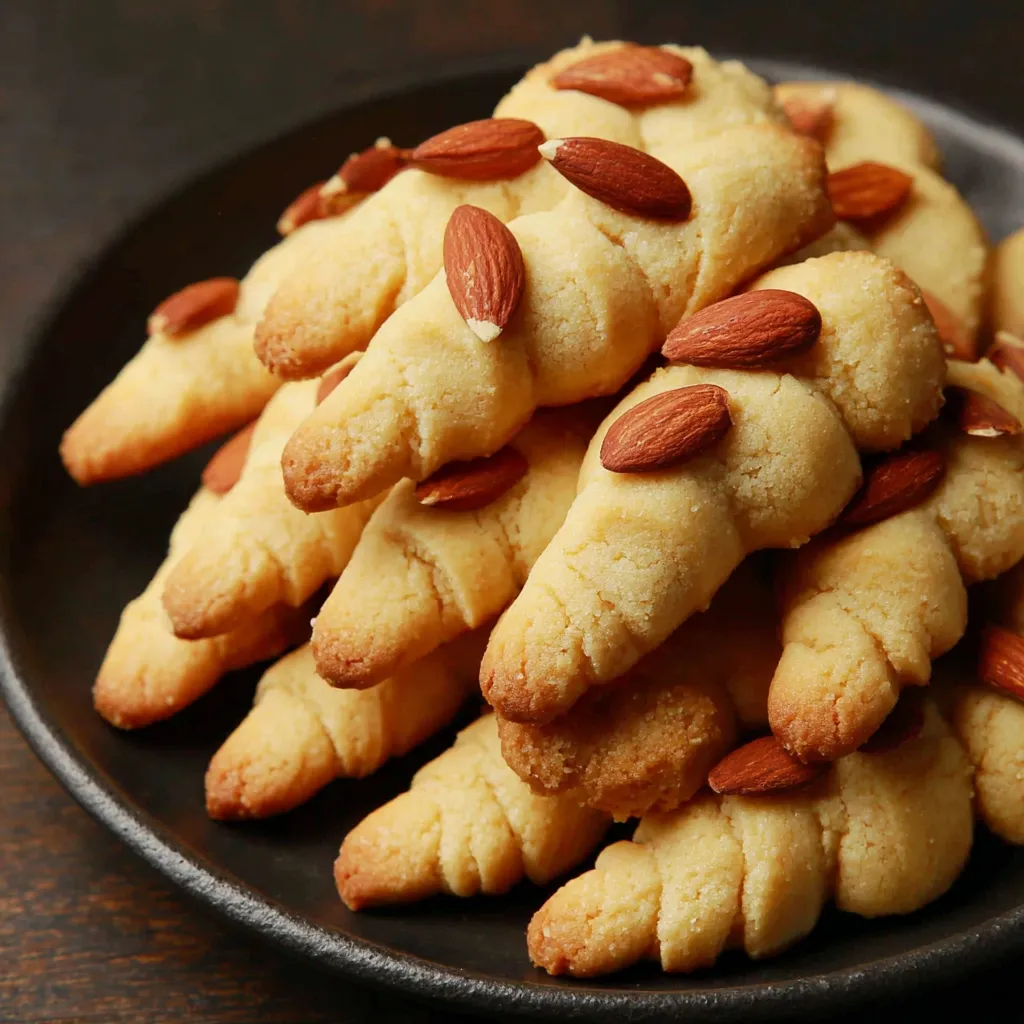
My favorite part is the moment the tray hits the table and a hush falls, followed by laughter. These fingers look theatrical but taste classic: buttery, lightly spiced, and not overly sweet. The almond nails toast just enough to add a nutty aroma, and every time I bake them, I remember my kids carefully pinching knuckles with dramatic concentration.
Once cooled, store cookies in an airtight tin or latch jar at room temperature for up to 5 days. Separate layers with parchment to protect the almond nails and prevent chipping. For longer storage, freeze baked cookies in a single layer until solid, then transfer to a freezer bag for up to 2 months; thaw uncovered to keep them crisp. If you prefer to bake fresh on party day, shape and chill the dough fingers on a sheet, then wrap tightly and refrigerate up to 3 days or freeze up to 3 months. Reheat day-old cookies on a baking sheet at 300°F for 3 to 4 minutes to refresh their snap.
You can swap light brown sugar with granulated sugar for a paler color and slightly crisper bite; use the same 1/4 cup. For a stronger spice profile, replace cinnamon with pumpkin pie spice in equal measure. If you need nut-free nails, press a small piece of candy (like a chocolate chunk or candy corn) after baking while the cookies are warm, or use a pumpkin seed for a similar look. For flavor depth, add 1/4 teaspoon almond extract along with the vanilla. While butter is key for shortbread, dairy-free baking sticks can be substituted in equal amounts for a firmer, slightly less tender texture.
Arrange the fingers on a black or slate tray with a dusting of cocoa powder for dramatic contrast. A small bowl of raspberry jam makes a playful dip for a spooky touch. Pair with hot apple cider, spiced tea, or a pumpkin latte to echo the cinnamon notes. For parties, alternate direction of the “fingers” and scatter a few extra almond slivers for texture. These travel well in cookie boxes; place a sheet of parchment between layers to protect the nails and details.
Shortbread’s origins trace back to Scotland, where simple ratios of butter, sugar, and flour created a beloved crumbly biscuit. Over time, home bakers have adapted shortbread into seasonal shapes because the dough’s high butter content holds details beautifully. Witches fingers likely emerged from this tradition of playful holiday shapes, transforming a classic into a Halloween showpiece. The combination of brown sugar and cinnamon is a modern, American-leaning twist that adds warmth and color, while almond nails deliver a whimsical nod to harvest season and add pleasing crunch.
In autumn, increase cinnamon to 3/4 teaspoon or add a pinch of cloves for deeper spice. For winter celebrations, swap cinnamon for 1/2 teaspoon cardamom and press a pistachio sliver at the tip. In spring, omit cinnamon and add lemon zest for bright, floral notes. For a dramatic Halloween finish, brush almond nails with a touch of red or black gel coloring after baking. You can also drizzle cooled fingers with a thin vanilla glaze for a glossy, snow-dusted look during the holidays.
To stay party-ready, shape a double batch and freeze on trays. Once solid, pack in freezer-safe containers with parchment between layers. Label with date and baking temperature. Bake directly from frozen at 350°F, adding a minute or two as needed. Cool completely before boxing them up for events. For gifting, line tins with parchment and cushion corners with small crumples to protect the nails. If you plan to decorate with gel color or jam, wait until just before serving for the cleanest presentation.
Whether you are planning a costume party or packing lunchbox treats, these shortbread witches fingers bring just the right mix of whimsy and great baking. They are buttery, crisp, and unfussy, and the shaping is a delightful touch anyone can master. Bake a tray, share a laugh, and enjoy every spooky bite.
Chill shaped fingers for at least 30 minutes to minimize spread.
Spoon and level flour for best texture and defined edges.
Score shallow knuckle lines to prevent cracking during baking.
Remove the cold tray 10 minutes before baking to promote even browning.
This nourishing buttery shortbread witches fingers recipe is sure to be a staple in your kitchen. Enjoy every moist, high protein slice — it is perfect for breakfast or as a wholesome snack any time.
Yes. Shape the fingers, place on a lined sheet, cover, and chill up to 3 days. Bake straight from cold for the cleanest details.
Use a pumpkin seed or press a small piece of candy onto the tip after baking while warm. For nut-free prep, avoid almond slivers entirely.
The bottoms should be just lightly golden and the edges set. Cookies will firm as they cool, so avoid overbaking to keep the centers tender.
This Buttery Shortbread Witches Fingers recipe makes perfectly juicy, tender, and flavorful steak every time! Serve with potatoes and a side salad for an unforgettable dinner in under 30 minutes.
Beat 1/2 cup unsalted butter with 1/4 cup light brown sugar and 1 teaspoon vanilla on medium until smooth and creamy, 1 to 2 minutes.
Whisk flour, cinnamon, and a pinch of kosher salt. Add to creamed mixture and mix on low until large clumps form.
Turn out and press together until no dry bits remain. Shape into a square to make rolling easier.
Roll between parchment to a rectangle 1/2 to 1/4 inch thick. Thicker dough yields softer centers; thinner bakes crisper.
Slice lengthwise in half, then crosswise into long rectangles about 1/2 inch wide for even baking.
Pinch each rectangle three times to form knuckles: 1/2 inch from the top, again 1/2 inch below, and near the base.
Lightly cut three short lines across each knuckle bump for realistic detail and to prevent cracking.
Press a slivered almond into the tip of each finger at a slight angle so it adheres and toasts in the oven.
Arrange on a parchment-lined sheet, cover, and chill 30 minutes or up to 3 days to firm the dough.
Preheat to 350°F. Bake 9 to 11 minutes until bottoms are lightly golden. Cool 5 minutes on the sheet, then on a rack.
Last Step: Please leave a rating and comment letting us know how you liked this recipe! This helps our business to thrive and continue providing free, high-quality recipes for you.
Leave a comment & rating below or tag
@royalmorsel on social media!

Juicy beef, sweet-charred peppers, and a silky queso drizzle turn these sliders into the ultimate crowd-pleasing bite for game day or weeknight fun.

Melt-in-your-mouth braised short ribs nestled over creamy garlic mashed potatoes, all in a rich, herb-scented sauce that feels like a warm hug.

Golden, garlicky pull-apart loaf swaddled in buttery herbs and stretchy mozzarella that begs to be shared warm from the oven.
Leave a comment & rating below or tag @royalmorsel on social media!
Enjoyed this recipe? Share it with friends and family, and don't forget to leave a review!
This recipe looks amazing! Can't wait to try it.
Comments are stored locally in your browser. Server comments are displayed alongside your local comments.

Join to receive our email series which contains a round-up of some of our quick and easy family favorite recipes.
