
>>

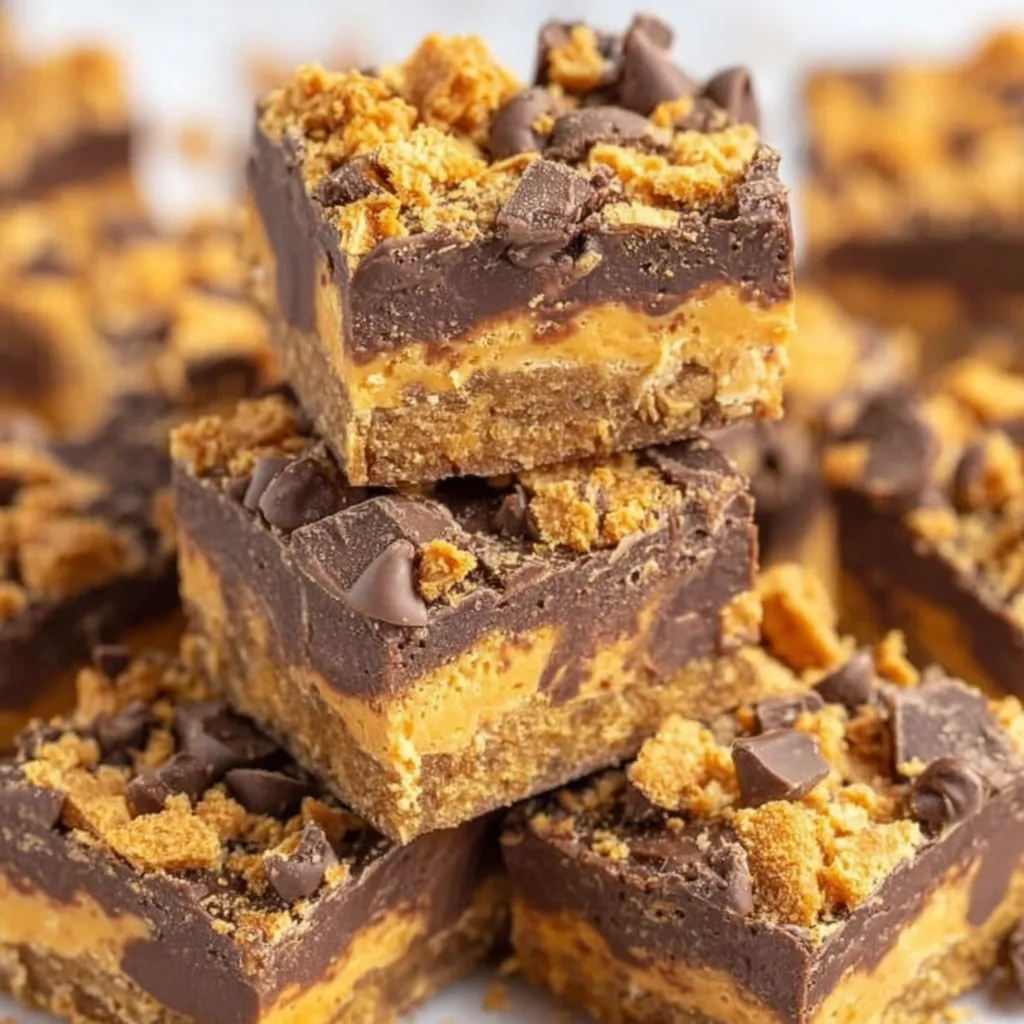
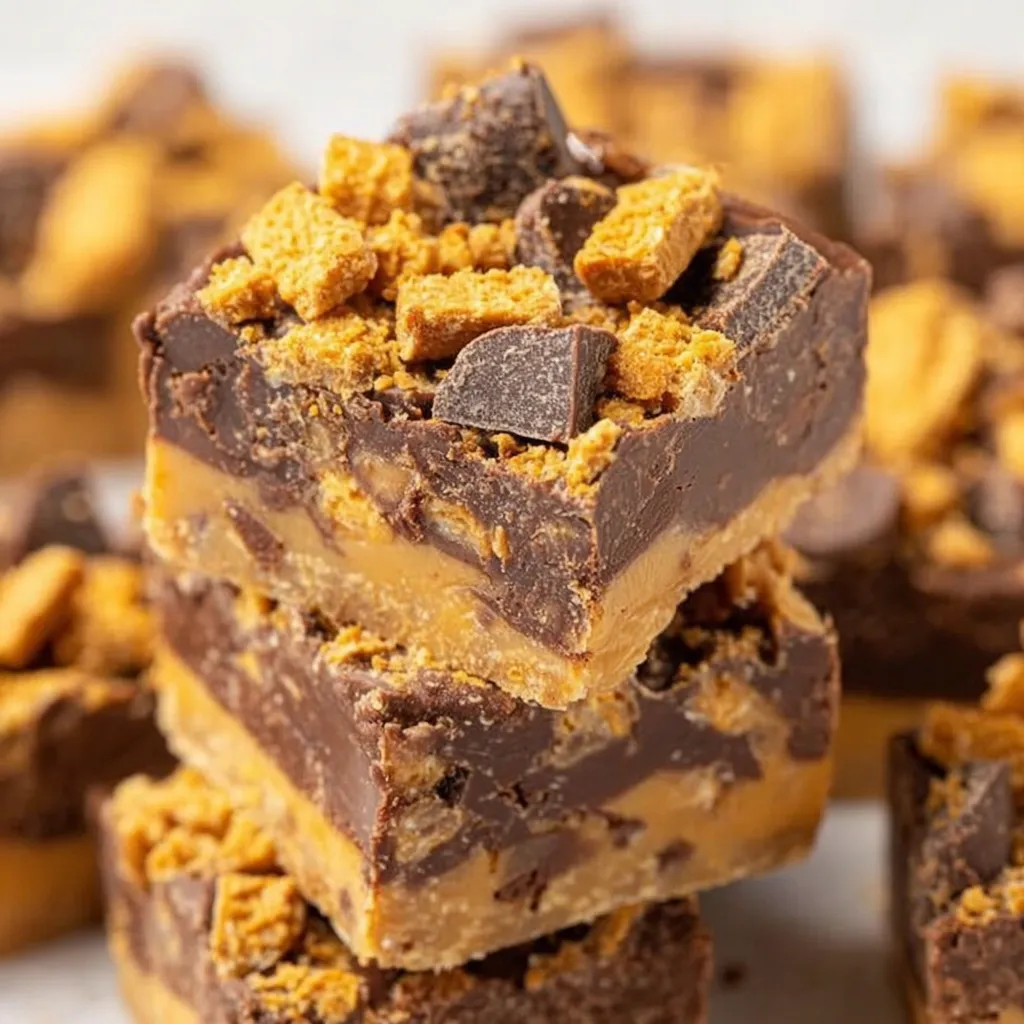
Rich chocolate fudge studded with crunchy Butterfinger pieces and finished with a Butterfinger topping — a nostalgic candy-bar twist on classic fudge.

I once brought this to a neighborhood cookie swap and two people asked for the recipe before I’d cleared the table. My niece declared it the "best fudge ever" and asked for it every birthday after. Its simplicity and the immediate, familiar candy flavor make it a modern classic in our house.
My favorite part about making this is the reactions — friends always close their eyes on the first bite and ask "what’s in this?" That crunchy Butterfinger finish paired with the glossy chocolate center feels like a grown-up candy bar and an old-fashioned treat at once. It’s the kind of thing people take home after a party, and I’ve wound up packaging it with twine and a small note more than once for hostess gifts.
Store the fudge in a single layer in an airtight container at refrigerator temperature for up to one week. For longer storage, freeze squares in a single layer on a baking sheet until solid, then transfer to a freezer-safe container with parchment between layers to prevent sticking; frozen fudge keeps up to 3 months. Thaw overnight in the refrigerator to preserve texture and flavor. Avoid storing at room temperature for extended periods, as the candy pieces can soften and the fudge may become overly sticky in warm environments.
If you can’t find Butterfinger bars, use any crisp, flaky candy bar with a similar texture — think chopped crispy peanut-butter bars or crushed honeycomb candy. Swap semi-sweet chips for milk chocolate if you prefer a sweeter base, but reduce added candy amounts slightly to keep sweetness balanced. To make a slightly lighter version, replace heavy cream with 2 tablespoons of light cream plus 2 tablespoons water, though the texture will be marginally less rich. For a nutty variant, stir in 1/2 cup chopped toasted peanuts or almonds, keeping in mind this changes allergy information.
Serve the squares on a decorative platter at room temperature alongside coffee or a glass of milk. Garnish individual squares with a small drizzle of melted chocolate or a light dusting of cocoa powder for presentation. These squares pair well with salted caramel sauce on the side for those who like an extra sweet-salty contrast. For holiday platters, wrap small stacks in parchment and tie with ribbon for elegant edible gifts.
Fudge in the United States traces back to the late 19th century and has long been adapted with local candy and flavors. Combining a classic chocolate fudge base with a popular candy bar is a modern American twist — echoing the tradition of mixing confections to create new textures and flavor contrasts. Butterfinger, introduced in the 1920s, became beloved for its flaky, peanut-buttery crunch, making it a natural companion to creamy chocolate bases in contemporary candy and dessert crafting.
For holidays, fold in seasonal candy like crushed peppermint for winter or chopped peanut-butter cups for spring gatherings. Add 1/2 teaspoon of sea salt to the top for a salted caramel holiday version, or swirl in 2 tablespoons of peanut-butter before chilling for a marbled effect. For summer potlucks, let the pan come to room temperature briefly before serving so the texture is softer and more scoopable.
Make the fudge up to a week in advance for stress-free entertaining. Portion into individual servings using small cupcake liners for grab-and-go treats. When freezing, label containers with the date and portion count; thaw in the refrigerator overnight and bring to room temperature 15–20 minutes before serving for optimal flavor. Use a ruler to mark cutting guides on the foil underside before slicing to help produce uniform squares.
There’s genuine joy in sharing this dense, crunchy-sweet confection. Whether you’re bringing it to a party or packing it into small tins for neighbors, it feels classic and celebratory. Try making a double batch — I promise it disappears fast.
Use high-quality semi-sweet chips (Ghirardelli) for a glossy, balanced base that holds up to the candy pieces.
Stir continuously over medium heat and remove from heat as soon as the chips are melted to prevent seizing.
Reserve some chopped Butterfinger for the top to keep texture contrast and visual appeal.
Chill fully before slicing and wipe the knife between cuts for tidy squares.
Store in an airtight container in the refrigerator up to 1 week or freeze for up to 3 months.
This nourishing butterfinger fudge recipe is sure to be a staple in your kitchen. Enjoy every moist, high protein slice — it is perfect for breakfast or as a wholesome snack any time.
Chill the pan for 1–2 hours until the fudge is firm; if you need firmer bars, refrigerate for up to 3 hours.
Use a large, sharp knife and wipe it between cuts, or chill the slab longer for cleaner squares.
This Butterfinger Fudge recipe makes perfectly juicy, tender, and flavorful steak every time! Serve with potatoes and a side salad for an unforgettable dinner in under 30 minutes.
Line a 9x9-inch straight-sided baking pan with aluminum foil leaving an overhang on two sides, and lightly spray the foil with nonstick spray. Set aside.
In a 3-quart saucepan over medium heat, combine the chocolate chips, sweetened condensed milk, and heavy cream. Stir continuously for 5–6 minutes until the chips are melted and the mixture is smooth and glossy. Keep heat moderate to prevent scorching.
Remove the pan from heat and allow the mixture to cool for 1–2 minutes. Fold in 2 cups roughly chopped Butterfinger pieces gently to maintain crunch.
Spread the mixture evenly into the prepared pan and smooth the top with an offset spatula. Sprinkle 1 cup finely chopped Butterfinger over the surface and press lightly so they adhere.
Refrigerate for 1–2 hours until firm. Lift fudge from pan using foil overhang and slice into 36 squares (1½ x 1½ inches) with a large, sharp knife.
Last Step: Please leave a rating and comment letting us know how you liked this recipe! This helps our business to thrive and continue providing free, high-quality recipes for you.
Leave a comment & rating below or tag
@royalmorsel on social media!

Juicy beef, sweet-charred peppers, and a silky queso drizzle turn these sliders into the ultimate crowd-pleasing bite for game day or weeknight fun.

Melt-in-your-mouth braised short ribs nestled over creamy garlic mashed potatoes, all in a rich, herb-scented sauce that feels like a warm hug.

Golden, garlicky pull-apart loaf swaddled in buttery herbs and stretchy mozzarella that begs to be shared warm from the oven.
Leave a comment & rating below or tag @royalmorsel on social media!
Enjoyed this recipe? Share it with friends and family, and don't forget to leave a review!
This recipe looks amazing! Can't wait to try it.
Comments are stored locally in your browser. Server comments are displayed alongside your local comments.

Join to receive our email series which contains a round-up of some of our quick and easy family favorite recipes.
